Nov 30, 2021 | Anna's Best Recipes, Dressings, rubs, spreads, sauces & more, Sides, starters, soups & snacks
I love this! First tasted at Christmas in 1989 in Italy while I worked (briefly) as an au pair. So many interesting new foods and flavours. This one was a keeper. If you are a foodie you will definitely enjoy…
Makes 600ml stuffing (enough to stuff the body cavity and neck of a 1.8kg bird) with about 1 cup of leftovers which you can use to make my delicious stuffed mackerel fillets for another dinner. Another thing I like to do at Christmas is add a little bit of chicken bone broth to any stuffing that didn’t fit in the bird. Just enough to wet it and allow you to compact it. And then bake in a parcel in the oven at 180C for around 40 minutes. Give that similar gorgeous meaty flavour and moisture as you get when its been cooked in the bird.
260g cooked peeled chestnuts
or
130g dried peeled chestnuts , soaked overnight, then boiled til tender, drained
1 heaped dsp fresh thyme leaves (or a 1 level tsp dried, but fresh is much nicer)
1 rounded dsp chopped sage
2 heaped tbs chopped parsley
A few good grinds of black pepper
1/4 level tsp Himalayan or Atlantic sea salt
60g onion, finely chopped so it cooks properly (1/2 a medium onion)
Knob of butter (around the size of a walnut).
- Process or mash thoroughly the chestnuts until they resemble coarse breadcrumbs, tip into a bowl with the onion, herbs and seasoning.
- If using butter, melt it gently. Add your butter to the bowl and mix well. This stuffing can be stored for a couple of days in the fridge before using.
Why this is better for you:
Chestnuts are lower glycaemic index (lower sugar) than bread so are a much healthier alternative. They also contain potassium, which helps your body neutralise the effects of eating too much meat at Christmas. Fresh herbs are antioxidant, anti-inflammatory, support friendly gut bacteria and are anti-ageing – good news especially at Christmas!
Oct 22, 2021 | Anna's Best Recipes, Dressings, rubs, spreads, sauces & more
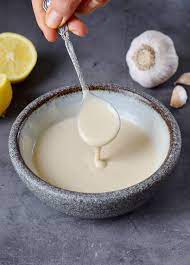
This is gorgeous Middle Eastern style dressing – creamy, tangy and moreish. Drizzle it over a salad or grilled/roast fish or chicken. If you want you can use a little less water or kefir to make this thicker and use as a dip.
1 rounded tbs light tahini (raw brand if possible, e.g. Carly’s)
1-2 cloves garlic, crushed
2 tbs lemon juice + 125ml cold water OR (instead of lemon + water) 150ml home made kefir
5 tbs extra virgin olive oil
Generous pinch Himalayan/sea salt
Flavour + health boosters: 1/2 tsp ground spice: sweet paprika, cumin or coriander.
In a mini food processor blend all the ingredients till blended. If you are doing this by hand get a decent size bowl, add the garlic and tahini and mix in just 1/4 of the liquid at a time. You are aiming for a consistency about the texture of double cream. You may need to add more water as you go to achieve this. The tahini will clump initially. Just keep mixing, and adding more liquid if needed.
Why this is good for you:
Garlic and lemon are fantastic supporters of detoxification, a critical function for all aspects of your health. Extra virgin olive oil keeps you fuller longer and aids weight loss (yes that IS correct) and is also rich in gut-helping immune-regulating vitamin E and polyphenols. Kefir is tolerated by most dairy-sensitive people because its a pre-digested food. The friendly bugs that manufacture kefir from milk break down the dairy sugar (lactose) and dairy protein (casein) that are the main trigger for dairy sensitivity reactions. Tahini, if its raw, is a good source of healthy omega 6 oils. Omega 6 is found in all raw nuts/seeds.
Mar 12, 2021 | Anna's Best Recipes, Sides, starters, soups & snacks
I LOVE this and it takes less than 10 minutes to cook. Have it as a side, or sprinkle with my vegan Parmesan (recipe on blog) or grated Parmesan and enjoy as a starter. Asparagus is contains prebiotic fibre, which feeds beneficial bacteria in your gut. You can make this even simpler if you want, by simply steaming the asparagus, then serving sprinkled with extra virgin olive oil etc. You can also steam asparagus, cut it up, cool and pimp up a lunchtime salad with it.
For 2
1 large bunch green asparagus
1 tbs extra virgin olive oil (EVOO)
Freshly ground black pepper
Optional: Parmesan or my vegan Parmesan to sprinkle
1. Rinse asparagus. Then snap off the thick fibrous ends (you can keep to make veg stock if you like).
2. Heat a frying pan on medium heat, add about 2 dsp EVOO (you don’t have to be exact), the same amount of water, asparagus spears and a good grind of pepper.
3. Cover with a lid or plate and cook for around 3-4 minutes until the colour changes to bright green and soft enough for your taste.
4. Divide between 2 plates and if you’re using as a starter, sprinkle with the Parmesan.
Apr 18, 2020 | Anna's Best Recipes, Desserts & drinks
This is easy to make and a fantastic support for your immune system. I have many packets of kefir grains packaged up in my freezer in 2019 ready to post to you (in Ireland) or to be picked up (by prior arrangement, with social distancing) if you live locally. These will get you started.
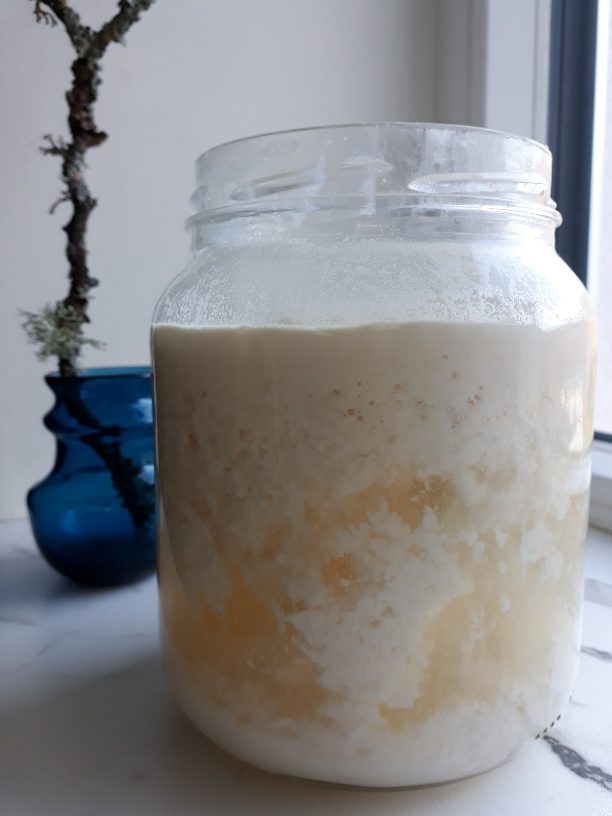
I call kefir the king of fermented foods. It’s very like natural yoghurt but more tangy because it is fully fermented so contains no milk sugar (lactose). It also thinner. Sometimes I strain my kefir through muslin to get a texture like greek yoghurt but mostly I use it as a drink, in smoothies or blended with a banana. Milk kefir contains over 30 different types of probiotics (beneficial yeasts and bacteria) compared to one or two species in yoghurt. Kefir includes lactobacillus plantarum and rhamnosus which studies have shown can help alleviate inflammatory bowel conditions. It also contains saccharomyces boulardii which successfully raises secretory IgA (an antibody) in your airways and gut. sIgA defends you against throat, lung and gut infections. Commercial kefir products are of variable quality and often are not fully fermented. This means they taste sweeter but have not broken down the hard-to-digest milk protein (casein) nor the lactose (milk sugar). They do not always contain live bacteria either. Making your own is the way to go and its really simple.
Friendly gut bacteria perform 80% (!) of your detoxification. They are important for energy, good skin, allergy control, preventing obesity and diabetes and healing your digestive system. They reduce the tendency to auto-immune conditions by promoting “immune “tolerance” or balance. Every type of good bacteria has its own special functions so the more you can get into your diet the better. Our grandparents ate a lot of fermented foods before the days of fridges but now our diet is sterile. Because kefir is easy to make and use it’s one of my favourite fermented foods to share with people. Use it any way you like, so long as you don’t expose it to heat. Eating it fresh ensures more beneficial bacteria. Add it to smoothies, knock half a glass back after a meal once or twice a day, or even use it to soak oat or buckwheat based muesli overnight to make super-digestible Birchner muesli (recipe on this blog).
Making kefir
There are two ways to make kefir. You can use live kefir grains that reproduce and will last a lifetime if you treat them right or you can purchase kefir freeze-dried culture packets (single use). In the recipe for Basic Kefir, I teach you how to make kefir using live grains. Kefir “grains” are in fact a cluster of microorganisms (bacteria and beneficial yeasts) held together by a polysaccharide matrix named kefiran.
Where to buy live kefir grains
In Ireland try the Sharing Starter Cultures Ireland FB group. This is a group of people who swap and donate surplus cultures – just put up a post to see who near you has grains to spare and collect for free. You can also email me to see if I have grains to spare that you could collect. Good grains will be creamy-white and look like springy cauliflower florets. Treat them right and they will live indefinitely, and grow. From anywhere in Ireland you can also buy grains online at www.adverts.ie. Or buy the kefir culture packets I mentioned before, but these only make a certain amount of kefir –you have to keep buying them.
Quantities
If you are only making kefir for one person, use1 tbs of grains for a cup (230ml) of milk. In a warm kitchen this will usually be fermented within 24 hours. If you are using from frozen it can take longer for the grains to revive.
How to Make Dairy Kefir
For top-quality kefir, try to buy organic milk. Goat’s milk is great but cow’s milk is fine too.
People who are dairy sensitive CAN usually tolerate well-fermented (i.e. not shop bought) kefir. This is because, when the kefir organisms ferment the milk, the lactose (milk sugar) is broken down and so is the casein (the main milk protein). Lactose intolerance is due to not producing lactase, an enzyme that digests lactose. Dairy sensitivity/allergy is due to difficulties breaking down casein. Casein is the protein that causes a problem for people with dairy allergy or sensitivity. The kefir micro organisms hydrolyse (break down) the casein, in effect pre-digesting it. This means there is no intact casein left in the kefir. Lactose is digested by kefir bacteria to produce beneficial lactic acid.
You can use the method below to make any amount of kefir you like. Just keep in mind that a good rule of thumb is to use 1 tablespoon of kefir grains per 1 cup of milk. So, if you want to make 1 cup of kefir, use 1 tablespoon of kefir grains and 1 cup of milk. For 2 cups of kefir use 2 tbs of grains and 2 cups of milk. Never heat kefir as this kills the good bacteria.
For 2 servings:
2 tbs live kefir Grains*
450ml/2 cups whole milk preferably organic. I use raw organic milk (available from organic markets such as The Green Door www.thegreendoor.ie in Dublin 12).
Plastic strainer
- Place fresh kefir grains in a glass jar and add the milk (It’s best not to fill jar more than ⅔ – ¾ full)
- Place a lid or plastic wrap loosely over the jar (those good bacteria need oxygen to fermwent) and let sit at room temperature for approx. 18 to 24 hours, or until the milk has thickened. (You might want to designate a spot for kefir fermentation in a cupboard or away from direct sunlight).
- It is important to swirl the kefir gently in the jar a few times during fermentation to mix the grains with the milk. This means all the milk is fully fermented, allowing less possibility for food sensitivity reactions (to lactose or milk proteins). If you are not sensitive to dairy products you don’t need to be so careful.
- Pour the contents into a strainer to separate your grains from the liquid kefir.
- Wash the jar, then place the kefir grains from the strainer back into the washed jar. (Do not add kefir grains to a jar that is still hot from washing! The heat can kill your grains) Then add fresh milk.
- The whole process is repeated again. The ready-to-use kefir can now be stored in the fridge until you are ready to use it – it will last for weeks, probably becoming more tangy as it goes as the last of the sugars are consumed by the grains.
If you are going away, remember to put your kefir grains in enough milk to keep it alive and fermenting for the number of days you are away. If you are away for 5 days, you will need 5 cups of milk per tablespoon of kefir, and it will still be alive when you get back. Or strain the grains and store in the freezer. They usually come back to life no problem.
How to Make Almond (or Coconut) Milk Kefir
This is an alternative to dairy kefir if you are vegan or highly sensitive to dairy. Don’t worry that the almond milk is sweetened. The kefir grains eat the sugars from the honey or agave syrup, using them up to support itself, leaving the finished product as low sugar (low glycaemic index) drink that won’t mess with your digestive system. Or buy unsweetened almond milk and add a teaspoon of natural agave syrup or honey to each 230ml of milk. Never heat kefir as this kills the good bacteria. I buy my almond milk for this from Dublin Food Co Op in Newmarket, near St. Patrick’s Cathedral Dublin 8. http://www.dublinfood.coop/ Most decent health stores sell almond milk. Ecomil original is a good brand (free from harmful additives like polysorbate 80 and sodium carboxymethylcellulose).
For 2 servings
2 tbs live kefir Grains*
450ml/2 cups agave-sweetened or honey-sweetened almond milk
500ml (or larger) glass jar with lid (or use a saucer/muslin and elastic band)
Plastic (not metal) strainer
- Place fresh kefir grains in a glass jar and add the almond milk (It’s best not to fill jar more than ⅔ – ¾ full)
- Place a lid or plastic wrap on the jar and let sit at room temperature for approx. 18 to 24 hours, or until the milk has thickened or has become sour to your liking. (You might want to designate a spot for kefir fermentation in a cupboard or away from direct sunlight)
- Pour the contents into a strainer to separate your grains from the liquid kefir.
- Wash the jar, then place the kefir grains from the strainer back into the washed jar. (Do not add kefir grains to a jar that is still hot from washing! The heat can kill your grains) Then add fresh milk.
- The whole process is repeated again. The ready-to-use kefir can now be stored in the fridge until you are ready to use it.
- If you are going away either:
a.strain off, rinse (in filtered or boiled cooled water) and freeze your grains until you want to use them again
b.put your kefir grains in enough milk to keep it alive and fermenting for the number of days you are away. If you are away for 5 days, you will need 5 cups of milk per tablespoon of kefir, and it will still be alive when you get back (especially if you put it in a coolish place).
c. some people bring the grains with them on holidays so they don’t miss out!
*There are special considerations that you have to take when making almond, coconut or other non-dairy kefir.
Kefir grains do not survive in almond or coconut milk long-term. They grow and thrive by eating the lactose from dairy milk, and since there is no lactose in almond or coconut milk, the grains will need to be refreshed in dairy milk (sheep, goat or cow) once a week or more. Beneficial cultures in dairy-free kefir will be less diverse and possibly lower in number.
Allow 1 cup or 230ml milk for each tablespoon of kefir grains, and make kefir in the usual way by fermenting the kefir with the milk (24 hours per cup of milk works well). The lactose in the milk feeds and grows the kefir. Then you can reuse the grains to make almond or coconut kefir again. You can also rinse them in coconut or almond milk to remove the dairy if you are allergic. The more often you do this, the more your grains will grow and multiply. It’s the lactose that keeps the bacteria alive and thriving.
Did you know?
In hot weather your kefir will be ready sooner. Warm temperatures speed up the process. Cooler temperatures delay it.
Books on fermenting, with lots of recipes:
Schwenk, Donna Cultured Food for Life
Pike, Charlotte Fermented
Mar 15, 2020 | Anna's Best Recipes, Cakes, biscuits & bars, Desserts & drinks
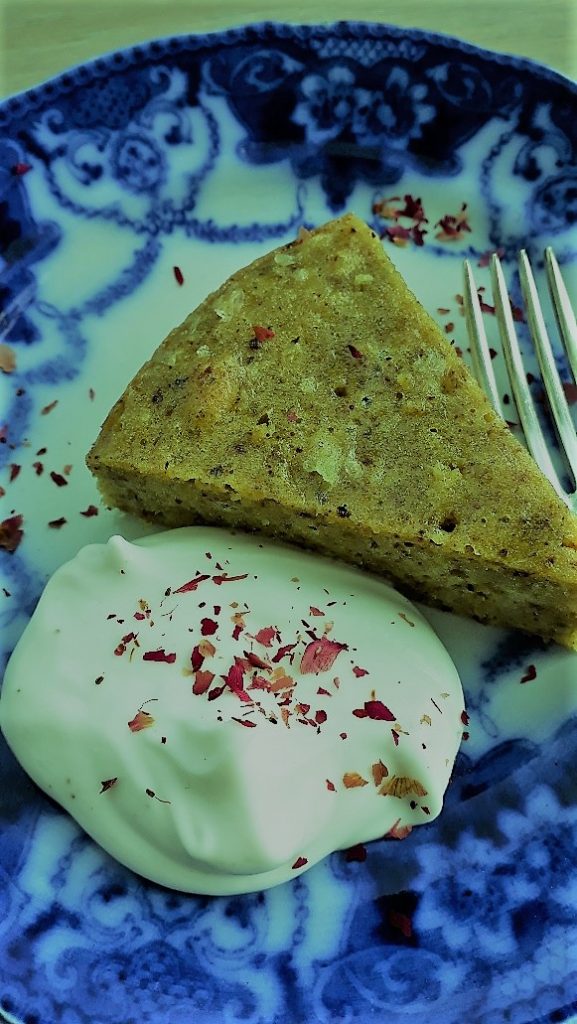
St. Patrick’s day home-baked treat, anyone? This is lovely and moist and soaked in rosewater and lemon syrup. Make it at least 2 hours before you want to serve it so the syrup has time to soak in. You can buy unsalted shelled pistachios in Middle Eastern and Asian Stores. The recipe, adapted by me to be healthier, is from Claudia Roden’s Arabesque. I am including 2 sizes of cake so you don’t have to go with enormous all the time, if you don’t have 12 people to serve. I increased the amount of lemon, to give a little more tang, and switched the immuno-suppressing sugar for xylitol/erythritol (from health shops). If you want to make serving this more spectacular, get yourself some rosepetals/rosebuds from a Middle Eastern shop and crumble some of the rose petals around and on top of each slice.
To serve 6
Cake:
3 eggs, seperated
60g xylitol or erythritol
25g coarsely chopped raw unsalted pistachios (optional)
100g pistachio flour (finely ground raw unsalted pistachios)
1 x 10-13cm round loose-bottomed cake tin
Syrup for small cake:
75g xylitol/erythritol
90ml water
1 tbs lemon juice
1 tbs rosewater
To serve (optional):
125ml Abbot Kinney’s/Coyo non dairy coconut yoghurt or whipped cream (I like to mix in a few drops of rosewater to either)
Large cake (to serve 12)
5 eggs, seperated
120g xylitol/erythritol
50g coarsely chopped raw unsalted pistachios (optional)
200g pistachio flour (finely ground raw unsalted pistachios)
1 x 23-25 cm round loose-bottomed cake tin
Syrup for large cake:
150g xylitol/erythritol
180ml water
2 tbs lemon juice
2 tbs rosewater
To serve (optional):
250ml Abbot Kinney’s/Coyo non dairy coconut yoghurt or whipped cream (I like to mix in a few drops of rosewater to either)
1. Make the syrup. Bring the xylitol/erythritol, water and lemon juice to the boil, simmer till everything is dissolved. Stir in the rosewater.
2. Let the syrup cool, then chill it.
3. Beat the egg yolks with the xylitol/erythritol to a pale cream, then add the ground pistachios and mix very well. Beat the egg whites until still and fold in gently. Pour into a greased cake tin and sprinkle the coarsely chopped pistachios, if using, on top.
4. Bake in pre-heated oven (180C/fan 165C).
Test for done-ness (where needle or point of knife comes out clean) after 35 minutes for the small cake and 40 minutes for the large, which should take around 45 minutes. If the cake is still sticky, give another 5 minutes, then test again.
5. Turn the cake onto a deep serving dish. Make little holes over the top with a fork and pour over the syrup. The holes will let it soak in quickly.
6. Serve, if you like, with the coconut yoghurt or (if you’re not dairy sensitive) cream.
Why this is better for you:
OK, so raw nuts are much better than baked (because nut/seed oils get damaged by heat) but this cake is high in protein and contains no sugar. This means it won’t disrupt blood sugar levels. Maintaining blood sugar balance is important if you care about your vitality and health. Erratic blood sugar levels contribute to fatigue, mood issues, inflammation, auto-immune conditions and so, so much more. Stay well.
Aug 9, 2019 | Anna's Best Recipes, Sides, starters, soups & snacks
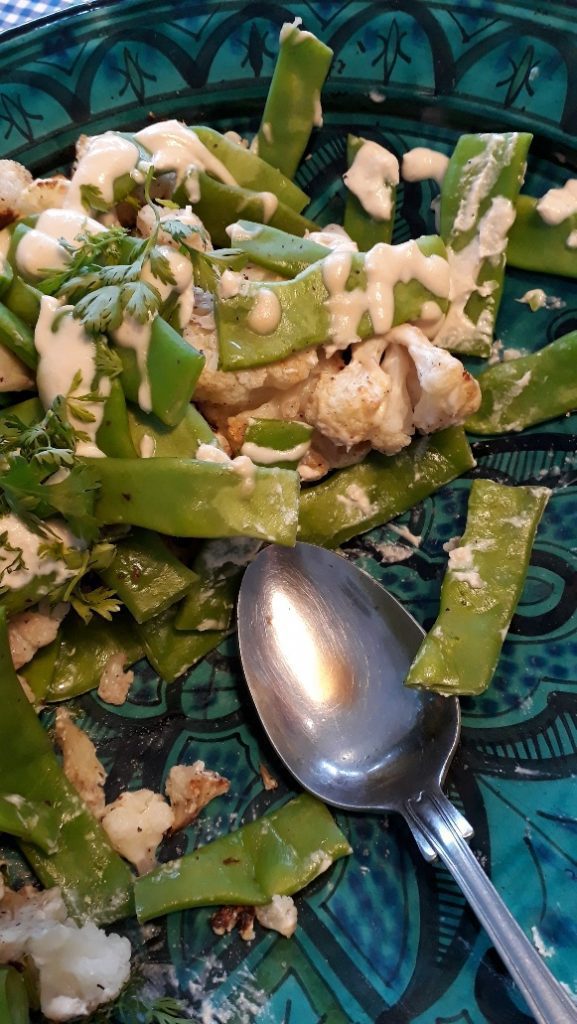
This is a delicious way to enjoy cauliflower. I use my Middle Eastern tahini sauce as a dressing but you could also dress with extra virgin olive oil, lemon juice and some paprika/smoked paprika. If you like, add some chopped fresh oregano or flat leaf parsley when the salad has cooled. The tahini sauce is also lovely used as a sauce over some simple poached/grilled fish, or as a dip with vegetable sticks. Keeps well in an airtight jar for several days. I like to make the dressing a bit in advance, to let the flavours develop. Eat it warm or cold – it’s all good.
For the salad:
1 medium cauliflower, leaves removed
2 tbs extra virgin olive oil
1 dsp sumac
Freshly ground black pepper
Himalayan/sea salt
2 large handfuls (about 250g) green beans (or runner beans)
For the dressing:
1 rounded tbs light tahini
2 tbs lemon juice and about 125ml cold water OR 150ml home made kefir (lemon juice OR kefir gives the sauce acidity and balance)
1-2 cloves garlic, crushed
1. Preheat oven to 200C/185C fan
2. Placing the whole cauliflower with stalk downwards, cut in half, and cut out the big central stalk. Then slice each half in slices approximately 1.5cm thick. Slicing (rather than breaking into florets) helps the cauliflower to caramelize deliciously.
3. Place in an ovenproof roasting dish, drizzle with olive oil, sprinkle over the sumac, a good pinch of salt and lots of black pepper and mix gently to coat everything evenly.
4. Roast for 20-25 minutes until you can pierce easily with a fork.
5. While the cauli is roasting, boil the kettle. Steam the green/runner beans until they are slightly softened but retain some crunch. Drain and refresh in cold water. This stops the cooking process. Once cooled, drain.
6. Make the tahini sauce. Whisk or blitz together in a mini food processor all the sauce ingredients. You are aiming for a consistency about the texture of double cream. You may need to add more water as you go to achieve this. The tahini will clump initially. Just keep mixing, and adding more liquid if needed.
7. When cauliflower is cooked so a fork pierces it easily, empty it and the green beans, into a serving dish and drizzle with the sauce.
Why this is good for you;
Cauliflower is a sulphurophane vegetable. This means that (like broccoli and cabbage) it is rich in sulphur which is crucial for detoxification. Detoxification affects every aspect of our health so if you want clear skin, good energy, mood and to keep clear of any health conditions, these sulphur rich veg are great to eat at least 3 times a week.
Garlic is also rich in sulphur and helps rebalance your gut bacteria in favour of useful micro organisms which ALSO aid detoxification. In fact over 70% of your detoxification is looked after by good gut bacteria – if you have enough quantity and variety of them!! Spices like sumac, paprika and black pepper, used to coat food, help reduce the toxic substances generated by roasting/heating food to high temperatures.
Spices (and herbs) also stimulate our body’s antioxidant defenses to keep us looking and feeling better for much, much longer. Kefir, especially when home-made, is a hypoallergenic milk product that’s really rich in over 30 species of beneficial micro organisms. Did you know that although many of these micro organisms dont survive the acid in our stomachs they still exert a beneficial effect. Research has shown that even heat-killed friendly bacteria do us good when we take them. Who knew! Of course we really also want to grow our own good bugs, which colonise and cling to the walls of our large intestine. There they ferment plant fibres (if we eat a big variety of plants) to make short chain fatty acids. Short chain fatty acids like butyrate are essential for daily repair of our gut. Get your gut health right and you have at least 90% of your health sorted.
Feb 22, 2019 | Anna's Best Recipes, Breakfasts & smoothies
I like to soak my muesli the night before because it makes grains, nuts and seeds super digestible and more filling. Unsoaked grains contain phytates which impede your mineral absorption. Making your own muesli is great because you can use the nuts and seeds you prefer. Commercial muesli is often high in dried fruit, which just gives you too much carbohydrate (sugars) at one sitting. It can also load up on cheaper ingredients like wheat flakes, instead of better-for-you oats. I love to add a heaped teaspoon of ground ginger and 2 of Ceylon cinnamon when making the muesli because I love the antioxidant punch of spices which keep you healthier and younger looking for longer.
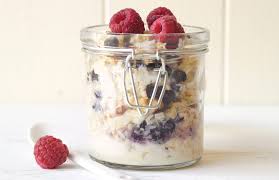
When I have early clinic I often make Birchner muesli. I put half a mug of muesli in a wide glass screw top jar, grate an organic apple in, add lots of kefir/yoghurt and mix it up, sometimes with a few drops of stevia if I am feeling like something sweeter or am using sour berries. Instant brekkie the following morning. Yum…
Luxury Muesli
3 cups gluten-free (or normal, if you tolerate gluten-contamination) jumbo oatflakes or porridge oatflakes
½ cup walnuts, broken into quarters, halves or roughly chopped
½ almonds, coarsely chopped
½ cup sunflower seeds
½ cup hazelnuts or Brazil nuts, coarsely chopped
½ cup organic whole chia seeds or linseeds (also known as flaxseeds)
½ cup chopped unsulphured apricots
½ cup dessicated coconut or large coconut flakes
Mix ingredients together and store in an airtight jar.
Serve ½ mug of this muesli with natural yoghurt, milk of your choice and a cupful of chopped fruit – apple, pear or berries.
If you need more sweetness, use a few stevia drops from health stores. Its a plant extract that’s much sweeter than sugar but without calories and negative health effects.
Birchner Muesli
Soak ½ a mug of this muesli in a bit more than double its volume of home made kefir or yoghurt overnight (for dairy free use almond or coconut based yoghurt – if it’s very thick you might need to add some non-dairy milk).
Serve with a grated organic apple/pear or 1 cup mixed fresh or frozen berries
As a yoghurt/kefir substitute you could use half water half cloudy apple juice to soak. This isn’t as good because it contains no protein and raises the (natural) sugars in the meal. But if you cant bear milk, yoghurt or kefir of any type with muesli (like my husband) what the hell…
A note about dairy sensitivities:
If you are mildly dairy-sensitive (you get symptoms but don’t have any major autoimmune health condition) you might like to try home made kefir. Kefir is a fermented milk product where the bacterial cultures have digested both the lactose (milk sugar) and casein (milk protein). I find that with any other dairy product, I immediately get a stuffed nose and throat, but not with home made kefir. You might be the same. Yay!! fully fermented home made kefir has over 20 varieties of beneficial bacteria to help your health. Even when good bacteria are killed by your strong stomach acid they still have a huge metabolic effect on you. How amazing is that…
Oct 19, 2018 | Anna's Best Recipes, Breakfasts & smoothies, Cakes, biscuits & bars, Recipes by category
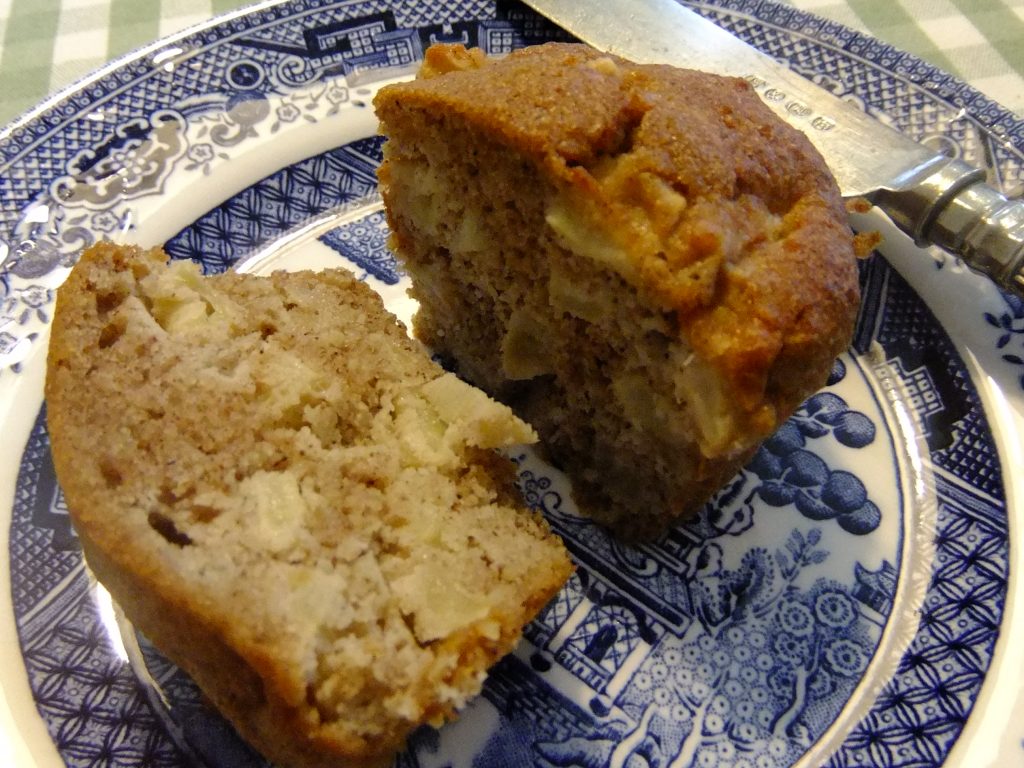
These are light, fluffy and a real celebration of Autumn. Unlike totally grain-based gluten free cakes, these keep fresh and moist for days (just keep them somewhere cool). I like to use reusable silicon muffin cases for this – muffins come off really cleanly and you are reducing waste as well. I adapted the recipe from one I found on supermummy.com. with a bowl of natural coconut or dairy yoghurt and some berries these would make a good breakfast too. Yummy!
To make this into a breakfast enjoy each muffin with a generous dollop of unsweetened coconut/almond or dairy yoghurt. This gives more protein to keep you fuller longer….
To make 12 x 7cm muffins
2 level tbs honey or maple syrup
100g coconut oil (or butter, if you want dairy), melted with the maple honey and cooled
3 tbs unsweetened plant milk (or cows milk if you eat dairy)
1/2 tsp of vanilla bean paste or 1 tsp vanilla extract (not essence, if you want to be gluten-free)
2 large eggs*
75g buckwheat flour
75g ground almonds
1 level tsp baking soda (also called bread soda)
Generous pinch Himalayan salt
For the apple pieces:
2 apples, eaters or cookers
Optional: 1 tbs unsulphured raisins
1 tbs buckwheat flour
1 level tsp Ceylon cinnamon
*If you have any leftover egg whites in your fridge, this is a good place to use them up. Instead of using 2 large eggs, I used two small/medium ones then at the end, with the apple pieces I folded in 2 very stiffly beaten medium egg whites*. The result was fab.
1. Peel core and dice the apples. Toss in a bowl with 1 tbs buckwheat flour and the Ceylon cinnamon until fully coated. Set aside.
2. Preheat oven (fan 180C standard 195)
3. Beat butter/coconut oil, milk, syrup/honey, vanilla and eggs in a bowl until frothy.
4. In a separate bowl whisk buckwheat flour, ground almonds, baking soda and salt together. Add to the liquid mixture and beat until fully amalgamated.
5. Fold the coated apple pieces into the mixture (along with the optional 1-2 stiffly beaten egg whites if you have some hanging around the fridge).
6. Spoon the mixture into 12 x 7cm muffin cases, supported by a muffin tin if you have one (this gives a nice shape to the finished product). If you don’t have a muffin tin, use a baking tray for the muffin cases.
7. Heat your oven to 180C while the muffins rest for a few minutes.
8. Bake 20-25 minutes (mine took 20) until golden on top. They are done when a skewer or toothpick inserted into the centre of a muffin comes out clean.
Why these are better for you:
Buckwheat is eally a seed rather than a grain. It is packed with a polyphenol (natural plant chemical) called rutin. Rutin is a powerhouse for aiding collagen production. Collagen is needed for healthy bones, tendons, ligaments, gut, connective tissue, and for keeping you younger a lot longer. Rutin has recently been on my mind as I implement a programme to heal tendonitis. I had a few minor shoulder injuries a few years back that prevented me moving properly (for 4 years), the tendon got pinched an inflamed. Ouch!!! Nothing like a (lot of) discomfort to refocus the mind on a few forgotten foods.
Sweetened with coconut sugar or maple syrup and containing apple to help feed these good bacteria these are SO much better for you than standard muffins loaded with refned sugar and toxic oils.
Buckwheat is naturally gluten-free. In EVERYBODY (whether gluten-sensitive or “normal”) gluten tears the lining of your small intestine. The damage lasts a minimum of 3 hours in ALL people (recent research has filmed this!). This damage allows bacterial fragments, gut bacteria and undigested food to spill into your bloodstream- putting your immune system into “attack” mode. This is a factor in inflammatory, autoimmune and mental health conditions. Using coconut oil or butter instead of omega 6 oils (like rape, sunflower, for example) means you avoid toxic trans fats produced by heating or refining nut/seed oils like sunflower, vegetable, rapeseed, sesame or peanut. Butter is healthier than damaged polyunsaturated oils.
Aug 22, 2018 | Anna's Best Recipes, Main courses, Sides, starters, soups & snacks
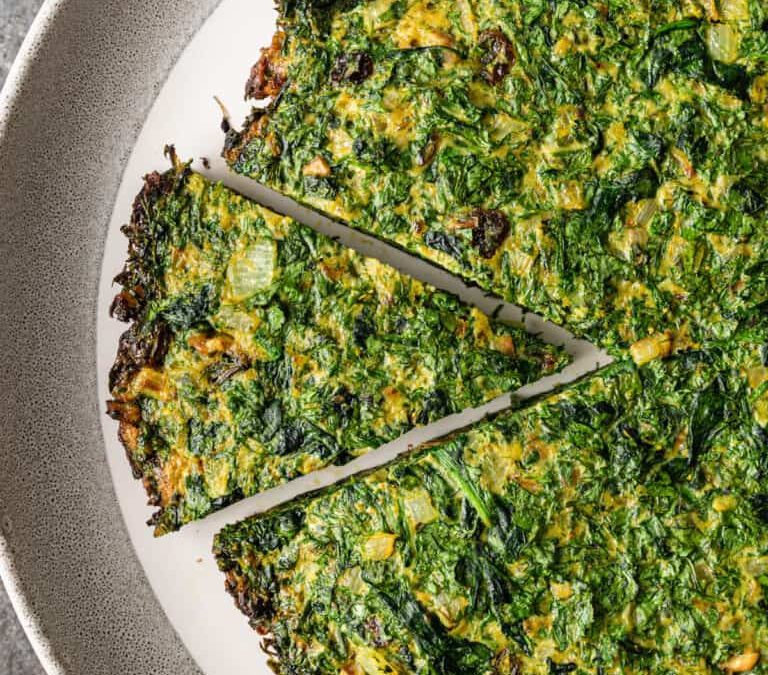
I made this for a birthday gathering last week and people LOVED it. It is a baked version of the more oily deep green frittata popular among Persians. There they serve little squares of it with drinks. This quantity makes enough to serve 4 people as part of a mezze meal. Give yourself plenty of time to make it though, it takes a while to process or chop all the herbs. The recipe is from Sabrina Ghayour’s Persiana.
200g flat leaf parsley
200g fresh coriander
40g fresh dill
40g fresh chives
2 bunches spring onions, thinly sliced
3 tbs extra virgin olive oil
2 tsp turmeric powder
8 medium organic eggs
2 tbsp gluten-free flour of your choice (I mix millet, gluten-free oat flour and sorghum or brown rice flour. Or use gluten-free oats blitzed to a flour in your food processor)
2 rounded tbs thick kefir or Greek yoghurt (to thicken your kefir, line a sieve with muslin or a single layer of kitchen paper, strain the kefir, letting the thin whey drain off). If you are very dairy-sensitive you can use natural soya yoghurt instead of Greek yoghurt/kefir (though many dairy-sensitive people can cope with fully fermented home-made kefir because the casein and lactose has been digested by friendly bugs)
3 tsp gluten-free baking powder
½ level tsp Himalayan salt or Atlantic sea salt
freshly ground black pepper
3-4 heaped tbs dried barberries, optional (I buy mine in the Asia Market, Dublin 2)
100g walnut pieces, chopped
Pyrex/ovenproof dish (22x30cm is ideal)
Non-stick baking paper (silicon paper)
1. Preheat the oven to 180C/fan 160C. On a medium heat warm a large cooking pot.
2. Finely chop all the herbs (if using a food processor, do this in 2 batches). Pour the olive oil into the warm pan and sweat the spring onions and herbs for a few minutes, then add the turmeric and stir to mix. Cook for a further 5 mins, then place the herbs on a flat plate and allow to cool.
3. Grease your ovenproof/pyrex dish and line with non-stick baking paper. This makes it easier to remove after everything is cooked.
4. Beat the eggs with the kefir/yoghurt, baking powder, salt, gluten-free flour and about half a level teaspoon of freshly ground black pepper (or to taste).
5. Once the herb mix has cooled so its no longer piping hot, slowly add a couple of spoonfuls at a time to the egg mixture and stir well until all the herb mix is combined. Add in the barberries and walnut and mix well once again.
6. Pour in the egg and herb mixture and bake for 35-40 mins. To check if the frittata is cooked, insert a knife into the centre. If it comes out clear of raw egg, the dish is done. If not, return to the oven for a few minutes. Once cooked, allow to cool, then cut into squares to serve. Enjoy…
Why this is good for you:
All herbs and many spices (especially turmeric) have antioxidant properties, helping reduce inflammation and keep you looking and feeling younger longer. Most herbs and spices have a selective action on your gut bacteria – fostering the helpful bacteria and helping reduce numbers of pathogens (disease-causing ones). Coriander also helps chelate (bind) the toxic metal mercury. If you have mercury dental fillings you are ingesting a significant dose every single time you eat. when coriander is in your gut at the same time it latches on to the mercury and escorts it safely out via your bowel. Onion family veggies also feed good bacteria which are needed for ALL aspects of your health. Green plant foods are rich in magnesium needed for detoxification of the many toxins our body needs to process every day. Magnesium is essential for keeping us calm and happy.
Nov 21, 2017 | Anna's Best Recipes, Desserts & drinks
Rich Gluten-free Xmas Pud
This is a very traditional-tasting, rich, dark pudding. Yummy! Its more intense than my normal gluten-free pud (a light, cakey version) which is also posted on this blog. The recipe is adapted from Jamie Oliver’s gluten-free pud recipe – I removed refined sugar/golden syrup and added blackstrap molasses and low GI xylitol/coconut sugar which are healthier. Thanks Jamie! I made 2 puds from this, one in a 1 litre bowl, that would give about 6 servings, and another small one that gives 4 modest servings.
You can make this pudding well ahead of time. In fact, 25 November is Stir-Up Sunday, the traditional day to make Christmas puddings. Soak the fruit the day BEFORE you want to cook the puds. Using dried fruit free from sulphur dioxide (used to preserve colour) is preferable as it can cause digestive symptoms and headaches in susceptible people.
If you can at all, use metal or ceramic pudding bowls. Cooking puds in plastic means toxic bisphenol A (BPA) residues leech into the food – mot something you want if you care about your health. If you havn’t wrapped a pud for steaming before you will see instructions here https://www.caseys.kitchen/2016/08/28/how-to-wrap-a-pudding-for-steaming/
100 g currants
150 g raisins
110 g dried sour cherries (from health stores. dried cranberries would do instead)
50g chopped dates
1 organic lime, the grated zest and juice of
½ an organic orange , the grated zest and juice of
50g mixed peel
75 ml tea, cooled (I use 1 tbs grated ginger root with a rooibosch teabag for extra flavour but you can just use normal tea if you want. If using ginger, strain out before using the tea)
Level teaspoon mixed spice
½ level tsp ground cinnamon
½ level tsp grated nutmeg
2½ tbs (40 ml) brandy
40g xylitol (or 40g coconut sugar which gives a nice caramel flavour)
1 level tbs blackstrap molasses
1 medium or large cooking apple,peeled and grated
50g roughly chopped almonds (sometimes I use flaked to save time)
25g rice flour
25 g cornflour
110g fresh gluten-free breadcrumbs (M&S now do a round GF loaf that’s slightly better quality than most GF sliced pan breads. If you are OK with dairy products you can also use Kelkin white sourdough gluten free bread which is free of industrial emulsifiers))
1 rounded tsp gluten-free baking powder
110g gluten-free suet (available online or see below for how to make it). You can substitute butter or coconut oil but these melt quickly and do tend to boil out of the pudding but if you are dairy-sensitive and want to avoid animal products or dairy…)
2 large free-range eggs , beaten (if your eggs are medium, add an extra egg)
1 large free-range egg yolk , beaten
Butter, coconut or light olive oil to grease
- In a large bowl combine the dried fruits, zests and mixed peel, then add the citrus juice, cold tea, spices and brandy, and leave overnight for the flavours to develop.
- The following day, add the coconut sugar, xylitol or coconut sugar, blackstrap molasses, apple and almonds.
- In a clean bowl, place the rice flour, cornflour, breadcrumbs, baking powder, coconut oil or suet and a pinch of salt. Add in the beaten eggs until you have a smooth mix, then stir into the fruit.
- Grease a 1.5-litre pudding basin and pour in the pudding mixture until it’s ⅔ full. Cover the top with a circle of greaseproof paper, then with 2 pieces of foil and secure with string. Or use a 1 litre and a smaller pudding bowl to make 2 puds.
- Place an upturned saucer into the base of a deep saucepan. Sit the pudding on top of the saucer, and carefully pour in boiling water to come halfway up the pudding dish. Put the lid on and steam for 8 hours (yes, 8!). According to Delia Smith DO NOT open the lids during the first half hour of steaming or you will prevent the puds from rising properly.
- According to Delia you should then allow the puds to get completely cold before removing the tinfoil and paper and replacing with fresh ones, again tied with string for easy manoevering on Christmas day.
- On Christmas Day: Fill a saucepan quite full with boiling water, put on the heat and when it comes back to the boil, place a steamer on top of the pan and turn it down to a gentle simmer. Put the pudding in the steamer, cover and leave to steam for 2 hrs 15 mins. You’ll need to check the water from time to time and maybe top it up a bit. When you are ready to serve the pudding, remove from the steamer and take off the wrapping. Slide a palette knife all round the pud and turn out onto a warmed plate. Place a suitable sized sprig of holly on top.
How to make suet
I had my first experiment with this in 2020 because there was only one online supplier and I was tired of buying online. Suet is made by grating or extruding leaf lard (pure, raw beef/pork fat) and then tossing it in some flour to keep it from clumping. Its best not to use lamb fat because its got a very strong flavour. Get a good butcher to save pork/beef fat for you and ask for at least double what you need because you will want to discard any pink bits. I give the pink bits to the birds who are desperate for extra calories at this time of year.
Instructions: freeze your suet, then pick through and remove any pink bits. Grate as much as you need for the recipe then toss in a teaspoon or two of gluten-free flour (rice flour will do). This can be made ahead of time and stored in the fridge. It will keep for ages.
Why this is (somewhat) better for you:
Gluten has a temporary damaging effect on your small intestine even when you are not gluten-sensitive or coeliac. Gluten causes the tight junctions between absorptive cells to become unstuck for several hours. This means that undigested food particles, gut bacteria and other debris can enter your bloodstream unchecked (this is called increased intestinal permeability). This can cause symptoms as diverse as joint pain, mood problems, headaches and tiredness to name but a few. Because it inflames you this lowers your ability to fight viral and other infections.
This recipe avoids using highly refined sugars, which is good news if you want to avoid sabotaging energy levels, skin and digestive health. Blackstrap molasses is rich in chromium and iron needed for energy and metabolising the sugar. Getting the unsweetened sour cherries gives a lovely tang but also avoids the added sugars in glace fruit (including dried cranberries). The recipe still contains corn flour, which is a refined product though, and the large amount of dried fruits means Xmas pud is high in natural sugars and so is not a vitality-boosting food. Still though, sometimes, who cares…..