
Jan 11, 2024 | Anna's Best Recipes, Breads, crackers, pancakes & wraps
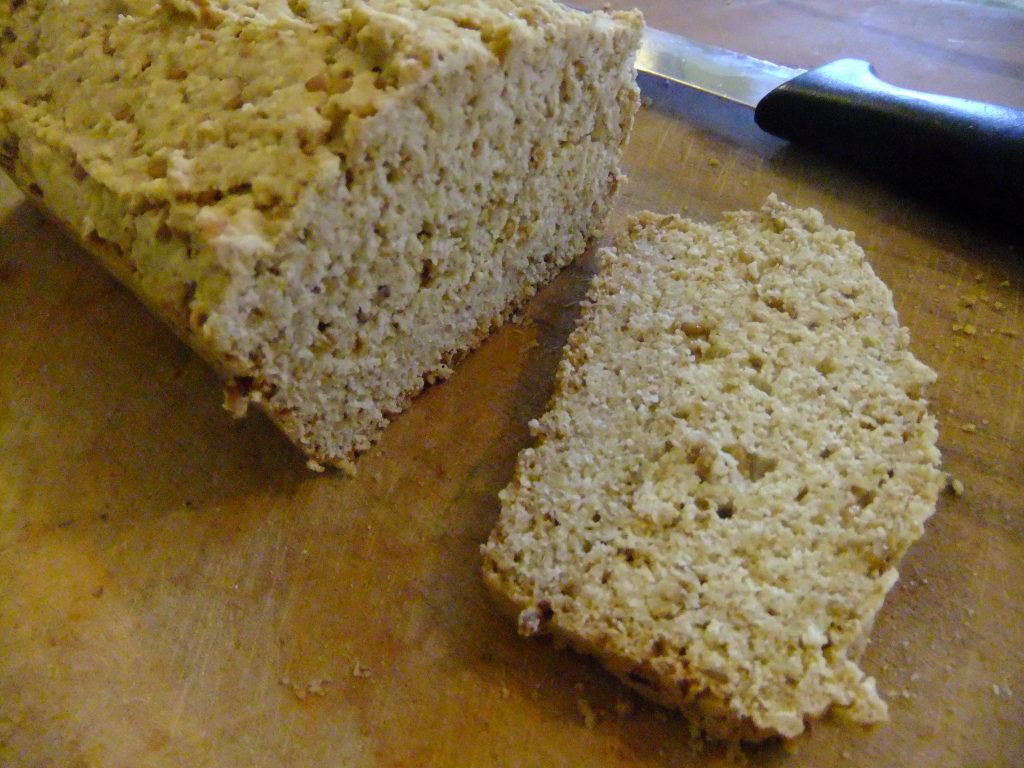
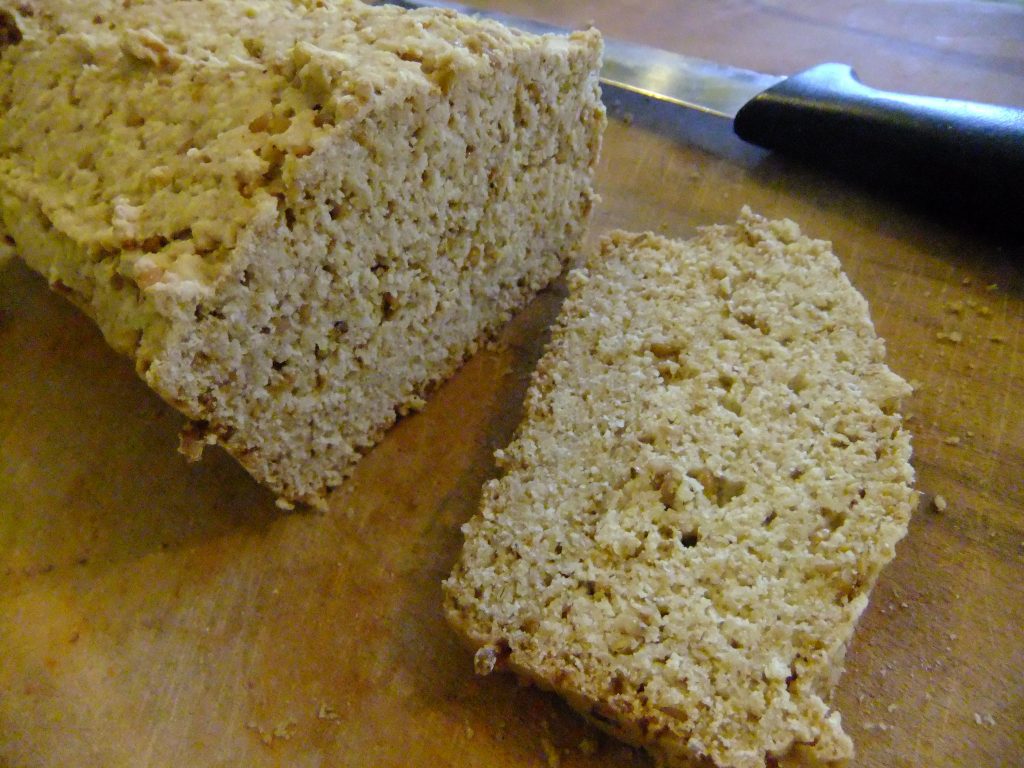
I’ve never made sourdough bread before. I’ve always thought minding a sourdough “starter” or “mother” seems like a big faff and I’m a more lackadaisical cook. I never found a good recipe – until now. Ever since I had to go gluten-free the one bread I really missed was good brown sourdough (usually rye). Huge gratitude to Sarah Cobacho for posting this online. Thank you SO much, Sarah!
This recipe uses the natural microscopic airborne yeasts and bacteria in the air all around you to start colonising and putting carbon dioxide into the mix. This is what rises the bread. Yes, true sourdough never, ever contains yeast or bread soda. The inside of this bread will not be dried out like normal bread but will retain moisture, just like a regular rye sourdough. Only this is gluten-free!
500 g hulled buckwheat kernels (Please note: It is important to use HULLED and whole BUCKWHEAT. You will not get good results with flour, unhulled (black), or roasted buckwheat.)
200 ml water
¼ tsp Himalayan or Atlantic sea salt
2 tsp poppy or sesame seeds (optional)
2 lb loaf tin and silicon/greaseproof paper to line
A little olive oil to grease the tin (optional)
1.Rinse the 500g of hulled buckwheat kernels under cold water until the water runs clear. This ensures that any dust or impurities are removed.
2.Transfer the rinsed buckwheat to a large bowl. Cover the kernels with cold water, ensuring they are fully submerged. Cover the bowl with a clean cloth and let it sit overnight. This soaking process initiates the fermentation which is key to this gluten-free buckwheat bread.
3.The next day, drain (do not rinse) and transfer to a blender with 200ml water and salt. Blend, starting at low speed and slowly increasing.
4.Pour the blended buckwheat mixture back into the bowl. Cover it again and let it sit at room temperature for 24 hours. This resting period allows the fermentation to continue, developing the unique flavor of the loaf.
5.When you’re ready to bake, preheat your oven to 180C. While the oven is heating, prepare a loaf pan by lining it with baking paper. I like to brush paper and tin with a little olive oil for easier removal but its not essential. Perhaps I am micro-managing the bread!!
6.Pour the fermented buckwheat dough into the prepared loaf pan. If you’d like, sprinkle the top with 2 tsp of poppy and sesame seeds for an added crunch and visual appeal.
7.Bake the bread in the preheated oven for 90 minutes. The bread should be golden brown and firm to the touch.
8.Allow the bread to cool down before slicing. This makes it easier to cut and improves the texture. Now, enjoy your homemade, healthy buckwheat bread! Keeps 4-5 days in in an airtight container or else slice and freeze for up to a month. Prize off a slice or two to pop in the toaster when you feel like it.
Why this is good for you:
Buckwheat is a massive source of a polyphenol called rutin. Rutin turbo-charges the strength of connective tissue, cartilage, bones, blood vessels and skin. I would always include either a rutin supplement or foods rich in rutin in any tissue/bone/skin rebuilding programme. Also helps prevent skin sagging (wrinkles!). Buckwheat also contains potassium, magnesium and calcium for healthy bones.
Sourdough fermentation makes ALL grains hugely more digestible. All grains, even gluten-free ones, contain lectins. Lectins are plant proteins designed to protect the plants babies (seeds) from being digested by predators. So these lectins disable your digestive proteases (enzymes). This causes irritation in the gut. By fermenting the buckwheat you get rid of almost all lectins.
FAQ
Can I use buckwheat flour instead of hulled buckwheat kernels? For this specific recipe, it’s recommended to use hulled buckwheat kernels rather than buckwheat flour. The process of soaking and fermenting the kernels contributes to the unique texture and flavour of the bread. Using buckwheat flour would not yield the same results. Personally I’ve never seen un-hulled buckwheat groats (which are black and inedible) for sale. Hulled are a green/light brown colour and pretty much every health store sells them.
Oct 19, 2015 | Anna's Best Recipes, Breads, crackers, pancakes & wraps
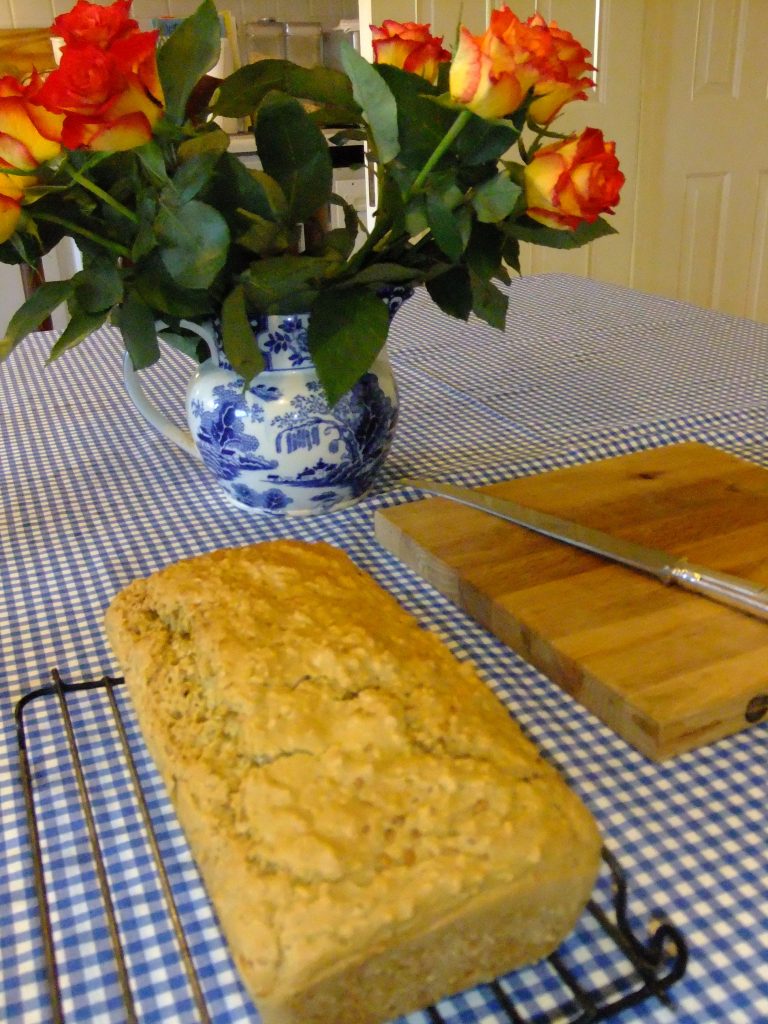
This is delicious and I think it tastes very like traditional brown soda bread and thankyou to the patient who gave me the recipe. Without something extra to bind it I do find it a little crumbly. If this is too annoying (I don’t mind this) you can add a large egg to the mixture to bind it, or alternatively a vegan “flax egg” (1 tbs ground flax seeds mixed with 3 tbs water). I also line the bottom of the loaf tin with silicon/baking paper (and grease this too) just in case it should stick.
1 large tub of organic natural yogurt (400 ml or 500g) or home made kefir (or dairy free versions: unsweetened soya or almond yoghurt)
2 tubs (about 800ml) gluten-free porridge oats (use the yogurt tub that you just emptied) or if you eat gluten, normal porridge oats
2 rounded tsp of baking soda
2 tbsp of extra virgin olive oil
To bind (optional) 1 large egg, beaten or 1 tablespoon ground flax see or chia seed mixed with 3 tbs water
A handful of porridge oats or poppy seeds for sprinkling on top
1. Preheat your oven to 180C (fan) or 195C (non-fan)
2. Get a big bowl and mix all of your ingredients gently but thoroughly
3. Grease a 2lb (900g) loaf tin with olive oil and line base with greaseproof/silicon paper if using
4. Pour your mix into the loaf tin and spread to flatten the top a bit
5. Put in the oven for 45 mins (at about 15mins, sprinkle some porridge oats or the seeds on top)
6. Take it out and carefully remove from loaf tin
If you really want crispy edges to the bread, put it back in the oven for 5 minutes.
Why this is better for you
Oats are packed with soluble fibre which feeds beneficial bacteria in your gut as well as helping you feel fuller for longer. Oats are naturally lower in sugars than wheat. Wheat (even wholemeal) contains amylopectin which can be fuel cravings and binges. Oats are also far easier to digest because they do not contain gliadin gluten or irritating wheat bran, which can make digestive issues flare up. Natural yoghurt is a much better binder for bread than the refined vegetable oils in a lot of shop bought breads. Refined oils interfere with energy production and cause inflammatory in your body – e.g. in your digestive system or your skin. Other grains such as millet and buckwheat are also healthy choices for making bread. Many people who are sensitive to dairy (milk products) can take kefir. This is because the kefir organisms hydrolyse (break down) casein, the problematic protein in milk. Kefir is also low in lactose because it is digested and turned into lactic acid (hence the tangy, yoghurty taste). Shop bought yoghurt is not usually totally lactose free as the fermentation is not allowed to be completed.
Oct 13, 2015 | Anna's Best Recipes, Breads, crackers, pancakes & wraps
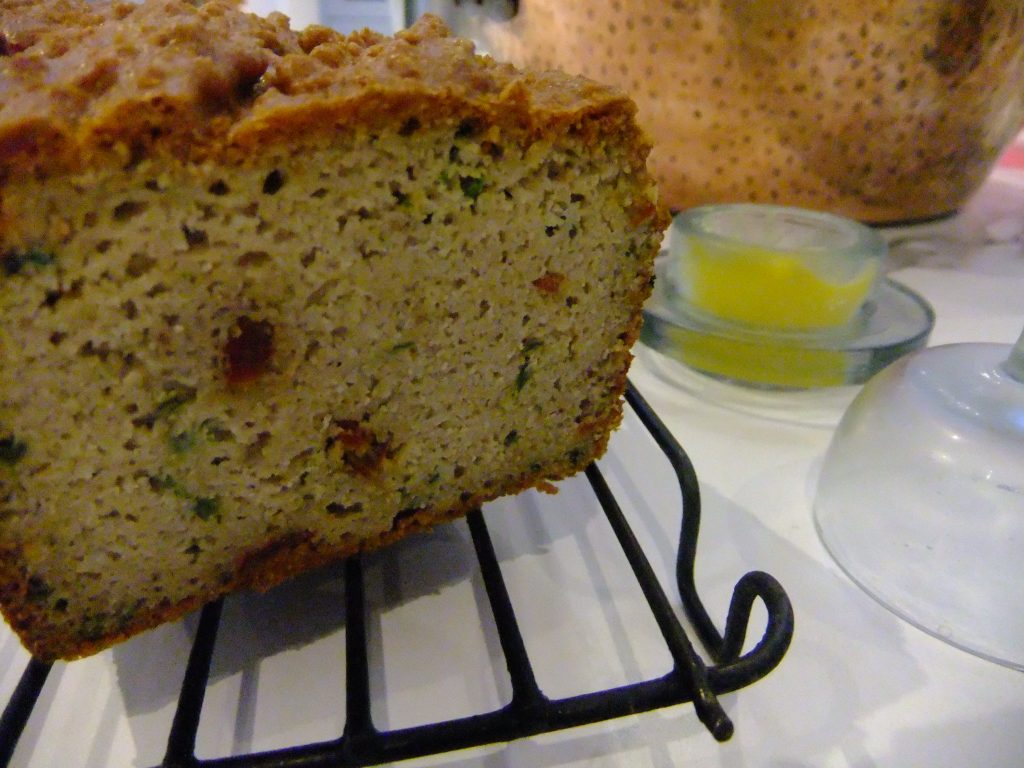
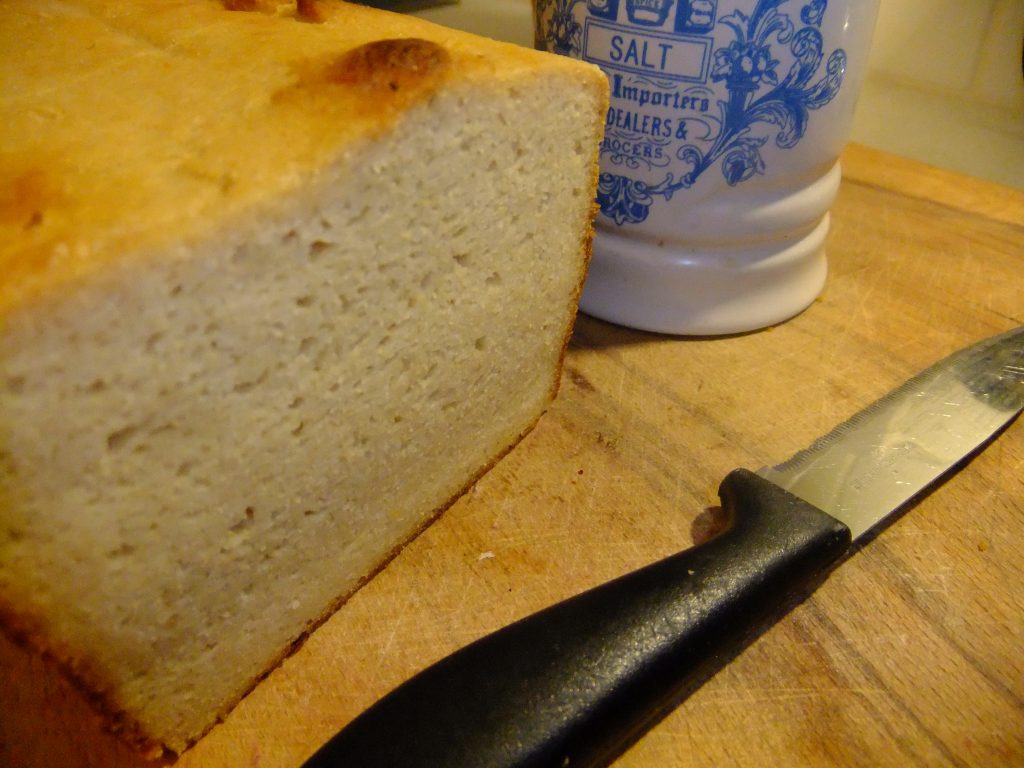
I am having a craze for recipes that fit in with the specific carbohydrate diet (SCD). The SCD is a lifesaver for so many people with Crohn’s and colitis that I had to start including some of the recipes here and eating them at home sometimes. This bread is really lovely and very easy to make. Just tried it at the weekend with home-made baked beans for breakfast and a piece of fruit to follow. Naturally I also smothered it in my home-made buttery spread for bread but you could use normal butter or ghee (clarified butter). Wish I could say the recipe is my own, but I found it in the wonderful SC diet cookbook. I did reduce the (I thought) excessive amount of salt from the original recipe and it still tasted great. This bread is suitable for a grain-free ketogenic diet as well – AND IS TOTALLY DELICIOUS AND SATISFYING.
900g (2lb) loaf tin
2 large eggs (if they are tiny, you could use 4)
230ml (1 cup) home made kefir or home-made natural yoghurt (see SC diet website)
28g clarified butter or ghee or (if you are not dairy sensitive) normal butter, melted
½ level teaspoon sea salt or Himalayan salt
1 rounded teaspoon baking soda (“bread soda” is another name for this)
½ teaspoon freshly ground black or white pepper
385g almond flour (ground almonds are fine. The finer ground the better – I whizzed mine in the food processor for a bit before adding the other ingredients)
12g (1/4 cup) chopped chives (do use these, they give a fab flavour – if you don’t have any you could use the green parts of spring onions chopped up finely)
14g finely chopped, dry, sun-dried tomatoes (with no additives if you are on SC diet)
1. Preheat oven to 170C (fan oven) or 195C otherwise. Grease and bottom line a 900g (2lb) loaf tin with baking parchment.
2. Blend together all ingredients in a food processor then pour into the tin.
3. Bake in the oven for 45-55 mins until a knife inserted into the centre comes out clean.
4. The bread, once cool, should keep well in a self seal bag or airtight container in the fridge for at least 5 days.
Why this is better for you:
Some people need to follow a grain-free diet in order to stay well. This recipe is just the thing to satisfy the longing for bread. This bread would be brilliant for anybody needing a low carbohydrate diet (e.g. people with diabetes, or people following a ketogenic diet to manage cancer). Being baked, its naturally not quite as healthy as eating the nuts (almonds) raw. But what the hey, sometimes you just want bread. Because the bread is very low in carbohydrates (sugars) its a great substitute for the wheaten bread that can cause such huge dips in energy after lunch. And of course its low GI and studies show low GI eating helps skin and hair health too. You might wonder why I mention “dairy-free” when the recipe contains ghee/clarified butter – this is because when you clarify butter you remove the lactose (milk sugar) and casein (problematic milk protein) and so it becomes hypoallergenic. Great news for anyone who is dairy sensitive. If you have a true dairy allergy (throat swelling, anaphylactic shock) you will of course still want to steer clear of any contact with dairy products whatsoever, even during food preparation for others.
Feb 25, 2015 | Anna's Best Recipes, Breads, crackers, pancakes & wraps
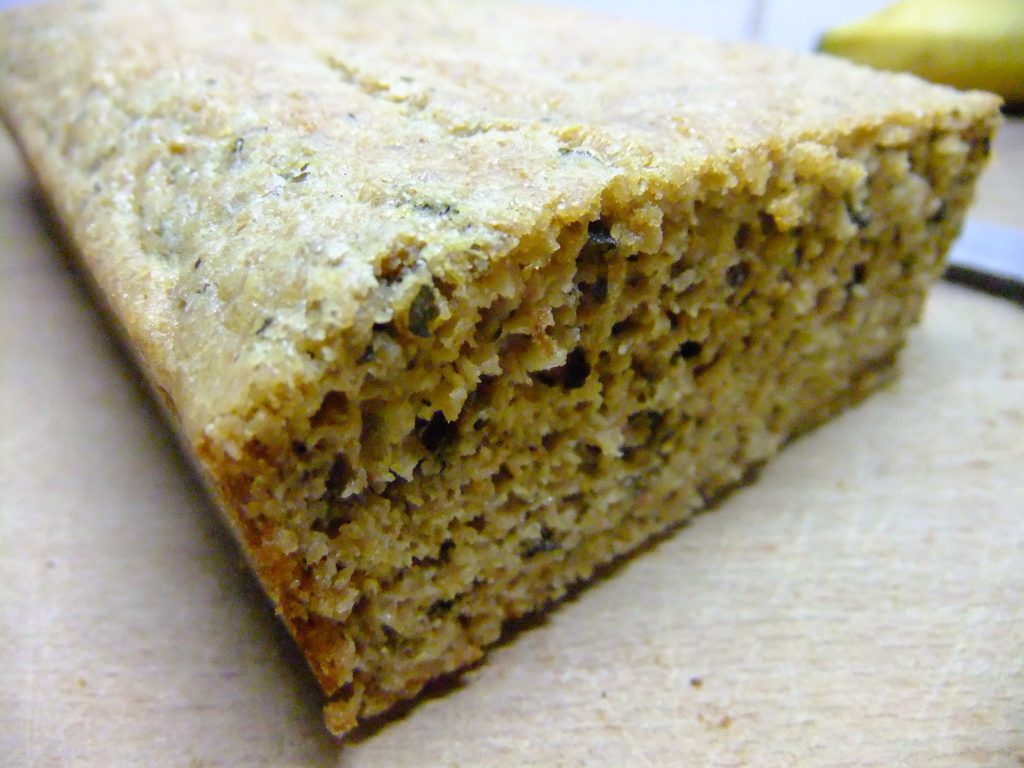
This bread is soft and moist and really filling. It’s such a huge treat when you are off grains! Because its high in protein and fibre (unlike normal breads) you don’t need to eat it with extra protein in order to avoid blood sugar dips and energy crashes. Enjoy it with my special buttery spread for bread, with virgin coconut oil or organic butter (or clarified butter for dairy intolerant people). If you want to increase your energy levels, use the coconut oil as a spread instead of butter (unlike butter, the MCT fraction of coconut oil – about 50% – goes straight into energy production)
Dry ingredients:
100g milled flax seeds. Flax is another name for linseed.
20g ground almonds
½ level tsp Atlantic sea salt or Himalayan salt (NOT ordinary table salt which contains harmful additives)
1 level tsp bicarbonate of soda (also called bread soda)
Plus, if you have it, one of the following
2 tsp dried oregano and 1 level tsp of paprika
1 level tsp Ceylon cinnamon and/or ½ level tsp cardamom
1/2 tsp each ground cumin and coriander
Finely grated rind of organic lemon
Wet ingredients:
2 eggs
1/3 cup (approx. 80ml) water, home made dairy kefir or non-dairy kefir*
1/3 cup extra virgin olive oil
1. Turn on the oven to 150C (or 140C for fan)
2. Mix together all the dry ingredients. In a separate larger bowl whisk or beat together the wet ingredients.
3. Add the dry ingredients to the wet and mix together well.
4. Line a 1lb/450g loaf tin (around 15 x 94 x 74cm) with greased parchment or greaseproof paper, pour in the mix and bake for 50-60 mins.
[If you only have a 2lb loaf tin (around 23 x 13 x 7cm) you can still use it but reduce the baking time to around 40 minutes. The resulting loaf will be half the normal height].
5. The loaf is done when a needle or knife inserted into the thickest part of the bread comes out clean. Remove from oven, remove paper and cool on a wire rack. Refrigerate if you intend keeping it for more than 1-2 days.
Variation
For a deliciously moist courgette flax loaf reduce the amount of kefir/water to 50ml and add 1 medium courgette, finely grated, to the dry ingredients.
*In my tags for this recipe I say this bread is dairy-free, so how come kefir is allowed, when its usually made from milk? This is because, if you make your own kefir properly at home, the problematic milk protein (casein) and lactose (milk sugar) have been broken down by the fermentation process. Kefir “grains” hydrolyse (break down) casein, and digest lactose, turning it into lactic acid. Good news all round, if you are recovering form dairy intolerance. Kefir also contains over 20 different types of beneficial bacteria to help heal digestive issues. Unsweetened non-dairy kefir can be a good option for shop-bought.
Why this is better for you
You may wonder why I mention kefir in a “dairy-free recipe”. Kefir is tolerated by people with dairy intolerance because provided it is properly made (at home) it contains no lactose and no casein. Lactose is the milk sugar that’s problematic in lactose intolerance. Most yoghurts still contain lactose because they are not properly (fully) fermented. Yoghurt you make at home will not contain lactose. Casein is the milk protein that dairy intolerant people react to. Kefir grains “hydrolyse” (digest) casein, leaving you able to eat kefir but not yoghurt, cheese, milk which all still contain casein. This loaf avoids grains completely so its really low in carbohydrates. If you are gluten intolerant or want to follow low GI, ketogenic, stoneage or paleo eating plana, it fits right in. Research shows that if you want to maintain good skin, digestion and keep mentally sharp then low grain low carbohydrate way of eating is really important for you. Flaxseeds are a really rich source of soluble fibre, which feeds good bacteria in your gut which helps your skin, your digestion, and even your brain function!! I would recommend having this bread now and again, rather then every day. This is because heating reduces the levels of beneficial oils in the ground flaxseeds. All nuts and seeds have more benefits when you eat them raw or soaked, rather then cooked. It’s still a million times better than sliced pan though!
Feb 16, 2015 | Anna's Best Recipes, Breads, crackers, pancakes & wraps, Desserts & drinks
Gluten-free pancakes with apple and vanilla yoghurt
These are my “traditional” but gluten-free pancakes and I love them for an occasional treat. They come out pretty similar to traditional wheaty pancakes and we think they are just as nice. I plan to eat these for dessert on Pancake Tuesday with freshly stewed cooking apple (sweetened with pure stevia or xylitol) and a large dollop of Greek yoghurt, natural yoghurt or Coyo coconut yoghurt. Coyo sometimes needs to be thinned thinned with a little non dairy milk when its extremely thick. Of course there’s always the more traditional option to eat them with lashings of lemon juice and a sprinkle of xylitol. Delicious!
For best results make the batter between 2 hours and 2 days before and store in the fridge until ready to use.
110g plus 1 tbs brown rice flour, organic if possible
35g soya flour
½ level tsp Atlantic sea salt or Himalayan (pink) salt
2 eggs
1 tbs virgin macadamia oil or light olive oil
250ml dairy or non-dairy milk of your choice (additive-free unsweetened almond or coconut milk are particularly good)
Virgin coconut oil for cooking
1. Combine all the ingredients and whisk thoroughly with an egg beater or electric mixer or in a blender. the batter should flow like double cream. If it is too thick or thin, adjust with either rice flour or water. Store in the fridge until ready to use.
2. Heat a frying pan over a medium-high heat. too low a temperature will produce tough crepes, too high will burn them before they are cooked. Add a knob of coconut oil (about the size of the top part of your thumb) to the pan before cooking each crepe.
3. Pour the batter (about an eight per crepe) into the hot frying pan, tilting the pan to distribute batter evenly and thinly. Pour out any excess.
4. Cook until the top appears dry, about 1 minute. Lift with edge of a heatproof spatula and if the bottom is golden, easy the whole crepe up with the spatula and turn. cook about 1 minute more. Crepes can be stacked and kept warm in a low oven.
Why these are better for you:
The soya flour and eggs in these is high in protein, so you are less likely to have a blood sugar rush and crash after these, even if you eat them on their own. Erratic blood sugar plays a massive part in skin problems, accelerated ageing process, stress and digestive issues.
Unfermented soya products like soya flour (and soya milk) are not an especially healthy option to eat every day because they bind (stick to) essential minerals, making it hard for your body to digest them. That’s why I recommend these pancakes for occasional treats rather than every day. In contrast to soya flour and soya milk, fermented soya products are beneficial and can help reduce the hormonal imbalances that lead to breast and prostate issues. Examples of fermented soya products are miso, tempeh and soya yoghurt. So best keep soya flour and soya milk for occasional treats. Coconut oil is fantastic for your brain, your skin and even your digestive system. Unlike many oils, it is not made harmful by normal domestic cooking heat.
Apr 8, 2014 | Anna's Best Recipes, Breads, crackers, pancakes & wraps
This is lovely bread with a soft golden brown crust. It rises as well as any wheaten soda bread and looks and tastes pretty similar. As I’m coeliac, when friends and relatives come to visit, I make this bread and we can all eat the same. Everyone seems to like it. You could use this mixture for scones too, by placing the mixture in very well-oiled muffin tins instead of a loaf tin.
If you want to make a bread with fewer ingredients, check out my oat bread, flax bread and quinoa bread recipes.
Makes 1 loaf 11cm x 22cm
325 ml/generous 1½ cups unsweetened additive-free non-dairy milk (e.g. coconut, almond, hemp). For dairy eaters you can use buttermilk or kefir
25g whole linseeds (also called flax seeds), soaked 2 hours or overnight in the milk above
75g millet flour (make this by blitzing millet flakes in the food processor) or potato flour
150g brown rice flour
75g millet flakes
25g rice bran
½ level tsp natural sea salt (eg. Atlantic/Maldon/Himalayan – other salts contain harmful additives)
1 rounded teaspoon bread/baking soda (ideally free from toxic aliminium, sometimes listed as flow agent or anti-caking agent – health stores sell good quality bread soda)
1 large organic egg, beaten or if avoiding egg use No-Egg Egg Replacer and make up according to manufacturers instructions
3 tbsp extra virgin olive oil or virgin macadamia oil
Optional: 1 tbsp sesame or poppy seeds to sprinkle on top
Tinfoil
1 loaf tin (about 1250ml) – this common size is about 11cm x 22cm x 8cm
1. Before you start, remember to soak the whole linseeds for 2-3 hours or overnight in the buttermilk. This is crucial, otherwise the bread will not bind together.
2. Preheat oven to 190C/fan 175C/375F/Gas 5
3. Grease and bottom-line a loaf tin with baking parchment/silicon paper
4. Sieve the flours into a bowl and add the other dry ingredients and mix well.
5. Pour off a cupful of the buttermilk and reserve. Add the rest of the buttermilk with the flax (linseeds), oil and beaten egg to the dry ingredients.
6. Add enough of the reserved cupful of buttermilk to make a thick batter (sometimes the mix may take more liquid than at other times depending on the absorbency of the dry ingredients). The mixture should be soft enough to pour into the tin (a bit wetter than queen cake mixture). If you are using sesame or sunflower seeds, sprinkle them on top now.
7. Bake for about 1 hour. Test after 50 mins with a metal skewer to ensure that it is done in the middle (the skewer will come out clean if it is done). The bread will also shrink away a bit from the sides of the tin when cooked.
8. If the bread is getting too brown during baking, cover with a sheet tin foil.
9. Turn onto a wire tray to cool.
Variation:
You could also use buckwheat flakes or quinoa flakes instead of millet flakes. Millet, rice, quinoa and buckwheat are all naturally gluten-free.
* although beneficial nut and seed oils are damaged by baking, whole linseeds/sesame seeds are too small for the body to break down. This means they pass through the digestive system without their heat-damaged oils being digested either. The soluble fibre in the linseeds does you good by absorbing water and emitting a gell that provides food for your body’s beneficial bacteria to help your health.
Why this bread is better for you:
This bread steers clear of the main four food allergens I encounter in my nutritional practice: gluten, dairy, yeast, and egg. Whether you are intolerant/allergic to it or not, gluten binds to N-acetyl glucosamine in our gut and inactivates this healing nutrient. That’s one reason why people adopting a gluten-free diet often get relief from digestive problems. Food allergies are usually easy to detect because the symptoms come on within 2 hours. This is different from food intolerances, where symptoms can take up to 48 hours to appear. Food intolerances are a sign that your small intestine is a bit damaged and so undigested foods are getting into your bloodstream and causing your immune system to “over-react”. Food intolerances are fixable by avoiding the food for a period and healing your gut using nutrition.
Millet is a grain that’s rich in magnesium, which you need to keep your mood chilled and your bowels and liver working well to remove toxins from your body. Brown rice flour and millet are also of course, wholegrains, so they contain chromium and B vitamins, also needed for mood, energy, and great skin.
Milk is a food that is great for stimulating rapid cell proliferation in babies and young animals. Unfortunately it’s not such an appropriate food for adults because research suggests it can fuel serious diseases of the breasts and prostate. .Although we do need calcium in our diet, non-dairy sources are more beneficial. Dark green leafy veg, nuts & seeds (especially almonds and ground sesame seeds), bone-in tinned salmon and sardines and fermented soya products contain high levels of calcium.
Mar 12, 2014 | Anna's Best Recipes, Breads, crackers, pancakes & wraps
This is a lovely, very white-looking bread that’s still made with wholegrain rice and quinoa flour. I adapted this from a Dove’s Farm recipe and was hard pressed to stop eating it last night with my buttery spread for bread (see blog). It’s 100% gluten-free, egg-free and dairy-free. Using quinoa flour in this recipe (instead of just rice flour) helps keep you fuller longer. This is because quinoa (pronounced “keen-wa”) is really a seed and not a grain. Quinoa is rich in protein (a whopping 14g per 100g!). If you are catering for fussy tastes which have not tried quinoa before, try omitting the quinoa and substituting with brown rice flour. The next time you make it, add a little quinoa flour, and keep going until you are up to 50% quinoa. The bread will be very sweet made with rice flour only, as rice is naturally very high in sugars.
Makes 1 large (1kg) loaf
1kg loaf tin (a standard loaf tin), oiled and (if you have some greaseproof or silicon paper) bottom-lined
Tinfoil
550ml warm water
2 level tsp honey (this is essential, otherwise the yeast won’t come alive)
2 rounded tsp quick yeast
250g quinoa flour, organic if possible
250g brown rice flour, organic if possible
2 tsp xanthan gum
1 scant level tsp Himalayan or Atlantic sea salt (or omit completely)
3 tbsp oil: virgin macadamia oil or (if you cant get this) olive oil
- In a jug or bowl mix the warm water, honey and quick yeast
- Into a separate, large bowl sieve the rice flour, quinoa flour, xanthan gum and salt, if using.
- Beat in the yeast liquid and the oil and beat until well mixed.
- Pour into tin, smooth the top and leave to rise in a warm place for 90 minutes. I put a small chopping board on top of a warm radiator for this and balance the tin on top of this, which seems to rise the dough really well.
- Cover the tin with oiled tinfoil. After around 75 minutes, turn your oven on to 220C/200 C fan.
- Bake in the preheated oven for 50-60 minutes, until a needle inserted into the centre of the bread comes out clean.
Why this is better for you
Brown rice and quinoa are whole foods (they have not been refined). So they’re higher in minerals and vitamins than their white counterparts. That said, all grains (especially rice) are still naturally high in sugars. That means if you want your meals to be vitality-boosting, it’s a good idea to keep bread (or other starchy foods, like potatoes) to no more than 1/4 of the meal!! Research shows that eating only small amounts of carbohydrates (eg. grains, root veg) with lots of veggies and moderate protein helps your body function better than if you live off mostly starchy foods. Because quinoa is high in protein and protein slows digestion, this bread will keep you fuller, longer, reducing the likelihood of energy dips, weight fain and stress due to fluctuating blood sugar.
Jan 22, 2014 | Anna's Best Recipes, Breads, crackers, pancakes & wraps
Since developing this recipe I’ve developed a simpler, yeast version that I find even more delicious (see super simple quinoa and rice yeast bread on this blog). But I’m leaving this recipe here in case you’re avoiding yeast. I developed this recipe as an alternative to the delicious (but horribly expensive) gluten-free quinoa bread by Artisan Bakery Originals. This is a lovely soft bread with a soft golden brown crust. It rises as well as any wheaten soda bread but has the gorgeous flavour of quinoa. You could use the mixture for scones too, spooning it into well-oiled muffin tins instead of a loaf tin and ajusting the cooking time. Slice up and freeze whatever you don’t eat within a day or two. Remember (if you are gluten-intolerant or coeliac) to use a separate toaster or grill from gluten-eaters for your bread to avoid being contaminated.
For one small (450g) loaf
325 ml generous 1½ cups unsweetened almond milk/coconut milk or (if you eat dairy) kefir or buttermilk
25g whole linseeds* (flax seeds), soaked for 2-3 hours/overnight in the milk above
75g potato flour
150g quinoa flour
75g quinoa flakes
1 rounded teaspoon xanthan gum
25g rice bran (or if you are OK with gluten you can use oat bran)
½ level tsp natural sea salt (eg. Atlantic/Maldon/Himalayan – other salts contain harmful additives)
1 rounded teaspoon aluminium–free bread soda
1 large egg, beaten
3 tbs extra virgin olive oil or macadamia oil
Tinfoil
1 small loaf tin (about 1250ml or 2 pint capacity)
1. Remember to soak the whole linseeds for 2-3 hours or overnight in the milk. This is crucial, otherwise the bread will not bind together and will fall apart.
2. Preheat oven to 190C or fan 175C
3. Grease and bottom-line a loaf tin with baking parchment/silicon paper
4. Sieve the flours, xanthan gum, salt and bread soda into a bowl, add the other dry ingredients and mix well.
5. Pour off a cupful of the buttermilk and reserve. Add the rest of the buttermilk with the flax (linseeds), oil and beaten egg to the dry ingredients.
6. Add enough of the reserved cupful of buttermilk to make a thick batter (sometimes the mix may take more liquid than at other times depending on the absorbency of the dry ingredients). The mixture should be soft enough to pour into the tin (a bit wetter than queen cake mixture).
7. Bake for about 1 hour. Test after 50 mins with a metal skewer to ensure that it is done in the middle (the skewer will come out clean if it is done). The bread will also shrink away a little from the sides of the tin when its done, like in this picture.
Bread shrinks slightly away from sides of tin when cooked
8. If the bread is getting too brown during baking, cover with a sheet tin foil.
9. Turn onto a wire tray to cool.
* although nut and seed oils are damaged by baking, whole linseeds seeds are too small for the body to break down and therefore they pass through the digestive system undigested. Therefore their (heat-damaged oils) are unlikely to be harmful because you cant digest them! The soluble fibre in the linseeds still does you good by providing food for your body’s beneficial bacteria. The fibre comes out of the intact seeds as a gel when you soak the seeds.
Why this bread is good for you:
Quinoa is packed with nutrients such as B vitamins and chromium. It’s also high in protein at 14g per 100g of the raw grain. This means quinoa is a great choice for a bread to help keep your blood sugar (and energy levels) even. Quinoa is easier on your digestive system than wheat. This is because wheat binds (inactivates) the beneficial, healing substance N-acetyl glucosamine (NAG) in our gut. So if you eat a lot of wheat, even wholewheat, for many decades you are more likely to have digestive issues e.g. gastritis, malabsorption, food intolerances, gastritis or bowel issues. Wheat also binds zinc and other minerals in your digestive system, making them hard to absorb. If you can afford to, buying the organic ingredients also makes sense as you are avoiding chemical residues. Wheat is sprayed with pesticides around 16 times (!!) between sowing and harvesting. Sadly, wholewheat, which contains nutrients, is the most likely to be contaminated of all the grains we commonly eat. Switching to a lower-grain diet, and using other (whole)grains, like quinoa, can make a great contribution to your health. High carb foods like grains (even quinoa) or potatoes should make up no more than a quarter of our adult diets if we want health and vitality.
Aug 23, 2013 | Anna's Best Recipes, Breads, crackers, pancakes & wraps, Breakfasts & smoothies, Main courses
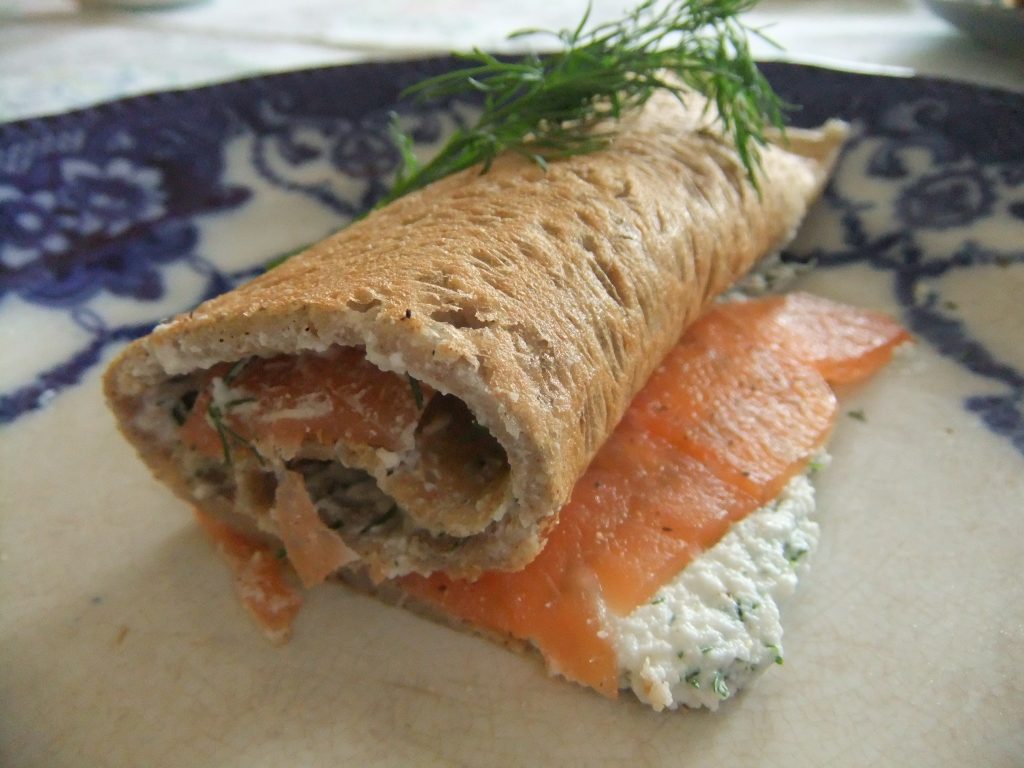
Ate these last Sunday for a late and leisurely breakfast. If you have ever successfully made ordinary pancakes, these will be a doddle for you. Buckwheat galettes are a traditional pancake made in Brittany and eaten with savory fillings. They are naturally gluten-free. If you want, you can store them in the fridge for 1 day, or freeze them for up to one month. When freezing, separate them with greaseproof or baking paper and store them in a self-seal bag to prevent drying out. To serve made-in-advance galettes hot, add one at a time to a dry frying pan, when the first side is hot, flip over. This recipe makes 4 large galettes. to make this a balanced lunch or dinner, simply add a large salad or steamed green vegetables drizzled with olive oil.
Buckwheat pancake with ricotta, dill & smoked salmon
For 2 piggy eaters (or 4 normal appetites!)
100g buckwheat flour (for unusual ingredients see larder section)
1 large egg, organic if possible
300ml/ ½ pint liquid – use 150ml/ ¼ pint each water and milk (rice milk, cows milk or soya milk or oat milk – NB oat milk may contain gluten) or use all water. See larder for further info.
A little virgin macadamia oil, coconut oil, or, if you can’t get these, some extra virgin olive oil
Freshly ground black pepper
100g smoked salmon, ideally wild or organic
1 small tub (150-200gg) buffalo or cow ricotta cheese (if you can’t get this, use low-fat cottage cheese, mashed or blitzed in a processor until smooth-ish in texture)
2 tbs chopped dill herb (a small bunch should be enough to yield this quantity)
1. Sift the flour into a large bowl.
2. Make a well in the middle and break in the egg and add a few grinds of black pepper.
3. Using a whisk, gradually add the liquid, whisking well, until the mix has the consistency of thin cream. Depending on the size of the egg, you may need a little more or less fluid than the quantity specified. Like all grain-based foods, buckwheat becomes more digestible if you leave it overnight to soak before cooking.
4. Heat a flat-based frying pan or griddle until hot, wiping a little oil over it with kitchen paper while it is still quite cool (macadamia oil, coconut oil, or extra virgin olive oil are fine)
5. When hot, pour a quarter of the mixture into the centre of the pan, tilting the pan to spread the mixture. Cook for a minute or two, until the pancake, begins to bubble around the edge. Flip it over with a spatula and continue cooking for another minute or two.
6. When the galette is cooked, turn it on to a plate, keep warm in the oven (covered with another plate to keep it all moist) and continue making more and piling them up.
9. To serve, mix the ricotta in a bowl with 2 tbs chopped fresh dill. Cut the salmon into strips and layout on a plate. Give each person a galette and allow them to add the cheese and fish and roll or fold before eating. Yum!
Variations:
Heat up some leftover chickpea curry, bean-based vegetarian curry, chili, or a casserole to use as a filling for these galettes.
Why this is good for you:
Buckwheat flour is a grain that is naturally gluten-free and is packed with nutrition. It is a valuable source of rutin, a bioflavonoid with anti-inflammatory and immune-balancing properties. Rutin, like many other bioflavonoids, helps support the integrity of your skin, making it stronger and less prone to allergic reactions. Ricotta is a cheese made from the watery whey skimmed off after making cheese. Because it is low in casein (the main milk protein that people can be intolerant to), its less likely to be a problem for those with a mild dairy intolerance. Smoked salmon is a high-quality protein that’s packed with essential omega 3 fats. The high protein content of this meal will keep you fuller longer.
Aug 23, 2013 | Anna's Best Recipes, Breads, crackers, pancakes & wraps, Packed lunches
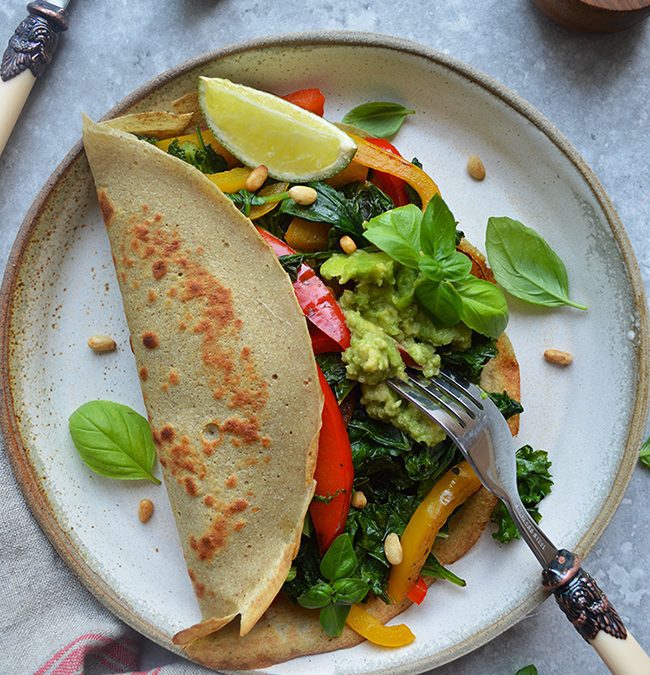
These are nutrient-packed versions of the sandwich wraps that are so fashionable now. They are as simple as a normal pancake to make and are inspired by the delicious buckwheat galettes you get in traditional restaurants in Brittany. This recipe comes from Ian Marber’s book, The Food Doctor everyday diet, which has lots of lovely recipes. Make them in advance and store them in the fridge for a day or two, or freeze for up to a month. When freezing, separate them with greaseproof or baking paper and store them in a self-seal bag to prevent drying out. Like all other grains, buckwheat is much more digestible if you soak before using (ie. make the batter a few hours before you need it or the previous day and store it at room temperature for an extra light result).
Basic sandwich wrap
Makes 8 small wraps
See “larder & shopping” to source new-to-you ingredients
100g buckwheat flour
1 large egg, organic if possible
300ml liquid – use 150ml/ ¼ pint each water and milk (rice milk, cows milk, or soya milk or oat milk – NB oat milk may contain gluten) or use all water. See larder for further info.
A little virgin macadamia oil, coconut oil or, if you can’t get these, some extra virgin olive oil
Black pepper
Baking/greaseproof paper (or tin foil) and (if you want to freeze the wraps) a self-seal bag
1. Sift the flour into a large bowl, then make a well in the middle and break in the egg and add a few grinds of black pepper.
3. Using a whisk, gradually add the liquid, whisking well, until the mix has the consistency of thin cream. Depending on the size of the egg, you may need a little more or less fluid than the quantity specified. Like all grain-based foods, the buckwheat flour becomes even more digestible if you leave the batter overnight to soak before cooking the wraps.
4. Heat a flat-based frying pan or griddle until hot, wiping a little oil over it with kitchen paper while it is still quite cool (macadamia oil, coconut oil or extra virgin olive oil are fine)
5. When hot, pour an eighth of the mixture into the centre of the pan, tilting the pan to spread the mixture. We use a ladle for this as it’s easier to measure out an eighth rather than trying to estimate when in mid-pour. Cook for a minute or two, until the pancake, begins to bubble around the edge. Flip it over with a spatula and continue cooking for another minute or two. Meanwhile, line a plate with greaseproof/baking paper/tinfoil
6. When the wrap is cooked, turn it on to the lined plate. Put another piece of paper/foil on top and continue cooking wraps and piling them up, separated by pieces of paper or foil to stop them from sticking to each other. When all the wraps are cooked and cooled, cover with either another plate and store in the fridge for up to 2 days or else place in a self-seal bag and freeze, to thaw and use as required.
Serving ideas:
Just spread a wrap with one of these combinations, roll up and wrap in a paper sandwich bag secured with an elastic band for a great packed lunch. If you can, add some additional salad in a box on the side.
- Plenty of humous, some de-seeded, chopped tomatoes and/or cucumber, and baby spinach/rocket/lettuce leaves
- Lean chicken, chopped red onion and cucumber, and avocado mashed with lemon/lime juice and some black pepper
- Ricotta or low-fat cottage cheese mashed with crushed garlic or chopped dill, black pepper, and strips of smoked salmon or mackerel
- Grilled Toulouse sausage (Toulouse sausage is usually gluten- and nitrite-free but check with your butcher) or Taifun grill herb sausages (contain gluten) or thickly sliced grilled Taifun basil tofu (gluten-free) PLUS salad veggies (eg rocket, chopped peppers, cherry tomatoes) and a little home-made mayo, aioli, non-sugar tomato ketchup or extra virgin olive oil to moisten.
Again, please see my larder section for all unusual ingredients.
Why this is good for you:
Buckwheat flour is a grain that is naturally gluten-free and is packed with nutrition. It is a valuable source of rutin, a bioflavonoid with anti-inflammatory and immune-modulating properties. Rutin, like many other bioflavonoids, helps support the integrity of your skin, making it stronger and less prone to allergic reactions. Bioflavonoids help build collagen, which is also vital for bone strength. So if you want strong healthy bones and wrinkle-free skin…Fresh raw vegetables are also a source of bioflavonoids.
As regards the fillings, protein (humous, ricotta, vegan sausage, basil tofu, Toulouse sausage, and smoked salmon) delays digestion, giving you a slow-burn, long-lasting energy for hours to follow.


