Feb 10, 2025 | Anna's Best Recipes, Desserts & drinks
This is decadent, fruity, crunchy and juicy with a mere hint of spiciness. I’ve been meaning to make this for years, ever since I clipped the recipe by Fadime Tiakaya from a newspaper. Because eating masses of sugar gets in the way of me feeling good and staying well I’ve replaced most of it with healthier alternatives. If you don’t tell, people will have NO idea that this is a lot better for them than the usual sugary dump from desserts that causes massive inflammation. There is a little “normal” sugar from the 80% chocolate.
Shopping tip: Source standard and icing erythritol (Dr Coys Stevia Erylite or NKD living are reliable brands) or (any brand) xylitol from health stores or www.pureandnatural.ie To get a finer, “icing” erythritol or xylitol without buying a seperate product, pop it in your food processor or spice grinder.
Serves 4-6
For the syrup:
30ml water
45g xylitol
Peel of 1 orange, organic if possible, thinly sliced and chopped
10g fresh turmeric (fresh ginger will do, peeled and very finely chopped
For the mousse:
175g dark chocolate (80-85% cocoa)
5g fresh turmeric, grated
½ tsp ground turmeric
¼ tsp cayenne pepper
3 large eggs, separated
3 level tbsp xylitol
1 tbs icing erythritol or icing xylitol (make your own by ginding fine in a spice grinder or blender)
175g double cream
To serve:
Cherries (stoned, fresh) OR slices of mandarin orange (I use tinned in juice)
1 For the syrup, put the water and 45g xylitol in a small pan and bring to the boil until the xylitol dissolves completely. On a low heat, add the orange peels and turmeric, let it boil for about 5 minutes, then set aside.
2 Put a heatproof bowl over a pan with simmering water in it, ensuring that the bottom of the bowl doesn’t touch the water. Break the 175g chocolate into the bowl, add your fresh and ground turmeric, as well as the cayenne pepper, and let it all melt together.
3 Meanwhile, whisk the egg yolks with the 3 level tbs xylitol until smooth. In a separate bowl whisk the egg whites with the icing xylitol/erythritol until it’s stiff.
4 Turn the heat down under the chocolate, add the egg yolks and quickly whisk until combined and the mix has a thick consistency, then add the double cream and continue to whisk.
5 Next, add the syrup and whisk to combine. Take off the heat and fold in the egg whites, then pour into individual serving bowls. Let it rest in the fridge for 30-60 minutes, add your cherries and serve.
Why this is better for you:
Spices have a powerful anti-inflammatory effect on your body and brain. Turmeric and ginger have thousands of scientific research papers on their therapeutic effects published in scientific journals. Sugar is highly-processed cane or beet that’s lost its nutrients (chromium, zinc, vitamin B3) which were there to help you detoxify the sugar. Cocoa, in high grade chocolate of at least 80%, is also anti-inflammatory. So yes, now and again this dessert is a lovely treat. Remember though that even 80% chocolate has SOME sugar added so don’t overdo it. Sugar, not saturated fat, is the enemy of your health and your waistline. Reduce the sugar but not the taste. Hope you enjoy this.

Nov 27, 2023 | Anna's Best Recipes, Cakes, biscuits & bars, Desserts & drinks
Want to have a few Christmas-with-a-twist treats? These have those seasonal flavours. Try them – they’re lovely as well as being super-easy to make. Thankyou to Parry Marsh, whose recipe this is. This makes around 22 pieces.
1 ½ cups (or 190 g) of mixed nuts – chestnuts, pecans & Brazil nuts go well in this
1 tbsp goji berries (*optional)
Grated rind of half a lemon and half an orange, organic if possible
1 scant tsp of mixed spice*
1 tbs runny honey (or if you are not on the special SC Diet, raw agave syrup will also work)
⅔ cup (or 95 g) mixed vine fruit or raisins, organic if possible
4–6 fresh (or Mejool) dates, stones removed
- In a food processor, process the nuts, goji berries, grated rind, and spice, until the nuts are all broken down into small pieces.
- Add honey/syrup, vine fruit/raisins, and process again until the fruit is mostly broken down.
- Then, with the food processor running, drop in the dates one at a time, and let each one get processed into the mix. Keep adding them until the mix starts to stick together.
- Once it’s nice and sticky, remove from the food processor, then break off portions of the dough and roll them in your hands to form balls – they should be about the size of a chocolate truffle or a small walnut shell.
- Eat at once, or chill for a while to firm up. You can even pop them in the freezer and eat them straight from there.
- If you want to make these a little chewier, try forming the balls around a couple of raisins, or even pieces of candied peel or crystallized ginger.
*Goji berries are optional but give it a slightly richer flavor and a few chewy bits since they never blend in totally.
**If you don’t have any mixed spice, you can easily make your own: use equal amounts of ground cinnamon, allspice, clove, nutmeg, and ginger.
Why this is better for you:
These yummy treats are packed with protein and healthy fats which stop the natural sugars in the vine fruits and agave from messing with your metabolism. If you’ve been working with me you know all about balancing your blood sugar and how it turbo-charges immunity, digestive and even mental health and energy production. If you’re curious as to how too balance your blood sugar check out the courses under “work with me tab” on the home page. Or send an enquiry about one-to-one coaching towards a healthier, happier you. Spices are incredibly anti-inflammatory. Dried grapes (sultanas, raisins, currants etc) feed certain species of healthy bacteria in your gut. Enough healthy bacteria are needed for every function in your body, from gut and digestive health to a balanced immune system and stable mood.

Nov 30, 2021 | Anna's Best Recipes, Cakes, biscuits & bars, Desserts & drinks
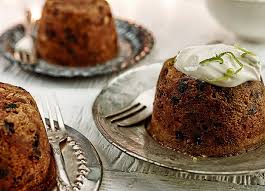
Grain free SCD steamed Christmas puddings
I got this fantastic recipe from www.quirkycooking.com.au/ and its lovely. You can do the fruit cooking and soaking the day before if you like. Makes 10-12 mini puddings, depending on the size of your moulds
150g sultanas
80g dried sour cherries
100g currants or raisins, whichever you prefer
30g activated or raw blanched almonds, roughly chopped
200g freshly squeezed orange juice
zest of 1 orange
40g ground almonds
20g coconut flour
1/4 tsp nutmeg
1/2 tsp mixed spice
1/4 tsp cinnamon
55g coconut oil, melted but not hot
40g cooking apple, peeled & cored
2 eggs
1/4 tsp fine salt
1/4 tsp bicarbonate of soda (bread/baking soda)
- Weigh dried fruit and almonds into a large saucepan and add the orange juice. Cover and cook the fruit gently on stovetop for 20 minutes until everything has plumped up and absorbed the juice. Remove to a large bowl and set aside to cool.
- Peel and grate the cooking apple to yield 40g. In the food processor or a large bowl blitz or beat orange zest, almond meal, coconut flour, spices, salt, bicarbonate of soda, grated apple, eggs and coconut oil until amalgamated. Add the cooled soaked fruit and nuts back to bowl
- Scoop mixture into small ramekins or miniature pudding basins, fill about ¾ full, cover with greaseproof paper and string, or tin foil, and steam as per traditional Christmas pudding method.
- Allow puddings to cool, covered, and store in fridge until needed.
Serve with :
Whipped coconut cream infused with a drop of vanilla extract (organic tinned coconut cream is free from gut-damaging emulsifiers – find it in health stores and www.thegreendoor.ie in Dublin).
My super-easy 3-ingredient cashew cream https://www.annacollins.ie/cashew-nut-cream/ but a note of caution – if your gut is very inflamed it’s best to stick with the coconut rather than cashew.

Nov 30, 2021 | Anna's Best Recipes, Cakes, biscuits & bars, Desserts & drinks
This is perfect for your SC diet if you want to make a delicious pastry-based dessert. I’ve adapted it for metric from the original Us recipe. Thank you to Jen Brown for her original recipe at https://www.alifeofhappenstance.com/easy-almond-flour-pie-crust/
This case can be pre-baked up to two days before planning to fill it. Simply cover with tinfoil or eco-friendly wrap and store in the fridge.
If your system can handle dairy, butter (or better still, clarified butter) can be used in place of coconut oil.
240g blanched finely ground almond flour (I blitz ground almonds for a few minutes in the food processor to get it nice and fine)
½ teaspoon salt
55g melted coconut oil (make sure it’s not hot)
1 large egg
9″/23cm tart case/pie dish or deep pyrex plate (+ extra coconut oil to grease)
1. Preheat oven to 175C/160C fan and grease a 9 inch/ pie dish. Set aside.
2. In a small bowl whisk together the melted coconut oil and egg. In a large bowl whisk the almond flour and salt. Pour the wet ingredients into the dry and use a rubber spatula or your hands to combine.
3. Form the dough into a ball and place in the center of the greased tart case. Use your hands to evenly press the dough into the bottom of the tin or dish.
4. Evenly press the dough up the sides of the tart case. If it seems a bit thinner in certain areas, simply take some dough from the thicker areas and press it where needed.
5. Once the dough has been pressed into the bottom and sides of the tart case, use your fingers to make sure the edge of the pastry is even all along the top. Then you can use a fork to press decorations into the crust or use your fingers to make a fluted design with the edge.
6. Use a fork to poke holes along the bottom and sides of the crust before placing on the middle rack of the oven and baking for 12 to 15 minutes. The case should be a very light golden brown.
7. Allow to cool completely before filling.

Nov 30, 2021 | Anna's Best Recipes, Cakes, biscuits & bars, Desserts & drinks
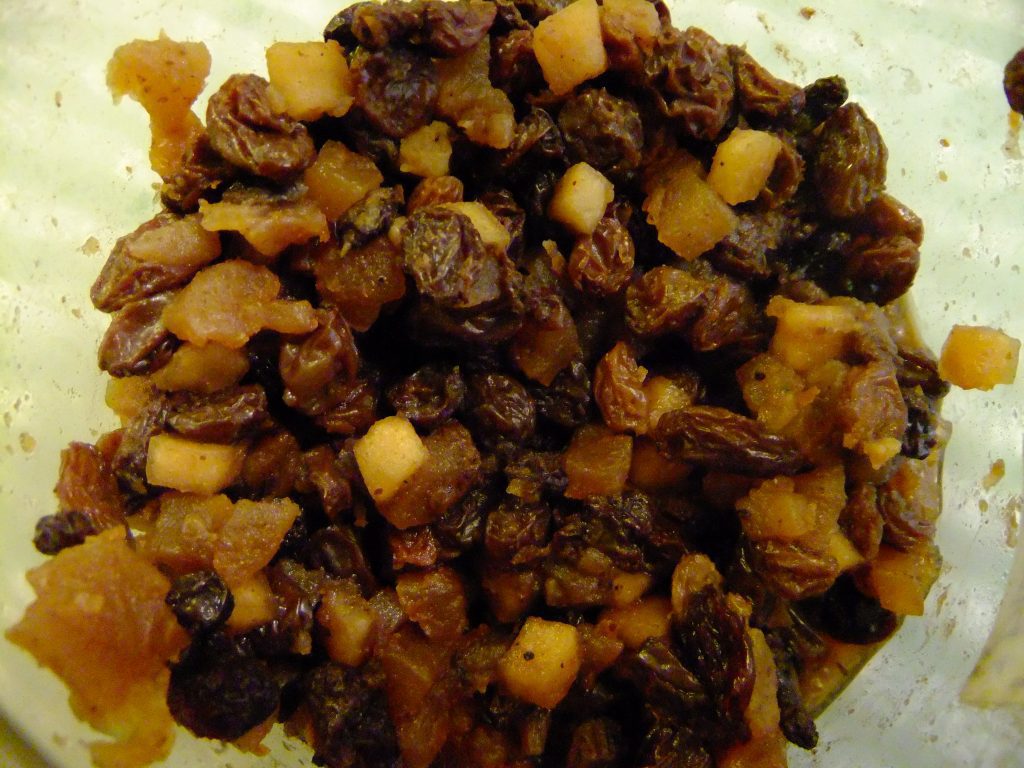
Don’t know about you but I’m really looking forward to Christmas and have started my baking already. This recipe is the nicest mincemeat and doesn’t boil over during baking. It’s adapted from Rose Cousin’s recipe but I’ve adapted specially for the SC diet. I’ve been making this for years because I love it. Somehow high sugar gloopy mincemeat stopped doing it for me. Store this mincemeat in a sterile glass jar. If you intend to store for more than a week or two, allow the mincemeat to cool a little before adding a tablespoon of brandy/whiskey. Mix well just before bottling. You can sterilise jars by boiling the lids in water and heating the jars themselves to around 80C in the oven for 15 minutes.
Organic where possible:
450g peeled cored eating (not cooking) apples – Cox’s are fantastic for flavour
225g unsulphured sultanas
225g unsulphured raisins
110g currants or chopped unsulphured apricots
Rind and juice of 1 orange (if avoiding citrus, use apple juice instead)
1/2 level teaspoon allspice
1/2 level tsp Ceylon cinnamon
¼ tsp ground or freshly grated nutmeg
1/4 tsp ground cloves
A little cloudy apple juice
1. Mix together all the ingredients in a large cooking pot with lid
2. Simmer very gently ½ hour
3. Taste and adjust the spice levels – I often like to add a bit more more cinnamon and allspice.
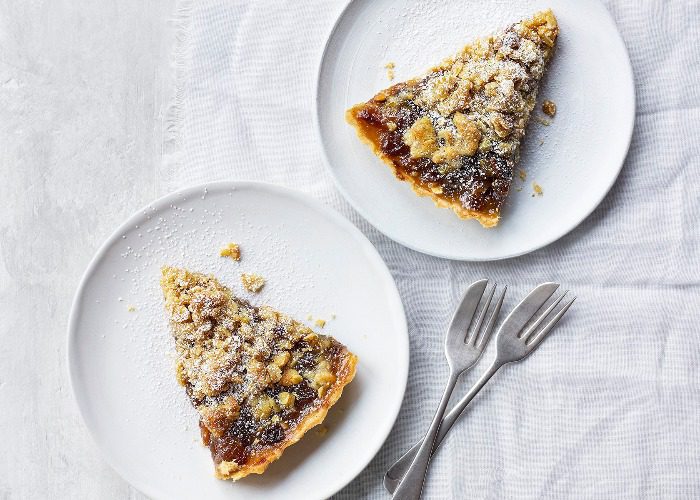
SCD pastry is hard to work so its best make 1 large pie base, pre-baked, then filled with your mincemeat and a lovely crumble topping before being baked again for a short time. You can also treat the mincemeat just like a crumble – that is, put it in a pie dish or deep ovenproof plate, liberally sprinkle over the topping, bake until golden and serve with shipped additive-free coconut cream (from health shops).
Crumble topping: https://www.annacollins.ie/scd-crumble-topping-for-mince-pies/
Pastry base https://www.alifeofhappenstance.com/easy-almond-flour-pie-crust/
If you don’t like coconut oil but are sensitive to dairy then you can use clarified butter for the pastry. Make this by very gently heating the butter, skim off the foam on the top and chill in a tall drinking glass or jug, then allow to solidify. You will use only the solid part to make your pastry. Discard the white liquid part underneath and rinse off any that’s clinging to the solid butter fat. This white liquid is where the problematic milk proteins and disaccharide sugars are found. Most people with IBD can tolerate SMALL amounts of normal butter but large amounts (found in pastry) can just be too much.
When baking your mince pies
Bake 20-25 mins at 185C fan/200C until golden
Put a baking try over the next rack in the oven so the pies cook evenly through.
Why this is (somewhat) better for you:
While I’d love to say this is a health-giving recipe I can’t really because its very high in natural sugars. Although it doesn’t contain refined sugar it IS very high in natural sugars from the dried fruit. BUT this mincemeat is free of low grade oils (like vegetable suet or sunflower oil) and refined sugar – both of which fire up inflammation in you. If you choose organic dried fruit you avoid sulphur dioxide (preservative) that wreaks havoc on so many peoples digestion around Christmas time. This preservative is converted by pathogenic bacteria in your bowel into irritating sulphites, which can cause gas, bloating and general unwellness in your gut. Non-organic grapes (raisins etc.) are also very heavily contaminated with herbicides that cause your gut to leak toxins and undigested food into your bloodstream.(increased intestinal permeability). This process predisposes to and perpetuates inflammatory conditions from autoimmunity to mood issues and many more besides. Pesticide residues in grapes damage the nerve supplying your gut and are linked to a range of neurological diseases (e.g. Parkinson’s, Motor Neurone). Choosing food free of undesirable contaminants is a great step towards better health. Here’s to a happy and a healthy Christmas. I will certainly be enjoying healthier mince pies – probably far too many.

Nov 30, 2021 | Anna's Best Recipes, Cakes, biscuits & bars, Desserts & drinks
I love this crumble which I make often for apple crumble. This quantity will top one 9 inch (23cm) diameter tart made in a pie dish or pyrex plate with possibly a little left over. You want the topping to mostly cover the mincemeat so it doesn’t burn. PS Sometimes I cheat on the topping, adding a few chopped hazelnuts or walnuts to the mix…
If this is for individual mince pies (rather than one big one) there’s no need to prebake the pastry base.
Pinch of Ceylon cinnamon (optional)
50g virgin coconut oil (or clarified butter, if you want dairy)
25g (teaspoon) runny honey
50g ground almonds
50g flaked almonds
1. If you have a food processor but the ingredients except the flaked almonds in a food processor and blitz until it resembles breadcrumbs. Empty into another bowl and stir in the almonds.
If you don’t have a food processor, rub the ingredients together (except for flaked almonds) by hand then stir in the almonds.
2. Sprinkle evenly over pie case/s you have already filled with mincemeat and bake at 165C fan/180C until golden, taking care the topping doesn’t burn.
Why these are better for you:
Because these pies don’t contain refined sugar (if you use my mincemeat recipe) they don’t immediately start to drain your body of nutrients like magnesium (for mood) or selenium (needed for fat-burning thyroid hormones). The nuts, although cooked (and therefore no longer containing much in the way of healthy oils!) do contain protein, which helps prevent the dips and peaks in blood sugar that can make you feel tired or narky. Coconut oil is not damaged by baking so its still healthy in the finished product. The medium chain triglycerides in coconut oil are useful for energy levels as they are used directly by your body instead of being stored as fat in your cells. Virgin coconut oil rules!! Ceylon cinnamon (but not normal cassia cinnamon sold as “cinnamon”) helps your body regulate blood sugar. This helps reduce the risk of peaks and troughs in energy, brain function and mood throughout the day. It also helps reduce your likelihood of developing diabetes possibly because it modifies your gut bacteria. Yes, your gut bacteria control EVERY aspect of your health from blood pressure, heart health to mood and immune function – not just your digestive health.

Jun 15, 2020 | Anna's Best Recipes, Desserts & drinks
I thought up this one day while casting around for a healthy mixer or stand-alone summer drink. It is YUM and seems to go down well with folks not into “healthy stuff”. A good substitute for normal high sugar or toxic zero calorie mixe, I must admit it also nice with a shot of vodka or gin. Ginger helps detoxification and is highly anti-inflammatory for your whole body (especially your digestive system).
For a super quick version, drop the xylitol/erythritol syrup and just use stevia drops but I think the flavour is better, more rounded when the syrup is in there.
If you are on a keto diet you can still enjoy this – just use stevia/erythritol instead of xylitol.
For 4 servings:
1 big thumb of ginger, juiced (if you don’t own a juicer make fresh ginger tea with 1 mug boiling water, 2 thumbs of ginger, finely grated, cover and leave until cool, strain and use as per ginger juice)
Juice of 2 large lemons, strained
3 heaped tablespoons of xylitol or Dr Coys Stevia Erylite sweetener (a blend of stevia and erythritol)
100ml filtered water to make the syrup
Stevia drops to taste (products should contain stevi/steviol glycosides and NO toxic additives e.g. sucralose, aspartame, saccharin)
1 litre of filtered or sparkling water
Ice
Optional: a few sprigs of mint to garnish
1. In a small saucepan combine the xylitol/erythritol/Stevia Erylite with 100ml filtered water and boil till dissolved. Allow to cool.
2. In a big jug, combine the syrup with the lemon juice, ginger juice or cooled ginger tea.
3. Dilute with your water of choice and if you have them, add a few sprigs of mint.
Why this is good for you:
Although this is a lovely summer refresher, its also a therapeutic drink because both lemon and ginger are powerful supports for your immune system and your liver detox systems. There are hundreds of high quality peer reviewed studies on ginger in relation to alleviating various health conditionSome of the research focusses on gingers ability to reduce inflammation in your joints and digestive system as well as helping reduce nausea in pregnant women. Reductions in nausea, inflammation (in the brain and stomach), supporter of detoxification (i.e. headache reduction) – I wonder could this be the next “hangover cure”…..Ginger, like many spices,is anti-viral and helps modulate gut bacteria in favour of the “good guys”.

Jun 1, 2020 | Anna's Best Recipes, Desserts & drinks
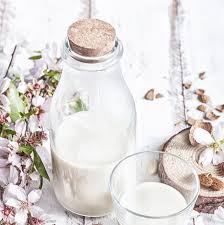
I first tasted almond milk in its traditional Italian form 20 years ago in Puglia. It was a beating hot day in the city of Lecce and we were given large glasses of iced sweet almond milk. It tasted amazing. I prefer something that’s a little more vitality-enhancing (i.e. not full of pro-inflammatory, immune sabotaging added sugar) so here’s my take.
Use this drink in place of animal milk OR for a summer cooler add liquid stevia to sweeten, a bit more water, lots of ice and maybe a couple of drops of natural almond extract.
100g almonds, soaked overnight in filtered water (you don’t need blanched almonds)
1 teaspoon vanilla extract (if you are glulten-free make sure to avoid vanilla “essence”)
1.25 litres filtered water
Drain the soaked nuts, blend with the filtered water.
Strain through a nut milk bag or muslin cloth, milking it to squeeze out all the liquid.
Add the vanilla extract, mix and serve.
Tip:
If you want to get more “value” from your almonds, blitz the soaked nuts with just 3/4 l of water. Strain through the nut milk bag. Put the ground nuts into the blender again with the remaining 3/4L water. That way you will find you get more almond milk out of the nuts.

May 8, 2020 | Anna's Best Recipes, Desserts & drinks, Dressings, rubs, spreads, sauces & more
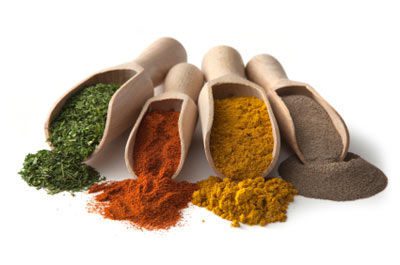
When I was in Marrakech last year I had a lovely concoction called cafe aux epices – literally coffee with spices. I like to make my coffee as normal, add the spices and then the milk or plant milk. Do remember to buy spices as fresh as possible and store airtight in a dark and ideally cool place. This prevents them losing their potency and flavour. There is a world of difference between stale and fresh spices.
I would suggest the only spice that’s really essential is the Ceylon cinnamon, everything else is mix and match according to your preference.
6 teaspoons ground Ceylon cinnamon
1 teaspoon ground cardamom
1/2 teaspoon of one or more of the following:
Ground cloves
Ground aniseed/fennel
Ground black pepper
Ground ginger
Why this is good for you:
Did you know that you have a very individual metabolic response to caffeine? If you (like me) have the genetic variant of the CYP1A2 gene then having more than 1 cup a day increases risk of high blood pressure and heart disease. This is why studies in the past have produced conflicting results on how coffee affects heart health. BUT just a cup a day can be beneficial for most of us. However some people with digestive issues may need to skip coffee and substitute dandelion coffee (try www.intelligenttea.ie mail order ground dandelion coffee – its delicious). Lighter roast coffee contains more beneficial polyphenols than dark. Polyphenols modify your good bacteria in favour of the good guys that help immunity and reduce inflammation.
Spices have an antioxidant effect. They stimulate your body to make more antioxidants. This is a great idea if you prefer not to struggle with inflammation. All common chronic health conditions of are driven by inflammation e.g. heart disease, asthma, eczema, depression, autoimmune conditions (e.g. hypothyroidism, Crohn’s) and cancer. Tens of thousands of high quality research papers published in peer reviewed scientific journals confirm the various health benefits of spices. By the way, Ceylon cinnamon helps you regulate blood sugar levels. So if you have insulin-resistence (pre-diabetets) or type II diabetes a teaspoon of Ceylon cinnamon a day is a fantastic thing to add in – whether in coffee/coffee substitutes, mixed in porridge/granola or in curries.

Apr 18, 2020 | Anna's Best Recipes, Desserts & drinks
This is easy to make and a fantastic support for your immune system. I have many packets of kefir grains packaged up in my freezer in 2019 ready to post to you (in Ireland) or to be picked up (by prior arrangement, with social distancing) if you live locally. These will get you started.
I call kefir the king of fermented foods. It’s very like natural yoghurt but more tangy because it is fully fermented so contains no milk sugar (lactose). It also thinner. Sometimes I strain my kefir through muslin to get a texture like greek yoghurt but mostly I use it as a drink, in smoothies or blended with a banana. Milk kefir contains over 30 different types of probiotics (beneficial yeasts and bacteria) compared to one or two species in yoghurt. Kefir includes lactobacillus plantarum and rhamnosus which studies have shown can help alleviate inflammatory bowel conditions. It also contains saccharomyces boulardii which successfully raises secretory IgA (an antibody) in your airways and gut. sIgA defends you against throat, lung and gut infections. Commercial kefir products are of variable quality and often are not fully fermented. This means they taste sweeter but have not broken down the hard-to-digest milk protein (casein) nor the lactose (milk sugar). They do not always contain live bacteria either. Making your own is the way to go and its really simple.
Friendly gut bacteria perform 80% (!) of your detoxification. They are important for energy, good skin, allergy control, preventing obesity and diabetes and healing your digestive system. They reduce the tendency to auto-immune conditions by promoting “immune “tolerance” or balance. Every type of good bacteria has its own special functions so the more you can get into your diet the better. Our grandparents ate a lot of fermented foods before the days of fridges but now our diet is sterile. Because kefir is easy to make and use it’s one of my favourite fermented foods to share with people. Use it any way you like, so long as you don’t expose it to heat. Eating it fresh ensures more beneficial bacteria. Add it to smoothies, knock half a glass back after a meal once or twice a day, or even use it to soak oat or buckwheat based muesli overnight to make super-digestible Birchner muesli (recipe on this blog).
Making kefir
There are two ways to make kefir. You can use live kefir grains that reproduce and will last a lifetime if you treat them right or you can purchase kefir freeze-dried culture packets (single use). In the recipe for Basic Kefir, I teach you how to make kefir using live grains. Kefir “grains” are in fact a cluster of microorganisms (bacteria and beneficial yeasts) held together by a polysaccharide matrix named kefiran.
Where to buy live kefir grains
In Ireland try the Sharing Starter Cultures Ireland FB group. This is a group of people who swap and donate surplus cultures – just put up a post to see who near you has grains to spare and collect for free. You can also email me to see if I have grains to spare that you could collect. Good grains will be creamy-white and look like springy cauliflower florets. Treat them right and they will live indefinitely, and grow. From anywhere in Ireland you can also buy grains online at www.adverts.ie. Or buy the kefir culture packets I mentioned before, but these only make a certain amount of kefir –you have to keep buying them.
Quantities
If you are only making kefir for one person, use1 tbs of grains for a cup (230ml) of milk. In a warm kitchen this will usually be fermented within 24 hours. If you are using from frozen it can take longer for the grains to revive.
How to Make Dairy Kefir
For top-quality kefir, try to buy organic milk. Goat’s milk is great but cow’s milk is fine too.
People who are dairy sensitive CAN usually tolerate well-fermented (i.e. not shop bought) kefir. This is because, when the kefir organisms ferment the milk, the lactose (milk sugar) is broken down and so is the casein (the main milk protein). Lactose intolerance is due to not producing lactase, an enzyme that digests lactose. Dairy sensitivity/allergy is due to difficulties breaking down casein. Casein is the protein that causes a problem for people with dairy allergy or sensitivity. The kefir micro organisms hydrolyse (break down) the casein, in effect pre-digesting it. This means there is no intact casein left in the kefir. Lactose is digested by kefir bacteria to produce beneficial lactic acid.
You can use the method below to make any amount of kefir you like. Just keep in mind that a good rule of thumb is to use 1 tablespoon of kefir grains per 1 cup of milk. So, if you want to make 1 cup of kefir, use 1 tablespoon of kefir grains and 1 cup of milk. For 2 cups of kefir use 2 tbs of grains and 2 cups of milk. Never heat kefir as this kills the good bacteria.
For 2 servings:
2 tbs live kefir Grains*
450ml/2 cups whole milk preferably organic. I use raw organic milk (available from organic markets such as The Green Door www.thegreendoor.ie in Dublin 12).
Plastic strainer
- Place fresh kefir grains in a glass jar and add the milk (It’s best not to fill jar more than ⅔ – ¾ full)
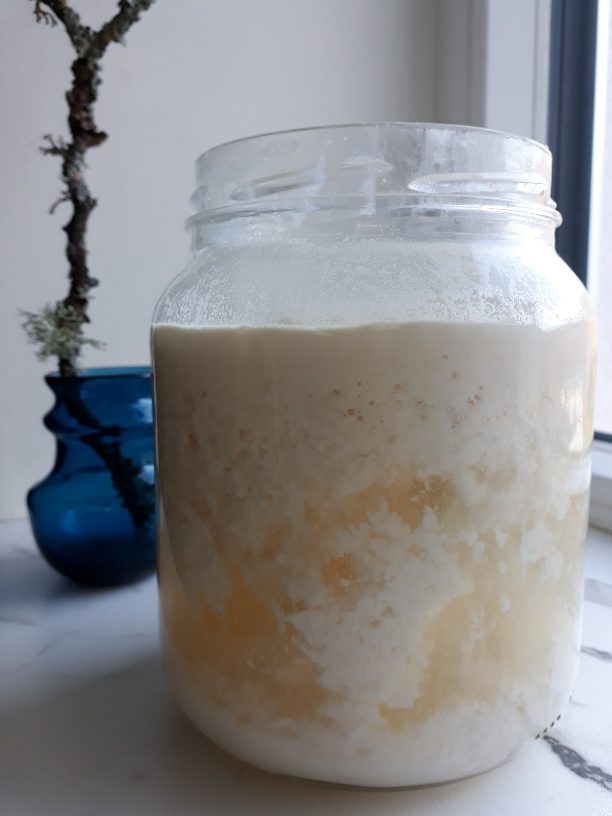
- Place a lid or plastic wrap loosely over the jar (those good bacteria need oxygen to fermwent) and let sit at room temperature for approx. 18 to 24 hours, or until the milk has thickened. (You might want to designate a spot for kefir fermentation in a cupboard or away from direct sunlight).
- It is important to swirl the kefir gently in the jar a few times during fermentation to mix the grains with the milk. This means all the milk is fully fermented, allowing less possibility for food sensitivity reactions (to lactose or milk proteins). If you are not sensitive to dairy products you don’t need to be so careful.
- Pour the contents into a strainer to separate your grains from the liquid kefir.
- Wash the jar, then place the kefir grains from the strainer back into the washed jar. (Do not add kefir grains to a jar that is still hot from washing! The heat can kill your grains) Then add fresh milk.
- The whole process is repeated again. The ready-to-use kefir can now be stored in the fridge until you are ready to use it – it will last for weeks, probably becoming more tangy as it goes as the last of the sugars are consumed by the grains.
If you are going away, remember to put your kefir grains in enough milk to keep it alive and fermenting for the number of days you are away. If you are away for 5 days, you will need 5 cups of milk per tablespoon of kefir, and it will still be alive when you get back. Or strain the grains and store in the freezer. They usually come back to life no problem.
How to Make Almond (or Coconut) Milk Kefir
This is an alternative to dairy kefir if you are vegan or highly sensitive to dairy. Don’t worry that the almond milk is sweetened. The kefir grains eat the sugars from the honey or agave syrup, using them up to support itself, leaving the finished product as low sugar (low glycaemic index) drink that won’t mess with your digestive system. Or buy unsweetened almond milk and add a teaspoon of natural agave syrup or honey to each 230ml of milk. Never heat kefir as this kills the good bacteria. I buy my almond milk for this from Dublin Food Co Op in Newmarket, near St. Patrick’s Cathedral Dublin 8. http://www.dublinfood.coop/ Most decent health stores sell almond milk. Ecomil original is a good brand (free from harmful additives like polysorbate 80 and sodium carboxymethylcellulose).
For 2 servings
2 tbs live kefir Grains*
450ml/2 cups agave-sweetened or honey-sweetened almond milk
500ml (or larger) glass jar with lid (or use a saucer/muslin and elastic band)
Plastic (not metal) strainer
- Place fresh kefir grains in a glass jar and add the almond milk (It’s best not to fill jar more than ⅔ – ¾ full)
- Place a lid or plastic wrap on the jar and let sit at room temperature for approx. 18 to 24 hours, or until the milk has thickened or has become sour to your liking. (You might want to designate a spot for kefir fermentation in a cupboard or away from direct sunlight)
- Pour the contents into a strainer to separate your grains from the liquid kefir.
- Wash the jar, then place the kefir grains from the strainer back into the washed jar. (Do not add kefir grains to a jar that is still hot from washing! The heat can kill your grains) Then add fresh milk.
- The whole process is repeated again. The ready-to-use kefir can now be stored in the fridge until you are ready to use it.
- If you are going away either:
a.strain off, rinse (in filtered or boiled cooled water) and freeze your grains until you want to use them again
b.put your kefir grains in enough milk to keep it alive and fermenting for the number of days you are away. If you are away for 5 days, you will need 5 cups of milk per tablespoon of kefir, and it will still be alive when you get back (especially if you put it in a coolish place).
c. some people bring the grains with them on holidays so they don’t miss out!
*There are special considerations that you have to take when making almond, coconut or other non-dairy kefir.
Kefir grains do not survive in almond or coconut milk long-term. They grow and thrive by eating the lactose from dairy milk, and since there is no lactose in almond or coconut milk, the grains will need to be refreshed in dairy milk (sheep, goat or cow) once a week or more. Beneficial cultures in dairy-free kefir will be less diverse and possibly lower in number.
Allow 1 cup or 230ml milk for each tablespoon of kefir grains, and make kefir in the usual way by fermenting the kefir with the milk (24 hours per cup of milk works well). The lactose in the milk feeds and grows the kefir. Then you can reuse the grains to make almond or coconut kefir again. You can also rinse them in coconut or almond milk to remove the dairy if you are allergic. The more often you do this, the more your grains will grow and multiply. It’s the lactose that keeps the bacteria alive and thriving.
Did you know?
In hot weather your kefir will be ready sooner. Warm temperatures speed up the process. Cooler temperatures delay it.
Books on fermenting, with lots of recipes:
Schwenk, Donna Cultured Food for Life
Pike, Charlotte Fermented


