May 26, 2021 | Anna's Best Recipes, Cakes, biscuits & bars
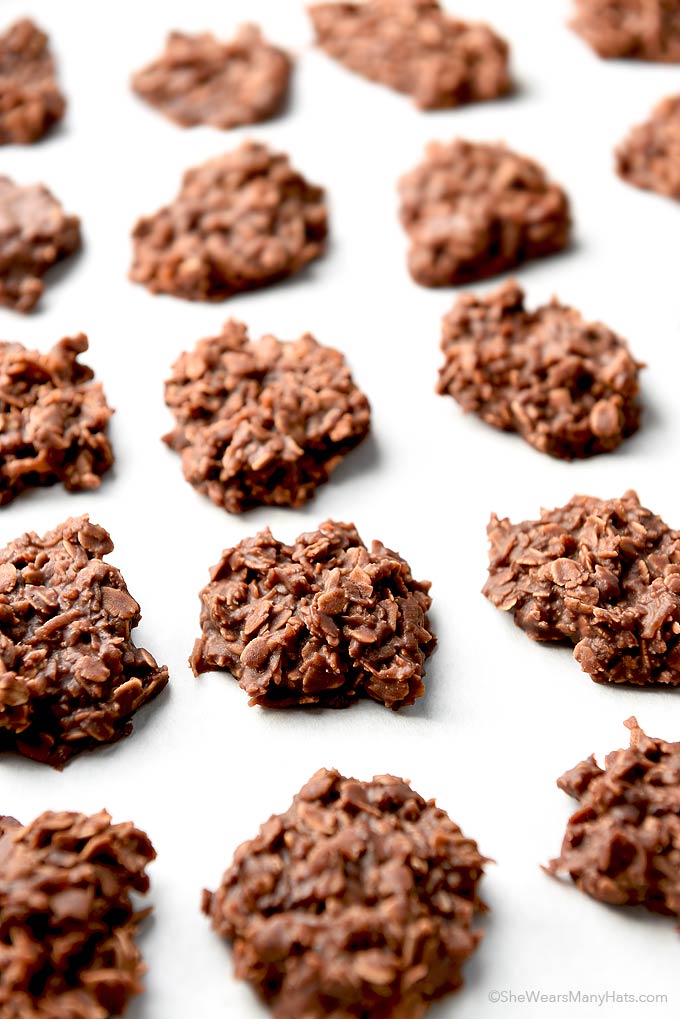
I can’t remember the cookbook these come from but my thanks to the amazing Emily and Patrick at Madawaska who produced these gorgeous bites using gluten-free oats. They didn’t last long. If you have the time and like a nuttier flavour, you can toast the oatflakes first like they did. I don’t bother. People really love these and they are super-easy. I did replace the bad-for-your-health margarine in the original recipe for a far healthier virgin coconut oil though.
Using non-dairy milks in these gives a much longer shelf-life in the fridge. The best plant milks have no toxic emulsifiers (carageenen, polysorbate-80, sodium carboxymethylcellulose) and no added sugar.
Makes 36 (enough to feed a small army!)
2½ rounded tbs cocoa powder
¾ cup maple syrup
¼ cup unsweetened non dairy milk (e.g. almond, coconut, hemp)
1/3 tsp vanilla extract (avoid vanilla “essence” unless you are OK eating gluten)
¼ cup virgin coconut oil
1½ cups fine gluten-free oatflakes (you can use normal porridge oatflakes if you eat gluten)
¼ cup no-added-sugar almond or hazelnut butter (if you are in peak health with no autoimmune conditions then no-added-sugar smooth peanut butter is OK to use)
1¾ cups dessicated coconut (divided into 1 cup and ¾ cup)
1. Mix the cocoa and syrup together in a saucepan, add the milk vanilla and coconut oil. Heat gently until liquified and stir to mix well, scraping the sides, being sure not to let it boil or burn. Cool mixture.
2.In a separate bowl combine oats, peanut butter together using your hands. Pour in tht cocoa mixture and add 1 cup coconut. Mix well with your hands.
3.Roll dough into 2.5cm balls. If the mix is too wet you can add more oatmeal or roll the balls into the remaining coconut. They will be somewhat sticky but will harden as they cool. Put on a try and store in the fridge.
Tip:
I wanted to make them stick really well together so added some more oatflakes I had whizzed to a flour in my mini food processor. Oat flour is stickier than oatflakes. I probably didn’t need to do this but liked the result.
Why these are better for you:
Although these contain carbohydrate (sugars) from oats and maple syrup they are healthy when you eat them in moderation. Raw cocoa is full of antioxidants. Virgin coconut oil is a great source of easy to digest medium chain triglycerides that can be burned by your body directly for energy instead of being stored as fat.
Oats contain soluble fibre that feeds beneficial bacteria. Maple syrup is essentially sugar, but it does contain some minerals – unlike refined sugar, which is just empty calories. The protein from peanut butter and the fat from coconut keeps you fuller for longer, reducing the tendency to binge you can get from eating low fat low protein high sugar products.
Cocoa is a spice with antioxidant and anti-inflammatory powers – hurray!!
Like gluten grains, peanuts are high in “lectins” – proteins that are hard to digest and can overstimulate your immune system if you have an autoimmune condition (e.g. hypothyroidism, Crohn’s, ulcerative colitis, arthritis),

Apr 13, 2020 | Anna's Best Recipes, Cakes, biscuits & bars, Desserts & drinks
I love these and just baked a load after a lovely walk in our woods close-by. Once my supplies of unusual ingredients like healthier-than-sugar xylitol and erythritol run out I will be going online to shop in www.evergreen.ie , www.nourish.ie or nipping into my local shop Get Fresh in Ballyroan for supplies. This recipe is from Darina Allen. The only change I made was dropping sugar and substituting xylitol.
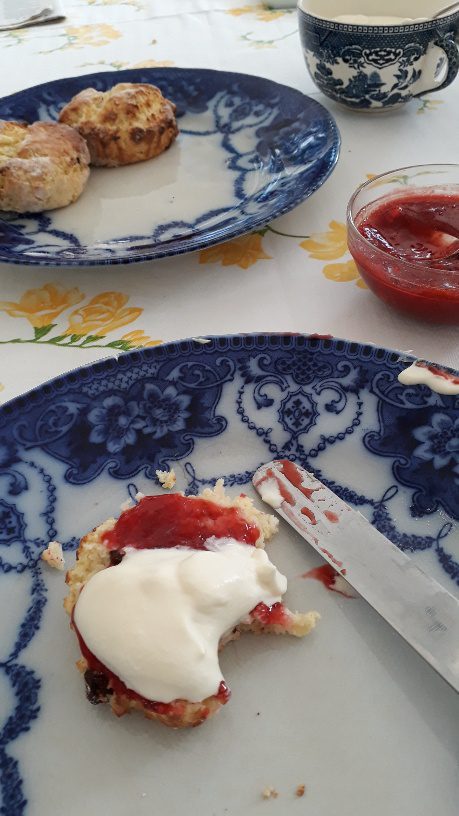
I like to eat these with some fresh raspberry/strawberry coulis sweetened with xylitol/erythritol/stevia and a big dollop of whipped cream. To make a coulis pour some frozen/fresh berries into a pan, cook until thawed and soft, mash a bit and add your (healthier) sweetener. It is a really good idea to avoid chemical sweeteners like sucralose, saccharin & aspartame because ironically these sabotage good gut bugs and contribute to weight gain!! These scones are not a health-booster but are less health-sabotaging than sugar-laden scones.
Tomorrow back to normality after my binge on high carbohydrate foods like breads, cakes and potatoes since lockdown. But for today, these yummy scones.
To make 6-7 decent size scones
138g white or blend of white and brown rice flour (I like Dove’s Farm mix of white and brown)
25g tapioca flour
2 tsp gluten-free baking powder
1 rounded tsp xanthan gum
1/2 teaspoon salt (sea salt/Himalayan salt)
2 rounded tablespoons erythritol/xylitol
55g butter, chilled
55g sultanas (optional)
1 egg, organic if possible
125-175ml natural yoghurt or (better for dairy-sensitive folk) natural, home-made kefir
Egg wash (optional, if you like a shiny top on your scones) – this is just a beaten egg
1. Preheat oven to 250C (235C fan)
2. Sift all the dry ingredients into a large bowl and mix well.
3. Rub in the butter, then add sultanas and gently mix together.
4. Lightly whisk the yoghurt/kefir and egg together.
5. Make a well in the centre of the dry ingredients, add the egg yoghurt/kefir and mix to a soft dough. Add a little more yoghurt/kefir if needed.
6. Turn onto a rice-floured board and knead lightly, just enough to shape into a round (knead too much and the result will be tough)
7. Roll to around 2.5cm thick, stamp into scones with a 5.5cm round cutter. Place on a rice-floured baking sheet and if using, brush with the egg wash.
8. Bake for approximately 10 minutes until golden brown on top. Leave to cool for a while on a wire rack.
9. Serve split in half with butter, or my fruit coulis (above), some no-added sugar jam like Follain or St Dalfour and whipped/clotted cream.
Why these are better for you:
OK, so a snack made from grains, cream and sweet stuff is never going to be a net health-promoter but by avoiding added sugar you are really helping reduce inflammation and helping your immune system fight off bad bugs. Did you know that gluten, in “normal” baking, opens up the normally tight barrier in your small intestine. These “tight junctions” are there to prevent toxins, bacterial by-products and undigested food spilling from your gut into your bloodstream. Gluten produces this reaction in normal, healthy volunteers and has been videoed live by researchers using capsule video cameras. Who knew!! This loss of barrier function lasts for 3-5 hours after gluten hits your small intestine. Remember, this is not only in people with gluten sensitivity. Why this is relevant to your health is that a damaged gut barrier opens the door to ALL chronic health conditions and stresses your immune system, leaving you more open to infection. A damaged gut barrier also increases sepsis in hospital patients.
Switching to a home-made fruit coulis (with healthy sweeteners) or a no-added sugar jam like St Dalfour/Follain brands means less of an assault on your immune system. Stay well.

Mar 15, 2020 | Anna's Best Recipes, Cakes, biscuits & bars, Desserts & drinks
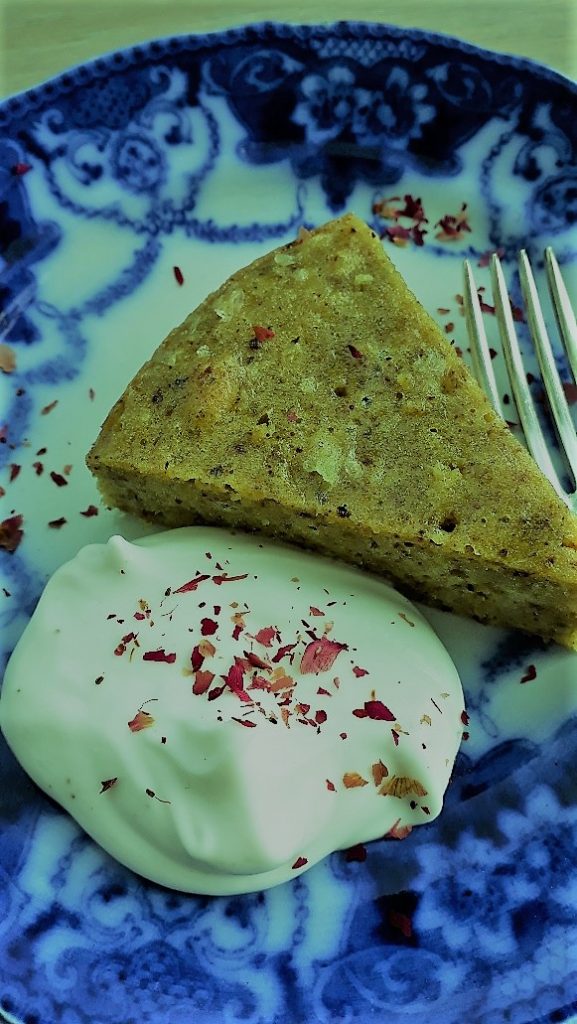
St. Patrick’s day home-baked treat, anyone? This is lovely and moist and soaked in rosewater and lemon syrup. Make it at least 2 hours before you want to serve it so the syrup has time to soak in. You can buy unsalted shelled pistachios in Middle Eastern and Asian Stores. The recipe, adapted by me to be healthier, is from Claudia Roden’s Arabesque. I am including 2 sizes of cake so you don’t have to go with enormous all the time, if you don’t have 12 people to serve. I increased the amount of lemon, to give a little more tang, and switched the immuno-suppressing sugar for xylitol/erythritol (from health shops). If you want to make serving this more spectacular, get yourself some rosepetals/rosebuds from a Middle Eastern shop and crumble some of the rose petals around and on top of each slice.
To serve 6
Cake:
3 eggs, seperated
60g xylitol or erythritol
25g coarsely chopped raw unsalted pistachios (optional)
100g pistachio flour (finely ground raw unsalted pistachios)
1 x 10-13cm round loose-bottomed cake tin
Syrup for small cake:
75g xylitol/erythritol
90ml water
1 tbs lemon juice
1 tbs rosewater
To serve (optional):
125ml Abbot Kinney’s/Coyo non dairy coconut yoghurt or whipped cream (I like to mix in a few drops of rosewater to either)
Large cake (to serve 12)
5 eggs, seperated
120g xylitol/erythritol
50g coarsely chopped raw unsalted pistachios (optional)
200g pistachio flour (finely ground raw unsalted pistachios)
1 x 23-25 cm round loose-bottomed cake tin
Syrup for large cake:
150g xylitol/erythritol
180ml water
2 tbs lemon juice
2 tbs rosewater
To serve (optional):
250ml Abbot Kinney’s/Coyo non dairy coconut yoghurt or whipped cream (I like to mix in a few drops of rosewater to either)
1. Make the syrup. Bring the xylitol/erythritol, water and lemon juice to the boil, simmer till everything is dissolved. Stir in the rosewater.
2. Let the syrup cool, then chill it.
3. Beat the egg yolks with the xylitol/erythritol to a pale cream, then add the ground pistachios and mix very well. Beat the egg whites until still and fold in gently. Pour into a greased cake tin and sprinkle the coarsely chopped pistachios, if using, on top.
4. Bake in pre-heated oven (180C/fan 165C).
Test for done-ness (where needle or point of knife comes out clean) after 35 minutes for the small cake and 40 minutes for the large, which should take around 45 minutes. If the cake is still sticky, give another 5 minutes, then test again.
5. Turn the cake onto a deep serving dish. Make little holes over the top with a fork and pour over the syrup. The holes will let it soak in quickly.
6. Serve, if you like, with the coconut yoghurt or (if you’re not dairy sensitive) cream.
Why this is better for you:
OK, so raw nuts are much better than baked (because nut/seed oils get damaged by heat) but this cake is high in protein and contains no sugar. This means it won’t disrupt blood sugar levels. Maintaining blood sugar balance is important if you care about your vitality and health. Erratic blood sugar levels contribute to fatigue, mood issues, inflammation, auto-immune conditions and so, so much more. Stay well.

Oct 19, 2018 | Anna's Best Recipes, Breakfasts & smoothies, Cakes, biscuits & bars, Recipes by category
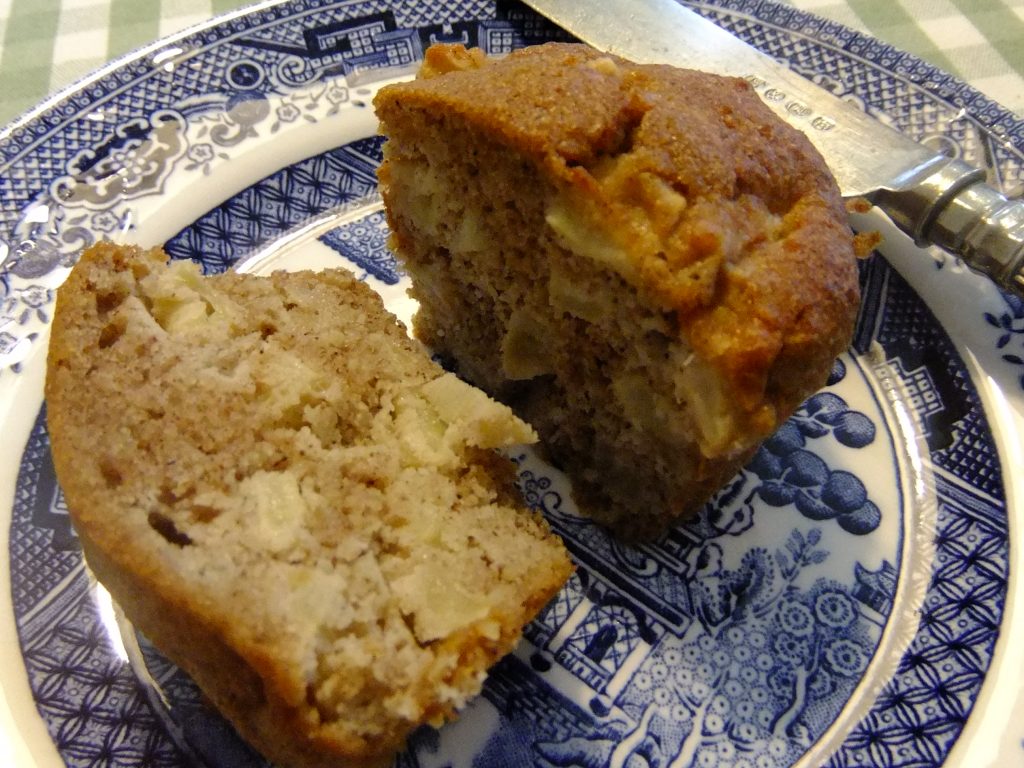
These are light, fluffy and a real celebration of Autumn. Unlike totally grain-based gluten free cakes, these keep fresh and moist for days (just keep them somewhere cool). I like to use reusable silicon muffin cases for this – muffins come off really cleanly and you are reducing waste as well. I adapted the recipe from one I found on supermummy.com. with a bowl of natural coconut or dairy yoghurt and some berries these would make a good breakfast too. Yummy!
To make this into a breakfast enjoy each muffin with a generous dollop of unsweetened coconut/almond or dairy yoghurt. This gives more protein to keep you fuller longer….
To make 12 x 7cm muffins
2 level tbs honey or maple syrup
100g coconut oil (or butter, if you want dairy), melted with the maple honey and cooled
3 tbs unsweetened plant milk (or cows milk if you eat dairy)
1/2 tsp of vanilla bean paste or 1 tsp vanilla extract (not essence, if you want to be gluten-free)
2 large eggs*
75g buckwheat flour
75g ground almonds
1 level tsp baking soda (also called bread soda)
Generous pinch Himalayan salt
For the apple pieces:
2 apples, eaters or cookers
Optional: 1 tbs unsulphured raisins
1 tbs buckwheat flour
1 level tsp Ceylon cinnamon
*If you have any leftover egg whites in your fridge, this is a good place to use them up. Instead of using 2 large eggs, I used two small/medium ones then at the end, with the apple pieces I folded in 2 very stiffly beaten medium egg whites*. The result was fab.
1. Peel core and dice the apples. Toss in a bowl with 1 tbs buckwheat flour and the Ceylon cinnamon until fully coated. Set aside.
2. Preheat oven (fan 180C standard 195)
3. Beat butter/coconut oil, milk, syrup/honey, vanilla and eggs in a bowl until frothy.
4. In a separate bowl whisk buckwheat flour, ground almonds, baking soda and salt together. Add to the liquid mixture and beat until fully amalgamated.
5. Fold the coated apple pieces into the mixture (along with the optional 1-2 stiffly beaten egg whites if you have some hanging around the fridge).
6. Spoon the mixture into 12 x 7cm muffin cases, supported by a muffin tin if you have one (this gives a nice shape to the finished product). If you don’t have a muffin tin, use a baking tray for the muffin cases.
7. Heat your oven to 180C while the muffins rest for a few minutes.
8. Bake 20-25 minutes (mine took 20) until golden on top. They are done when a skewer or toothpick inserted into the centre of a muffin comes out clean.
Why these are better for you:
Buckwheat is eally a seed rather than a grain. It is packed with a polyphenol (natural plant chemical) called rutin. Rutin is a powerhouse for aiding collagen production. Collagen is needed for healthy bones, tendons, ligaments, gut, connective tissue, and for keeping you younger a lot longer. Rutin has recently been on my mind as I implement a programme to heal tendonitis. I had a few minor shoulder injuries a few years back that prevented me moving properly (for 4 years), the tendon got pinched an inflamed. Ouch!!! Nothing like a (lot of) discomfort to refocus the mind on a few forgotten foods.
Sweetened with coconut sugar or maple syrup and containing apple to help feed these good bacteria these are SO much better for you than standard muffins loaded with refned sugar and toxic oils.
Buckwheat is naturally gluten-free. In EVERYBODY (whether gluten-sensitive or “normal”) gluten tears the lining of your small intestine. The damage lasts a minimum of 3 hours in ALL people (recent research has filmed this!). This damage allows bacterial fragments, gut bacteria and undigested food to spill into your bloodstream- putting your immune system into “attack” mode. This is a factor in inflammatory, autoimmune and mental health conditions. Using coconut oil or butter instead of omega 6 oils (like rape, sunflower, for example) means you avoid toxic trans fats produced by heating or refining nut/seed oils like sunflower, vegetable, rapeseed, sesame or peanut. Butter is healthier than damaged polyunsaturated oils.

Oct 11, 2018 | Anna's Best Recipes, Cakes, biscuits & bars, Desserts & drinks
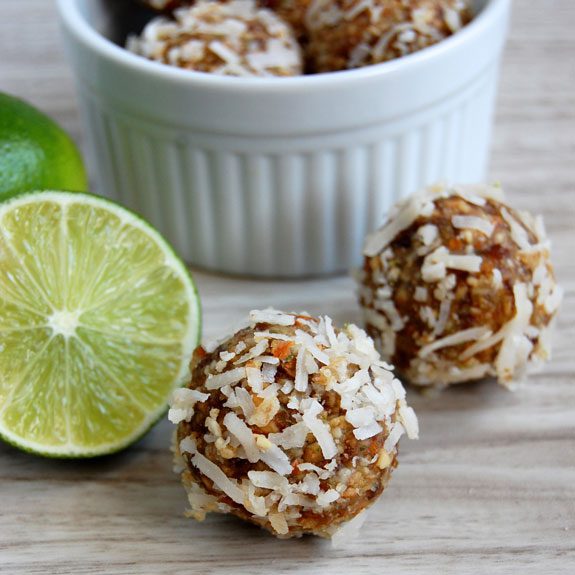
My friend Gretta shared the recipe for these delicious no-cook treats (from paleogrubs.com) with me. So easy and a real crowd-pleaser. Lovely as a decadent treat with a cup of green tea. Do use soft moist dates, otherwise the mix doesn’t stick together. I’ve left the measurements in cups because it’s quicker to make that way. If you are feeling fancy, use miniature cake/petits fours cases to serve.
As cashews are high in lectins (natural proteins that inhibit digestion) if you have a sensitive gut limit these to one or two and not every day.
1/2 cup (raw) almonds (1 cup is 230ml or a standard mug)
1/2 cup cashews
1½ cup Medjool or other soft moist dates, pitted
Zest and juice of 2 limes (organic if possible)
1/2 cup pure desiccated coconut
1. In a food processor blitz the nuts into small pieces not paste.
2. Add the dates, lime juice, zest. Pulse until the dates are finely chopped and the mix starts to clump.
3. Shape the mixture into 2-3cm balls. Roll in coconut. Store in fridge where they will keep for 4-5 days (if they last that long!)
Why these are better for you
These contain protein and unrefined oils. This prevents sugars in the dates from upsetting blood sugar levels (and potentially mood, energy, and concentration). Because they are made of unrefined ingredients they won’t rob valuable nutrients from your body. BUT think of these as treats, not staples, because dried fruit particularly, and even nuts, are best eaten sparingly. Too much dried fruit upsets the balance of bacteria in your gut and too many nuts give you too much omega 6 oil, and our bodies work best on just a little (about 1 tablespoon of raw nuts/seeds a day gives you plenty of omega 6). Cashews are not the best source of omega 6. They have to be steamed to make them edible so you can never buy raw cashew nuts. Raw nut oils are best. Great for a treat though.

Apr 2, 2018 | Anna's Best Recipes, Cakes, biscuits & bars, Desserts & drinks
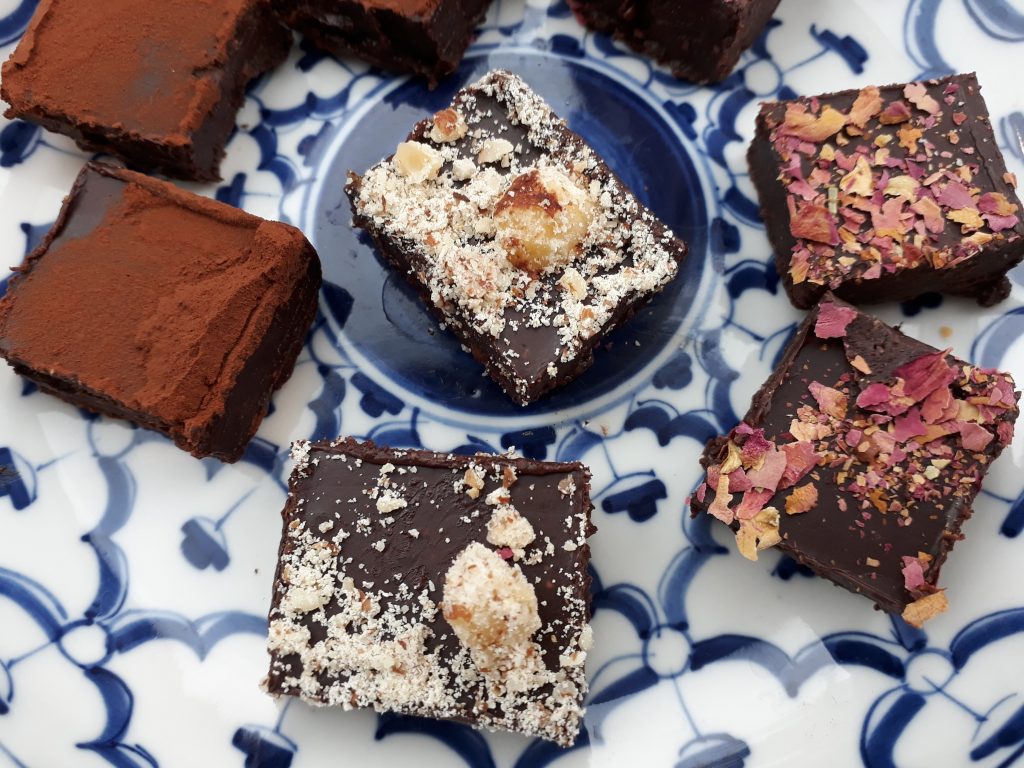
These are amazing for people who like really posh chocolate with gorgeous flavours. I have adapted Anna Jones recipe (from her book The Modern Cook’s Year) by using coconut sugar instead of standard brown sugar. It gives a gorgeous very slight crunch to the truffles. Keep them in the fridge until serving though, otherwise they melt.
This mix makes a lot (I got around 40), and will keep you in truffles for a couple of weeks.
For the flavouring, I used ground cardamom (1 teaspoon) and the rind of 1 organic orange which turned out gorgeously. I found the crushed rose petal topping looked spectacular and everyone wanted to eat those ones.
60g coconut oil, plus extra to grease
30g coconut sugar (gives a lovely crunch)
200g no-added sugar nut butter at room temperature (raw nut butter is healthiest)
200g dark chocolate (minimum 70% cocoa solids, I used 81% for a less sweet truffle)
Seeds from 1 vanilla pod or ¾ level teaspoon vanilla powder or vanilla extract
2 big pinches of Himalayan salt
20 x 20cm brownie tin (with removable base. If you have to use a normal tin then I suggest lining it with silicon baking parchment so its easier to remove from the tin)
Additional flavours (optional)
Zest of 1 unwaxed/organic orange, lemon or lime
Smoked sea salt
Seeds of 3 cardamom pods, crushed (or use ¾ teaspoon ground cardamom)
½ teaspoon ground Ceylon cinnamon
To coat
50g raw cocoa or cocoa powder
Pistachios, almonds, finely chopped
Candied ginger, finely chopped
Grated dark chocolate
Dried rose petals, crushed
1. Grease a 20cmx20cm square brownie tin with coconut oil.
2. Heat the coconut oil and sugar in a saucepan on a low heat until the oil has melted (the coconut sugar won’t really melt, I find).
3. Take the pan off the heat and add chocolate, nut butter, vanilla, salt and stir till melted. Then add the whatever flavourings you are using.
4. Pour the mix into the tin and chill for around 2 hours until set solid.
5. Turn the truffle slab out onto a cool work surface and cut into squares (mine were nearly 2cm) then gently dip each truffle in its coating to cover. I found I got half of them done then had to put everything in the fridge to harden up again is it was all starting to melt.
The truffles will keep in the fridge for up to 2 weeks in a sealed container. If you want to keep them cool when serving, place on a chilled plate in the fridge until just ready to serve.
Why these are better for you
Although these contain cocoa (a stimulant) and a small amount of sugar (coconut and the normal sugar in the chocolate) they also contain some protein (from nut butter). That means they don’t upset your blood sugar and cause massive inflammation the way normal chocolates do. Coconut sugar also has a lower glycaemic load than normal sugar (doesn’t pump up blood sugar quite as much as traditional sugar AND contains more minerals). All sweet foods are still high carbohydrate though so these chocs are intended as a treat rather than a staple. Vanilla, cinnamon, cardamom, cocoa and organic citrus zest are antioxidant and anti-inflammatory – good if you want to look better and be more well for longer. Coconut oil is easier to digest than all other fats as its absorbed in a different way in your gut. It contains medium chain triglycerides which are used directly for energy by your brain.

Nov 17, 2015 | Anna's Best Recipes, Cakes, biscuits & bars
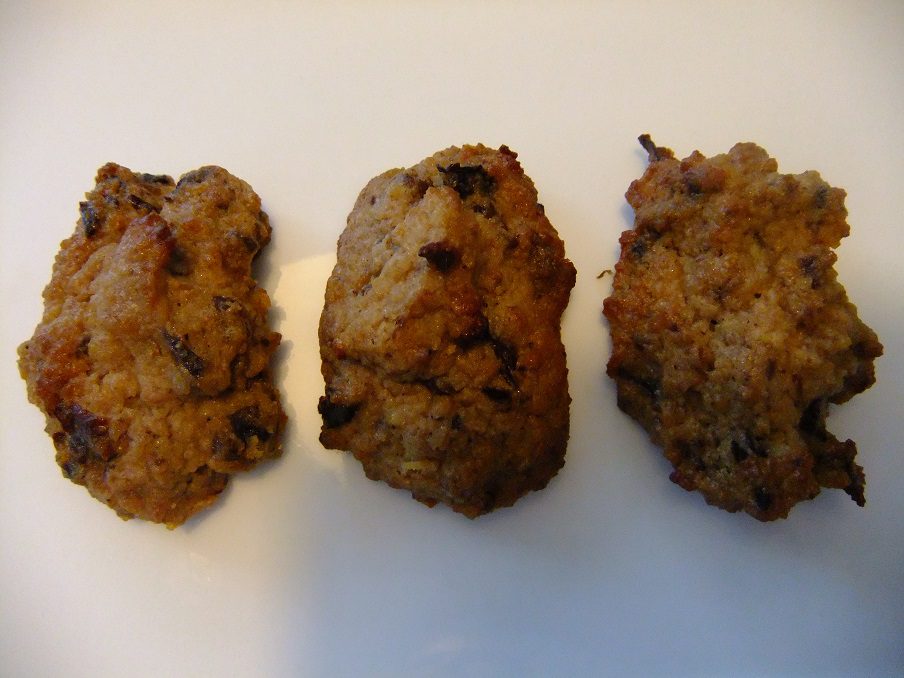
I love to make these around Christmas-time. They are deliciously moist, flattish but light and are a crowd-pleaser. Prune-haters also usually like these cakes, provided you keep it a secret that they contain prunes! They will keep in an airtight jar in a cool place for about 10 days. I love spices so I generally also add some extra. I add a generous pinch of ground cloves and ground ginger but you don’t have to.
Makes 16 small cakes about 1cm high
60ml water
85g ground almonds
1/2 level teaspoon mixed spice
1 egg white, stiffly beaten
175g pear, peeled
50g dried stoned prunes (with no sulphur dioxide additive), preferably organic, finely chopped
1. Put prunes and water in a small pan and simmer till water is absorbed
2. Combine with the almonds and mixed spice
3. Grate the pear into the almond mixture and stir
4. Fold in the egg white to make a thick paste
5. Place 16 dessertspoonfuls of mix on a greased baking tray
6. Bake 170C (or 155C fan) for 20 mins or until lightly browned
Why these are better for you
First of all these cakes have some high quality protein from the almonds and egg white. This means that the sugars from the pears and prunes only gradually hits your bloodstream (protein slows down absorption of sugars in your gut). This is good news if you like to keep your energy, mood and blood sugar levels fairly even. Sulphur dioxide is a preservative that can have unpleasant effects on your digestive system. Mixed spice, like all spices, contains antioxidants that help reduce inflammation and slow the ageing process. Cooking damages foods, so these are not as healthy as eating raw food (e.g. my raw green tea macaroons on this blog). But sometimes you just want cake anyway…

Apr 1, 2015 | Anna's Best Recipes, Cakes, biscuits & bars, Desserts & drinks
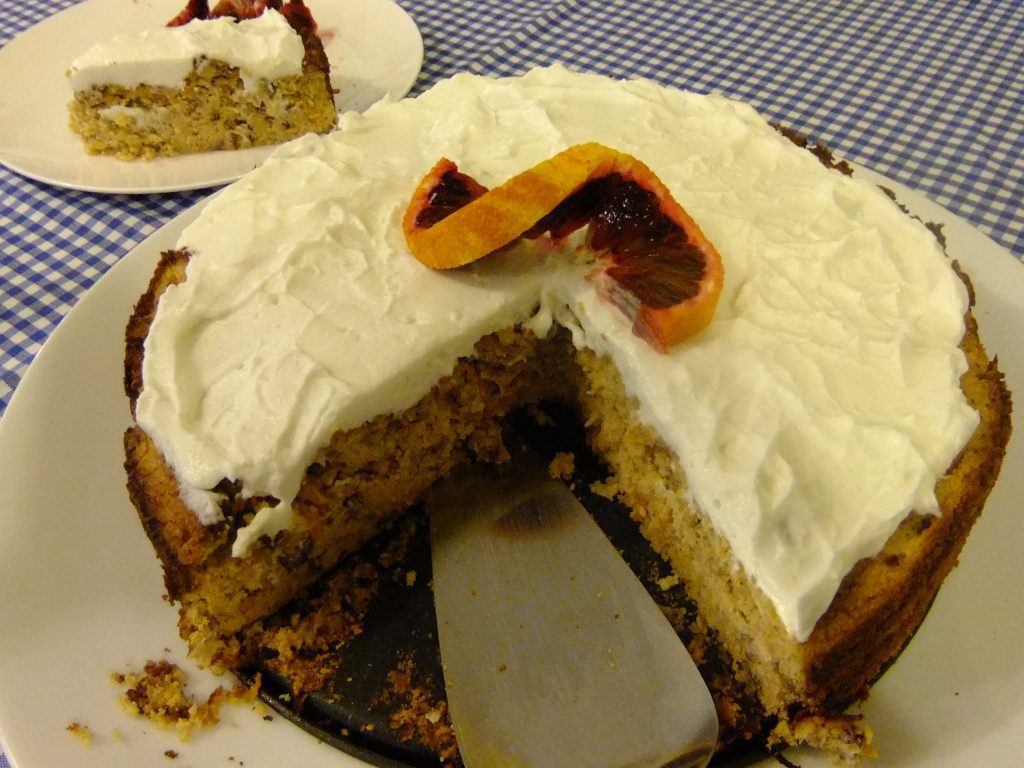
I have to admit I was dubious about making this cake because it contains no grains. I couldn’t believe it could be as nice as the wheaty carrot cake I used to make before I learned I was coeliac. But this one is lovely and moist and not as fiddly to make. The icing is phenomenal whether you go for the dairy-free or the dairy-laden option. I’ve adapted the recipe slightly from the one on “Wheat Belly” by cardiologist William Davis. He writes about why humans are totally unsuited to eating gluten and how you can enhance your health by cutting grains. The original recipe uses double the sweetener for the cake, but I found that a bit sickly. If you (or your kids) have a massive sweet tooth though, feel free to double it…
For 10 generous servings:
Cake:
125g coconut flour
90g xylitol or erythritol
2 tbs grated orange zest*
1 rounded tbs ground flaxseeds
2 rounded tsp ground cinnamon
1 rounded tsp ground allspice
1 rounded tsp grated/ground nutmeg
1 rounded tsp gluten-free baking powder (this is usually free of toxic additives)
Pinch Himalayan salt/Atlantic sea salt
4 large eggs, organic if possible
105g coconut oil, gently melted
200ml natural soya yoghurt, natural yoghurt or kefir
100ml full fat coconut milk (tinned is fine)
2 tsp pure vanilla extract (not “essence” unless you are happy to eat gluten)
160g (2 cups) finely grated carrots
110g pecans, chopped (or use walnuts)
23-25cm circular or square springform baking tin
Electric cake mixer or whisk
Icing (vegan or standard cheese base):
1 tbs lemon juice or home made kefir
1 tbs xylitol/erythritol (or more, to taste, if you want it sweeter)
200g plain Coyo (dairy-free yoghurt) for dairy-free/paleo diets OR ricotta cheese if you want to eat dairy
Alternative kefir cheese icing (kefir is tolerated by most dairy-sensitive people):
200g kefir cheese (made by straining kefir through muslin/nut milk bag to remove the watery “whey”)
2 tbs xylitol
Optional: zest of a lemon
*If you don’t use organic oranges, there will be pesticide residues on the peel. So put your oranges into a litre of water, add 2 tbs vinegar and leave for at least 20 minutes before scrubbing well (to remove the chemicals). This trick also works for cleaning vegetables (leafy greens can just be soaked and washed off after).
1. Preheat oven to 170C (155C fan) and grease the baking tin with coconut oil.
2. To make the cake: combine the coconut flour, erythritol, xylitol, orange zest, ground flaxseed, cinnamon, allspice, nutmeg, baking powder and salt in a large bowl and mix by hand.
3. Beat together the eggs, gently melted (just hand hot) coconut oil, yoghurt or kefir, coconut milk and vanilla in a medium bowl. Pour the egg mixture into the coconut flour mixture. Using an electric mixer, beat until thoroughly mixed. Stir in the carrots and pecans by hand. Pour the mixture into the baking tin.
4. Bake for around 1 hour checking after 45 mins. When a toothpick/skewer inserted into the cake comes out clean it’s done. You want the cake to remain moist. Much better slightly undercooked than over, I promise!
5. To make the icing: combine the Coyo or ricotta with the lemon juice and xylitol in a bowl and beat until smooth. If you’re making the kefir cheese based icing omit the lemon juice and optionally add the zest of a lemon.
6. Spread the icing over the top of the cooled cake.
Why this cake is better for you:
As you probably know any food that’s cooked above 100c generates toxic by-products (though less so if you don’t use sugar or polyunsaturated oils). That’s why a raw or just gently cooked diet (nothing above 100c) helps keep you younger longer, lowers inflammation and generally helps your body. That said, who doesn’t occasionally want something like a cake? This one is ideal as it’s grain free and protein rich. This means it doesn’t cause the fluctuations in blood sugar that fuel inflammation and can trigger skin issues, fatigue or dips in brain function. Coconut, unlike most oils, is still good for you even when it’s been heated. Roll on full-fat coconut milk! The low fat stuff is filled with emulsifiers and lacks the good stuff. Xylitol is what’s called a sugar alcohol and is 1.6 times as sweet as sugar but with half the calories. It’s not absorbed by your body so it doesn’t affect blood sugar levels. It’s generally deemed to be safe. If you have a very sensitive bowel, go cautiously with xylitol because it can be hard for some people to deal with in large quantities. Guideline: just a slice, and not the whole cake in one sitting!
If you use Coyo yoghurt (or kefir) in the icing, you will also be getting a boost of friendly bacteria in this delicious cake to boost vitality and wellbeing.

Dec 17, 2014 | Anna's Best Recipes, Cakes, biscuits & bars, Desserts & drinks
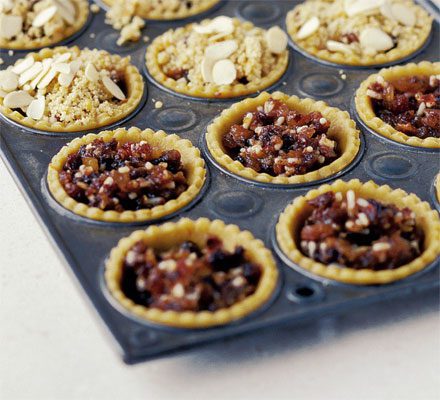
I got this idea for a crumble topping from Domini Kemp and adapted it to be less tooth-achingly sweet and gluten & dairy-free. I love this decadent topping because it means you don’t have the time-consuming fiddly task of sticking pastry tops onto your mince pies (a real pain if you are making a large batch). You can make this topping in advance and store in the fridge in an airtight jar for a week or two.
This also makes a gorgeous topping for any sort of fruit crumble if you mix it 60:40 with gluten-free oatflakes.
To top 16 mince pies
Pinch of Ceylon cinnamon
25g virgin coconut oil (or butter, if you want dairy)
12g xylitol
25g brown rice flour
25g ground almonds
25g flaked almonds
1. If you have a food processor but the ingredients except the flaked almonds in a food processor and blitz until it resembles breadcrumbs. Empty into another bowl and stir in the almonds.
If you don’t have a food processor, rub the ingredients together (except for the flaked almonds) by hand then stir in the flaked almonds.
2. Divide between 16 mince pies and bake at 180C fan/195C until brown. Cool in the tins for 5 minutes.
Why these are better for you:
Because these pies don’t contain refined sugar (if you use my mincemeat recipe) they don’t immediately start to drain your body of nutrients like magnesium (for mood) or selenium (needed for fat-burning thyroid hormones). The nuts, although cooked (and therefore no longer containing much in the way of healthy oils!) do contain protein, which helps prevent the dips and peaks in blood sugar that can make you feel tired or narky. Coconut oil is not damaged by baking so its still healthy in the finished product. The medium chain triglycerides in coconut oil are useful for energy levels as they are used directly by your body instead of being stored as fat in your cells. Virgin coconut oil rules!! Ceylon cinnamon (but not normal cassia cinnamon sold as “cinnamon”) helps your body regulate blood sugar. This helps reduce the risk of peaks and troughs in energy, brain function and mood throughout the day. It also helps reduce likelihood of developing diabetes.

Aug 17, 2014 | Anna's Best Recipes, Cakes, biscuits & bars
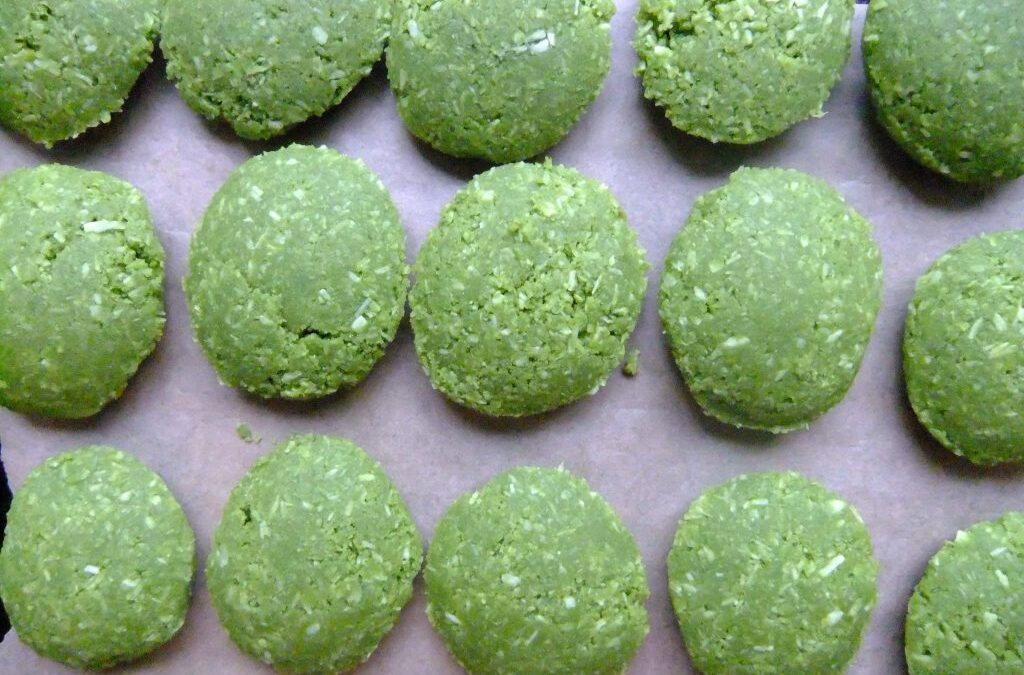
These are a simple-to-make confection from Sarah Jane White, whose book, The Extra Virgin Kitchen, is a favourite of mine. I made them today and they turned out a totally delicious treat that’s bright green. As the author says, they are idiot-proof. Although you are supposed to freeze them I didn’t bother and just chilled them down to harden them a bit. Yum!
If you are gluten-free, remember that vanilla “essence” can contain gluten while vanilla extract (made from actual vanilla) is gluten-free.
Buy matcha green tea powder in Asian shops or health stores.
Makes 16
1 teaspoon vanilla extract (or a generous pinch of vanilla powder)
3 level teaspoons matcha green tea powder
125g desiccated coconut
2 tbs coconut flour
Pinch sea salt/Himalayan salt
3 rounded tbs coconut oil
2-4 level tbs honey
Pinch dried ground turmeric
Quick squeeze fresh lemon juice (2 dessertspoons, give or take)
Food processor
Line a flat plate or baking sheet with greaseproof paper.
Add the ingredients to the food processor and blitz for 30 seconds, or until the mix starts to form a ball.
The next thing you want to do is shape the dough using 2 dessertspoons or small soup spoons. Scoop out a small spoonful of dough and form it into a mini macaroon or madeleine shape using both spoons. As Sarah Jane suggests, you could also use one of those special metric tablespoon you can buy from kitchen suppliers, to give a professional looking shape.
Freeze the macaroons until they are solid, then transfer to your fridge.
Why these are good for you:
Green tea has health benefits as they are laden with antioxidant catechins. Green tea promotes the growth of beneficial bacteria in your gut which are helpful for clear skin, super-efficient digestion and absorption of nutrients. Good bacteria are also responsible for helping remove toxic chemicals and used-up hormones from your body quickly and safely. Green tea also contains L-theanine, an amino acid that can be super-helpful for reducing stress or anxiety. Coconut oil is a great source of medium chain triglycerides. These help feed your brain and also supply ready energy to your body without being converted to fat! Lemon juice has antioxidant properties and helps boost liver function, to help rid you of all those natural and man-made toxins your body works to get rid of every minute of every hour.
