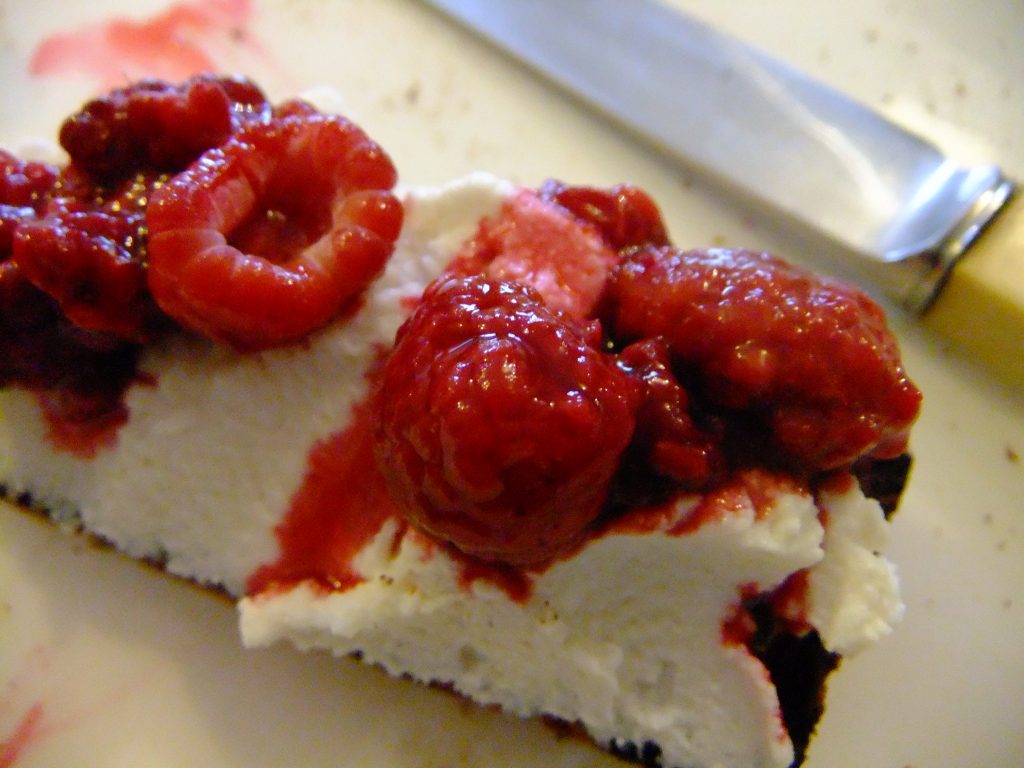
I love this and invented it one weekend a few years ago when I saw beautiful ricotta on sale. Now I see it seems to be “a thing” on the internet. Quantities are to serve 2, as usual. If you use frozen berries and you forget to thaw them overnight first, just put into a pan and warm with about 1 dessertspoon of xylitol or around 5 drops of steviaor some erythritol/xylitol and warm gently, covered, until thawed. Allow to cool a bit before using.
2 mugs (about 200g) (THAWED OVERNIGHT) frozen or fresh organic raspberries or strawberries (personally I love frozen cos when you thaw them you get lots of juice)
4 small slices 100% wholemeal gluten-free bread (if you eat gluten, 100% wholemeal spelt, wheat or rye sourdough is great with this)
100-150g tub super-fresh ricotta cheese (NOT salted ricotta)
1/4 tsp vanilla powde or vanilla extract (make sure its extract not essence if you want to be gluten-free)
Stevia drops, erytirotol/stevia or xylitol to sweeten
1. Mix the vanilla powder/extract into the ricotta and add stevia/xylitol/erythritol to taste.
2. Toss your berries (with any juice that came out) with stevia/erythritol/xylitol to sweeten to your liking.
3. Toast your bread, divide the ricotta between the 4 slices, piling on top, and spoon over the berries and their juice (if any).
4. Enjoy for a leisurely breakfast.
Why this is better for you Ricotta is rich in protein which keeps you fuller longer than if you just ate toast with fruit or jam for breakfast. The protein stops your blood sugar from soaring too high too quickly, which would cause inflammation and accelerated ageing. Protein slows digestion so this is a slow-burn energy breakfast. Slow burn meals are really important if you want to be well long-term and be the best body shape for you. Strawberries (and raspberries) are really rich in vitamin C and polyphenols which help keep every part of our body young-looking, springy and strong – from your skin to your arteries and intestines. Do go for organic if at all possible. Xylitol, stevia and erythritol have NO effect on blood sugar – this is good news for all of us, not just people with diabetes.
I like to soak my muesli the night before because it makes grains, nuts and seeds super digestible and more filling. Unsoaked grains contain phytates which impede your mineral absorption. Making your own muesli is great because you can use the nuts and seeds you prefer. Commercial muesli is often high in dried fruit, which just gives you too much carbohydrate (sugars) at one sitting. It can also load up on cheaper ingredients like wheat flakes, instead of better-for-you oats. I love to add a heaped teaspoon of ground ginger and 2 of Ceylon cinnamon when making the muesli because I love the antioxidant punch of spices which keep you healthier and younger looking for longer.
When I have early clinic I often make Birchner muesli. I put half a mug of muesli in a wide glass screw top jar, grate an organic apple in, add lots of kefir/yoghurt and mix it up, sometimes with a few drops of stevia if I am feeling like something sweeter or am using sour berries. Instant brekkie the following morning. Yum…
Luxury Muesli
3 cups gluten-free (or normal, if you tolerate gluten-contamination) jumbo oatflakes or porridge oatflakes
½ cup walnuts, broken into quarters, halves or roughly chopped
½ almonds, coarsely chopped
½ cup sunflower seeds
½ cup hazelnuts or Brazil nuts, coarsely chopped
½ cup organic whole chia seeds or linseeds (also known as flaxseeds)
½ cup chopped unsulphured apricots
½ cup dessicated coconut or large coconut flakes
Mix ingredients together and store in an airtight jar.
Serve ½ mug of this muesli with natural yoghurt, milk of your choice and a cupful of chopped fruit – apple, pear or berries.
If you need more sweetness, use a few stevia drops from health stores. Its a plant extract that’s much sweeter than sugar but without calories and negative health effects.
Birchner Muesli
Soak ½ a mug of this muesli in a bit more than double its volume of home made kefir or yoghurt overnight (for dairy free use almond or coconut based yoghurt – if it’s very thick you might need to add some non-dairy milk).
Serve with a grated organic apple/pear or 1 cup mixed fresh or frozen berries
As a yoghurt/kefir substitute you could use half water half cloudy apple juice to soak. This isn’t as good because it contains no protein and raises the (natural) sugars in the meal. But if you cant bear milk, yoghurt or kefir of any type with muesli (like my husband) what the hell…
A note about dairy sensitivities: If you are mildly dairy-sensitive (you get symptoms but don’t have any major autoimmune health condition) you might like to try home made kefir. Kefir is a fermented milk product where the bacterial cultures have digested both the lactose (milk sugar) and casein (milk protein). I find that with any other dairy product, I immediately get a stuffed nose and throat, but not with home made kefir. You might be the same. Yay!! fully fermented home made kefir has over 20 varieties of beneficial bacteria to help your health. Even when good bacteria are killed by your strong stomach acid they still have a huge metabolic effect on you. How amazing is that…
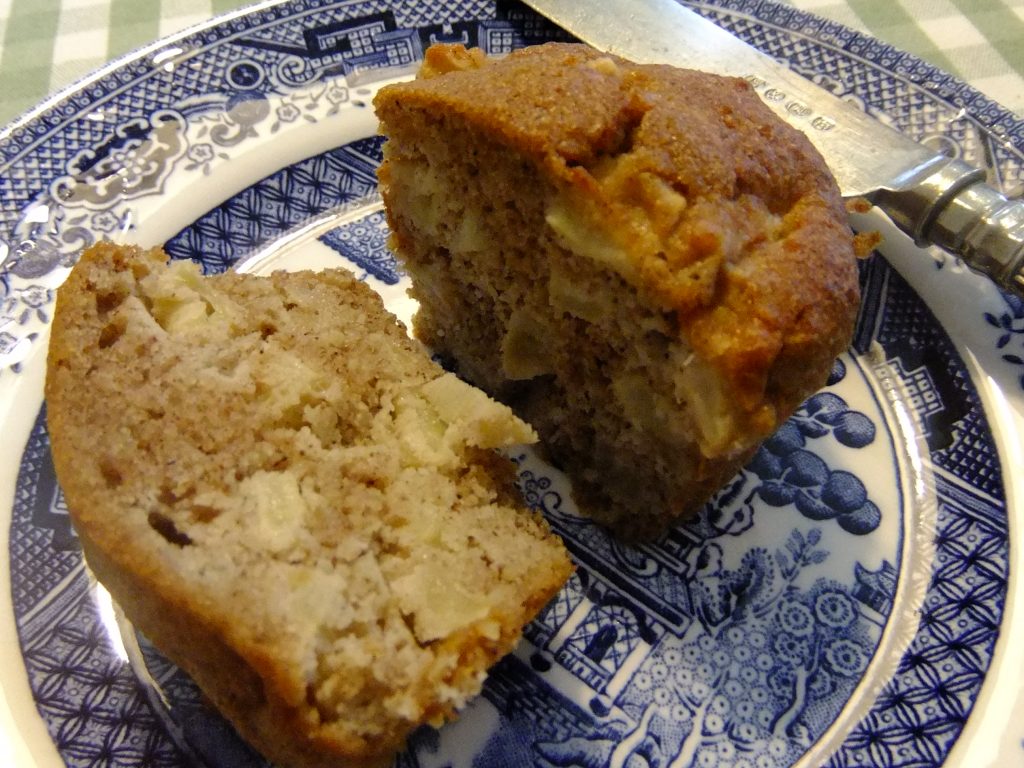
These are light, fluffy and a real celebration of Autumn. Unlike totally grain-based gluten free cakes, these keep fresh and moist for days (just keep them somewhere cool). I like to use reusable silicon muffin cases for this – muffins come off really cleanly and you are reducing waste as well. I adapted the recipe from one I found on supermummy.com. with a bowl of natural coconut or dairy yoghurt and some berries these would make a good breakfast too. Yummy!
To make this into a breakfast enjoy each muffin with a generus dollop of unsweetened coconut/almond or dairy yoghurt. This gives more protein to keep you fuller longer….
To make 12 x 7cm muffins
1 rounded tbs honey
100g coconut oil (or butter, if you want dairy), melted with the maple syrup/coconut sugar and cooled
3 tbs unsweetened almond milk (or other unsweetened milk).
Level tsp of vanilla powder or extract (not essence, if you want to be gluten-free)
1 heaped tbs coconut sugar (or use 2 scant tbs pure maple syrup)
2 large eggs*
75g buckwheat flour
75g ground almonds
1 level tsp baking soda (also called bread soda)
Generous pinch Himalayan salt For the apple pieces:
2 cooking apples
1 tbs buckwheat flour
½ level tsp Ceylon cinnamon
*If you have any leftover egg whites in your fridge, this is a good place to use them up. Instead of using 2 large eggs, I used two small/medium ones then at the end, with the apple pieces I folded in 2 very stiffly beaten medium egg whites*. The result was fab.
1. Peel core and dice the apples. Toss in a bowl with 1 tbs buckwheat flour and the Ceylon cinnamon until fully coated. Set aside.
2. Preheat oven (fan 180C standard 195)
3. Beat butter/coconut oil, milk, coconut sugar or maple syrup, vanilla and eggs in a bowl until frothy.
4. In a separate bowl whisk buckwheat flour, ground almonds, baking soda and salt together. Add to the liquid mixture and beat until fully amalgamated.
5. Fold the coated apple pieces into the mixture (along with the optional 1-2 stiffly beaten egg whites if you have some hanging around the fridge).
6. Spoon the mixture into 12 x 7cm muffin cases, supported by a muffin tin if you have one (this gives a nice shape to the finished product). If you don’t have a muffin tin, use a baking tray for the muffin cases.
7. Heat your oven to 180C while the muffins rest for a few minutes.
8. Bake 20-25 minutes (mine took 20) until golden on top. They are done when a skewer or toothpick inserted into the centre of a muffin comes out clean.
Why these are better for you:
Buckwheat is eally a seed rather than a grain. It is packed with a polyphenol (natural plant chemical) called rutin. Rutin is a powerhouse for aiding collagen production. Collagen is needed for healthy bones, tendons, ligaments, gut, connective tissue, and for keeping you younger a lot longer. Rutin has recently been on my mind as I implement a programme to heal tendonitis. I had a few minor shoulder injuries a few years back that prevented me moving properly (for 4 years), the tendon got pinched an inflamed. Ouch!!! Nothing like a (lot of) discomfort to refocus the mind on a few forgotten foods.
Sweetened with coconut sugar or maple syrup and containing apple to help feed these good bacteria these are SO much better for you than standard muffins loaded with refned sugar and toxic oils.
Buckwheat is naturally gluten-free. In EVERYBODY (whether gluten-sensitive or “normal”) gluten tears the lining of your small intestine. The damage lasts a minimum of 3 hours in ALL people (recent research has filmed this!). This damage allows bacterial fragments, gut bacteria and undigested food to spill into your bloodstream- putting your immune system into “attack” mode. This is a factor in inflammatory, autoimmune and mental health conditions. Using coconut oil or butter instead of omega 6 oils (like rape, sunflower, for example) means you avoid toxic trans fats produced by heating or refining nut/seed oils like sunflower, vegetable, rapeseed, sesame or peanut. Butter is healthier than damaged polyunsaturated oils.
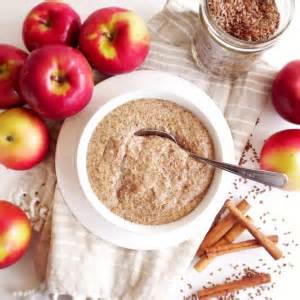
I love this autumnal porridge with apples from the garden (we have a glut right now). Add Ceylon cinnamon, a grated apple and a dessertspoon or two of protein powder and you have a slow-burn meal that takes you through to lunch no problem. I love spices and what they do for your body so if I have time I also put in a pinch of ground cloves – a reminder of my childhood and my mother, who made the best apple tarts, always with a few cloves. Instead of the apple stirred into the porridge you can also top the finished product with a cupful of thawed or fresh mixed berries.
For 1 big eater (if portion size seems too big, reduce oats by 1/3 and protein powder to 1 rounded dsp)
Just under 1/2 mug (about 40g) gluten-free porridge oats or (if you are not gluten-sensitive, normal porridge/jumbo oats/oatmeal)
1 tsp Ceylon (Sri Lankan) cinnamon
1-2 dsp additive-free protein powder (I like a mix of sprouted rice protein and pea protein or Nu Zest brand but for dairy-eaters grass-fed whey protein concentrate like Solgar Vanilla Whey-To-Go is also good and some people prefer it)
1 apple – organic if possible
1 heaped tbs (2 heaped dsp) mixed raw milled seeds (get a blend that includes flax/chia)
Optional: pure stevia drops to sweeten (if you are only just weaning off sugar) or use a little xylitol or erythritol/stevia blend (from health shops)
1.If you think of it the night before, soak your oats in boiling water – cover the oats so you have at least 1.5cm of water on top, they will drink it all up. This reduces the cooking time A LOT and makes them easier to digest. If you forget to soak the oats overnight, just pour on boiling water when you get up.
2.Bring the oats to the boil then simmer until a lot of the grains have broken down.
3. Grate your apple (unless its organic, peel it first) into the porridge, add the cinnamon, protein powder and (if using) your stevia drops/xylitol etc. Give it a good stir. At this point it will probably be too thick so add some boiling water, give it all a good stir and pour into your bowl.
4.Top with the seeds and get stuck in.
Why this is good for you: Oats and apples are a rich source of prebiotic fibre that feeds your good gut bacteria. These bugs are vital for digestive, skin, hormonal and mental health (in fact every aspect of your health). If the apples are not organic they are usually contaminated with agri-chemicals toxic to humans. You can read about contaminants in apples here: https://www.ewg.org/release/apples-top-ewgs-dirty-dozen . Oats are naturally low in gluten (their only gluten being contamination by wheat or barley). Low/no gluten foods are easier to digest. In all grains, beans,and pulses there are problematic proteins called lectins that are reduced by soaking/sprouting. This is why some people tolerate sourdough wheat bread but not other forms of wheat bread. The sourdough fermentation process reduces or lectins, including gluten, by over 99%. Many plants contain lectins – they are the plants defence against being eaten and digested!!
Protein: Adding protein from (seeds, additive-free protein powder) slows your digestion. This gives you a steady feed of energy rather than a quick burst, followed by feeling exhausted, down or hungry. Buy a raw milled seed mix or grind your own blend (flax, pumpkin, sunflower, sesame) using an electric coffee/spice grinder. Keep in an airtight glass jar in the fridge.
Spices: Ceylon/Sri Lanka Cinnamon (but not products labelled simply “cinnamon”) helps balance your blood sugar and is a powerful antioxidant. So if you want to lower inflammation, be a healthy weight, slow the ageing process, balance hormones and maintain a good, stable mood this sort of breakfast is a winner.
There are of course, some people who do much better on a grain-free diet altogether, but this is a more personalised area of nutrition aimed at resolving specific health issues.
Made these a few weeks ago and thought I’d better get them up here in time for Pancake Tuesday. They are thicker than normal pancakes and really light. I love to eat them for a weekend breakfast with a dairy-free coconut yoghurt and lots of thawed mixed berries. Mix a few drops of pure stevia with yoghurt or berries if you like them sweeter. Being a bit greedy, I made double quantity here but it was too much. The coconut flour and eggs make these protein rich to give you slow burn energy.
For 4 pancakes to serve 4
(with a generous serving of berries and maybe some coconut yoghurt)
45g coconut flour
1/2 teaspoon vanilla powder or 1 teaspoon vanilla extract (if you are gluten-sensitive avoid vanilla essence)
1 medium banana (with spots if you are on SC diet)
6 medium eggs
1/2 level teaspoon Ceylon cinnamon
Blitz everything except the coconut flour in a blender until mixed up and no lumps.
Add the coconut flour, blitz till mixed.
Heat frying pan on medium heat, add a little coconut oil. Use 1/4 of the batter for each of the pancakes.
Serve with the yoghurt and berries.Variation: This is also lovely with apple stewed with Ceylon cinnamon.
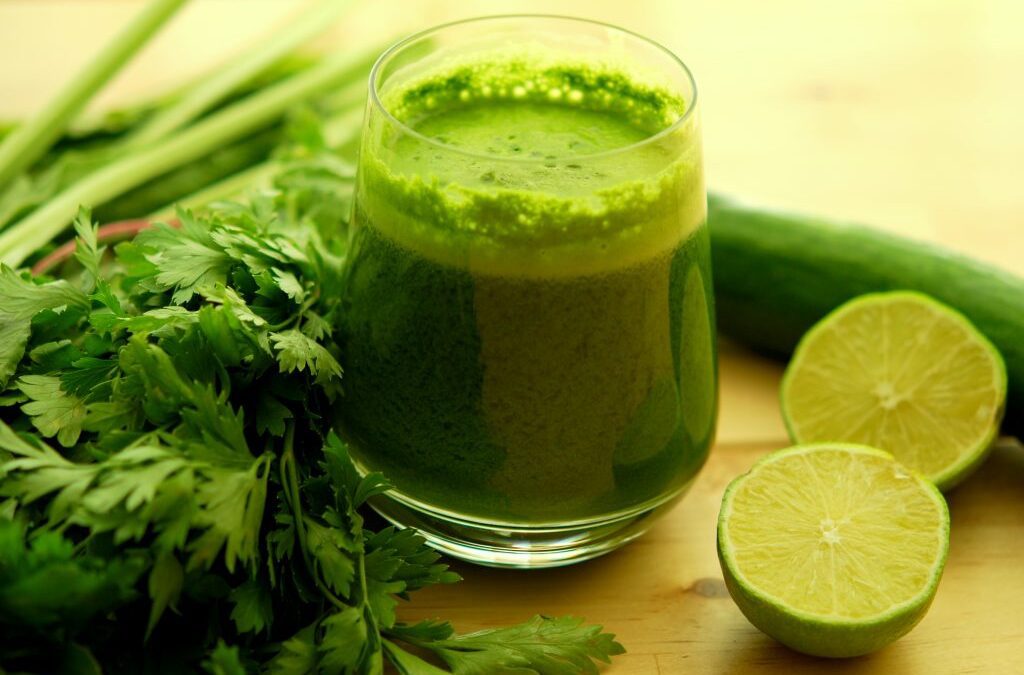
How do you increase your veggie intake to help your health if you have almost no time in the evenings to prepare a full meal or you have problems chewing? Try these green smoothies. You can even make two servings and store leftovers in an airtight glass jar in the fridge for the next day. Citrus juice and airtight containers help prevent oxidation (nutrient loss and discolouration). If you don’t like your green smoothies cold you can heat these VERY gently in a saucepan until they are lukewarm.
Garden walk (950ml or 2 servings) 1 cup baby spinach, packed
1 cup fresh parsley (any type), packed
2 large ripe tomatoes
2 tbs freshly squeezed lemon juice
½ avocado
¼ tsp chilli pepper (can cause flushing so avoid if you have rosacea)
Optional: a cupful or so of filtered, boiled and cooled, or bottled spring water to help everything go round in the blender. Wash and chop everything roughly. Blitz well.
Cucumber dill-icious soup (950ml or 2 servings)
1 large cucumber
½ a small bunch of dill (or use fresh basil if you like)
1 small avocado
3 leaves curly kale, stalks removed
1 large stalk celery
½ lime, juiced
2 cloves garlic*
Wash everything and blitz everything with a little filtered, spring or boiled and cooled water to help it all go round in the blender.
Wild green pear (makes about 500ml)
1 ripe Bartlett or Williams pear (these are lovely and sweet)
1 cup local greens (e.g. rocket, organic baby spinach, lettuce, kale, watercress, beet tops, young dandelion greens)
1 cup water
1 heaped teaspoon sunflower seeds, pumpkin seeds or 8 blanched almonds
Wash, roughly chop and blitz the fresh produce with the water and sunflower seeds.
Salad smoothie idea (or “make this up as you go along”)
Blitz a large handful of roughly chopped green leaves, a tomato, celery stick, heaped dsp chopped red onion, clove of garlic, half a red or green pepper, a glug of extra virgin olive oil, a squeeze of lemon and a generous splash of tomato juice from the carton. Add Himalayan (pink) salt and fresh ground black pepper to taste.
Green gazpacho (makes about 3 large servings)
A green take on the traditional chilled Spanish summer soup. Quite filling.
1 bunch spring onions
3 cloves garlic, roughly chopped*
1 small green pepper (stalk and seeds removed)
100g organic baby spinach ½ romaine lettuce (or any lettuce other than iceberg)
1 avocado
Small bunch fresh coriander
1 small green chilli, halved and deseeded (optional)
50g ground or blanched almonds
3 tbs extra virgin olive oil
3 tbs apple cider vinegar/1 of white wine vinegar and 2 of sherry vinegar
200ml water (filtered, boiled and cooled, or use bottled spring water)
Himalayan (pink) salt
Freshly ground black pepper to taste
Optional: 3 tbs home-made kefir or natural yoghurt (or use unsweetened soya/almond-based yoghurt if you are avoiding dairy due to sensitivity or skin health issues)*
Wash and roughly chop the veggies, leaves and herbs. Put into your blender processor with the 3 tbs olive oil, the citrus juice/vinegar, 200ml water and whizz to a thick puree. You might have to do this in 2 batches. Taste for seasoning. If it’s a bit bland then add salt, freshly ground black pepper and maybe more lemon juice/apple cider vinegar or olive oil. It’s the amount of seasonings that makes this a great soup. Serve chilled with another generous slug of extra-virgin olive oil.
For more great green smoothies buy Victoria Boutenko’s “Green Smoothie Revolution” available on www.bookdepository.com (postage is free). If you make smoothies which include a piece or two of fruit, always include some protein/good fats (e.g. nuts, seeds, avocado, coconut oil) to avoid sudden dumps of sugar in your bloodstream that compromise digestive/skin health and energy.
What’s good about green smoothies
Green veggies are rich in magnesium needed for healthy skin, a chilled mind and plenty of energy. They are giving you a range of skin-supporting, digestive-system healing and vitality boosting phytonutrients.
*Garlic is a natural antibiotic. But unlike antibiotic medications, it helps healthy bacteria in your gut to flourish and lowers levels of disease-causing yeasts and bacteria. If you are new to using raw garlic, start small and build up. As it kills off disease-causing micro-organisms you may notice some short-term flatulence! This will disappear over time as you keep going – replacing unhelpful micro-organisms in your gut with healthy ones to help every aspect of your health.
Organic vegetables and fruits, where you are eating the outer surface (rather than peeling) give you a little dose of healthy bacteria with every mouthful. In “conventional” produce good bacteria are absent. Herbicides kill the beneficial soil bacteria. Monsanto originally patented the bestselling herbicide glyphosphate as an antibiotic. It disrupts thyroid function, nerve function and is deeply toxic. Many “conventional” crops contain residues.
Why use filtered, boiled and cooled or bottled spring water in a smoothie? This is to avoid chlorine, that kills beneficial bacteria in your gut and suppresses thyroid function. Boiling allows the chlorine to evaporate. Chlorine, like fluoride, disrupts your thyroid function by blocking iodine. Iodine also helps prevent skin infections, PMS and hormonal cancers (e.g. breast, prostate).
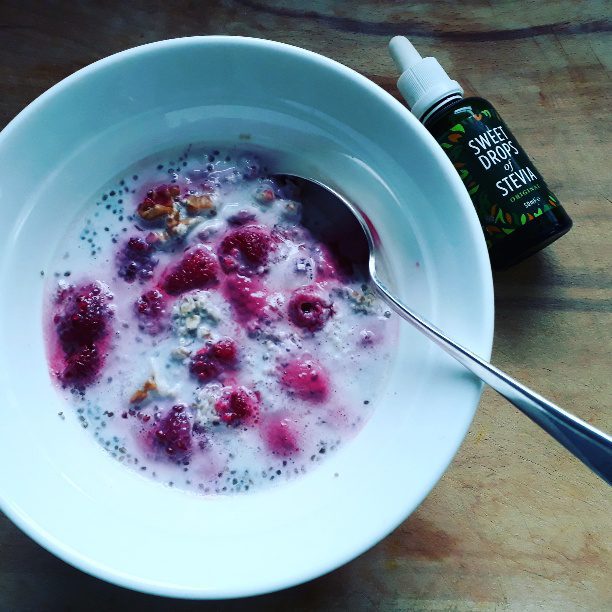
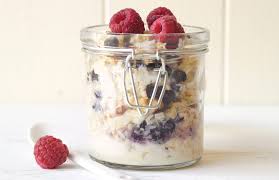
This is just the thing for when you have a minute in the evening but no time in the morning rush. You can even make it in a glass jar with lid and take it with you to work. I adapted the recipe from one by Derval O’Rourke to have more protein and a lot less starchy carb. So it will keep you going longer and is not a weight-gainer breakfast. If you like this but find it too cool on an autumn morning, you could warm it very gently for a minute or two in a small pan before eating.
For 1:
35g gluten-free oatflakes, about 2/5 of a mug (or normal porridge oats if you eat gluten)
1 heaped tbs (tablespoon) walnuts, roughly broken up, chopped or left whole
1 heaped tbs chia seeds
1 cup frozen raspberries (or use fresh but don’t add until the morning)
10 drops pure stevia (from health stores) – optional
250 ml milk: unsweetened almond milk, thin coconut milk with no additives (or if you prefer goat’s or cow’s milk you can use that but do refrigerate overnight).
1. Put all the ingredients in a large bowl. Mix and cover with a plate or cling film.
2. Allow to stand overnight. If you used cow/goat milk store in the fridge.
3. The next morning, add another splash of milk if you fancy and enjoy.
Why this is good for you: All grains, even oats, contain phytates. Phytates lock onto nutrient minerals like zinc, forming large molecules that can’t be absorbed into your body. Wheat contains some of the highest levels of phytates. Oats contain fewer but soaking any grain overnight dramatically reduces phytate levels. Raw berries are a powerhouse of polyphenols which help keep your body strong, healthy and young-looking. They even help toughen up a sensitive tummy or help clear your skin. Try to get organic berries if you can. Walnuts and chia seeds provide you with protein to keep you full and when they are soaked their nutrients become more available for your body to absorb. They also contain omega 3 fats and minerals to benefit your body. Unfortunately oats are steamed to make them into oatflakes so this doesn’t qualify as a totally raw breakfast but it’s still great for you.
This breakfast is delicious but even more importantly is packed with anti-inflammatory, immune-supporting goodness that keeps you full for hours. It’s fresh and zingy but really filling. If you like your smoothie thinner, add more liquid. If you prefer it thicker add less liquid and eat from the glass with a spoon like I do – yum!
It also has protein which your body needs in order to make antibodies to ward off infections. See below for more details of how this smoothie helps your immune system.
For 1 hungry adult:
1 scoop/2 rounded dsp of Sun Warrior Warrior Blend protein powder or other protein powder of your choice (e.g. pea protein, sprouted rice protein, or for for a dairy option, Solgar Whey to Go Vanilla) If you don’t have protein powder, make sure to use more avocado and seeds to keep you fuller longer
200ml unsweetened milk of your choice: almond, hemp, coconut milk, home-made kefir, milk
1 small/medium pear, washed
2.5cm of peeled sliced fresh ginger (slice it across the grain to avoid long fibres in your brekkie!)
1 level tsp ground turmeric (or half a thumb of peeled fresh turmeric, sliced)
Rounded tbs ground seeds e.g. linseed or a blend (e.g. pumpkin, sesame, sunflower and linseed). If you don’t have seeds you could use nuts, either ground or soaked overnight
Optional: 1/4 ripe avocado (use more if you don’t have protein powder)
Optional: a teaspoon of lecithin granules (helps you digest fats and feeds your brain)
Optional (for extra sweetness): pure stevia drops, erythritol or xylitol to taste, or a little honey
1. Remove stalk from the pear, cut up the rest (seeds and all) and throw in the liquidiser.
2. Add the liquid and then other ingredients. Blitz for a minute until smooth. Enjoy.
Why this smoothie is good for you: Turmeric, ginger and avocados contain the natural anti-inflammatories curcumin, gingerol and vitamin E. So if you want to get rid of annoying skin conditions or boost your digestive wellness these are fantastic things to add to your everyday eating.
Flax seeds and pears contain soluble fibre which feeds the beneficial bacteria that support your resistance to infections both viral and bacvterial. Ginger is anti-viral too. Ginger and turmeric selectively encourage growth of good bugs in your gut.
Because this breakfast is rich in protein, beneficial oils and low in sugars (from fruit) it helps regulate blood sugar to keep your energy, concentration and mood even throughout the morning. Like all meals, this shouldn’t be gulped down – you need to “chew” all your food to mix it with saliva and digest it properly. Avocados are rich in monounsaturated fatty acids and vitamin E, great for moisturising skin and body from within. Yoghurt and kefir provide friendly bacteria important for a healthy digestion, clear skin and stable mood. Fermenting makes the milk easily digested, removing the casein (dairy protein) that triggers food sensitivities in so many people. Lecithin granules help emulsify (digest) fats and are a great source of phospatidyl choline. Pho. choline is only found in egg yolks, lecithin and organ meats and are essential for memory.
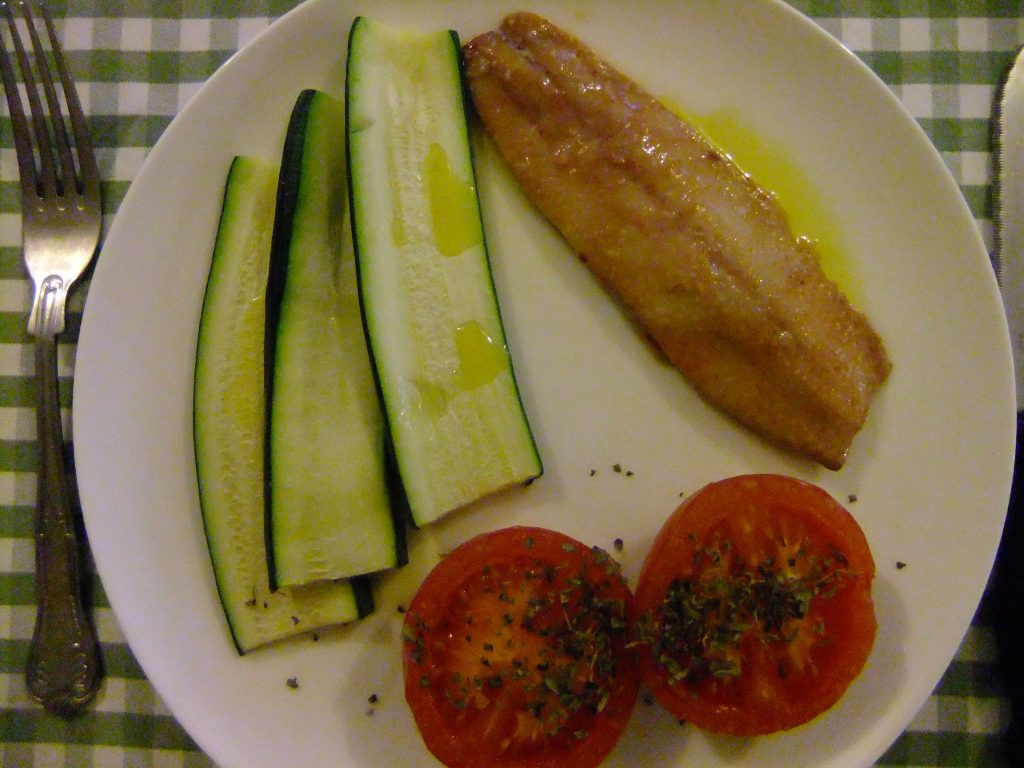
This is a great breakfast (or any meal) and is super fast. The kippers are left to stand in boiling water for a few minutes while you grill the courgettes and tomatoes, simple…
I like to remove the skin of the kipper before cooking because otherwise it causes the fish to curl up unattractively. But if you don’t care about that, don’t bother. You could also have the lovely vegetables more simply with a small smoked mackerel or trout fillet – no need for the pan of water.
1 small kipper (smoked herring) fillet, skin removed with a sharp knife
1 medium courgette, sliced lengthways into strips around ½ cm thick
2 medium tomatoes, halved, woody bit removed
Extra virgin olive oil
1 teaspoons dried oregano
Freshly ground black pepper
1. Boil the kettle. While the kettle is heating up place a small pan on a medium heat to warm before putting in the kipper and pouring on enough boiling water to cover. Take off the heat and leave to poach in the hot water for about 3 minutes.
2. Meanwhile heat the grill. Place the courgettes and tomatoes on a baking sheet or on the grill rack and cook until just softened. You are not looking for everything to be squishy, just heated through and softened slightly.
3. Arrange on a plate, sprinkle with olive oil to taste and scatter the dried oregano over the tomatoes.
4. Serve with the kipper.
Why this is good for you: Kippers are smoked herrings. Because herrings are a wild cold water fish, they are rich in essential omega 3 fats you need for healthy skin and hair. Omega 3 helps prevent your blood from clotting too much and this helps bring more blood and nutrients to the whole of your body. Oregano, even dried, is high in antioxidants (provided you store it away from light and air) and has anti-fungal, anti-yeast and anti-microbial properties against bad bacteria in your gut. “Bad” bacteria and yeast are a major cause of skin problems and weight issues. They can be lowered, and good bacteria encouraged, by what you eat every day. Tomatoes and courgettes are a rich source of beneficial fibre and (more) antioxidants, which protect our bodies from inflammation and delay the ageing process. This breakfast is very light on carbohydrates (sugars) and free from grains so its super-healthy.
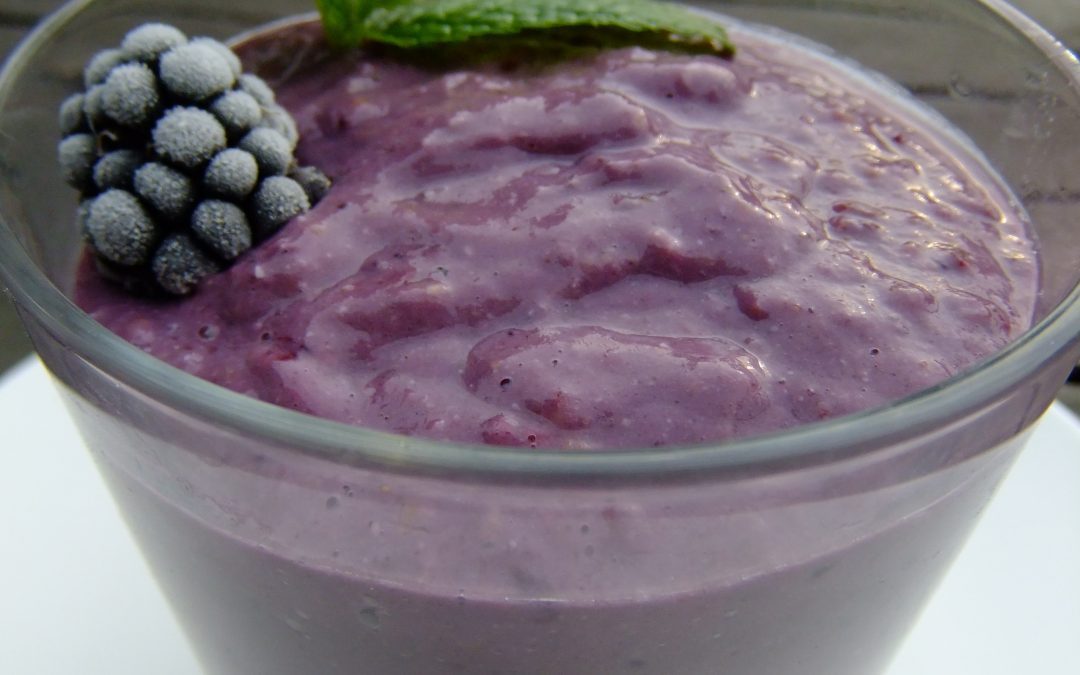
Just concocted this for breakfast today. I had lots of foraged blackberries in the freezer and had taken out a cupful to thaw overnight. I have to say it was fab, and SOOO SIMPLE. I make mine so thick I eat it with a spoon, but you can also make it thinner with more liquid. This will keep you full for ages with its generous amounts of healthy protein, good fats and only small amounts of carbohydrate (sugars). It’s also a genius way of incorporating the fermented superfood, keffir, into your diet. Blueberries or mixed frozen berries also work fine instead of the blackberries. For the ground seeds, I grind organic seeds, keeping them fresh in a glass screw top jar in the fridge. It’s best this way but you can of course buy a good cold-milled ready-made brand like Linwood’s and store airtight in the fridge.
What you need (for one person):
1. Liquid: 200ml liquid + extra to thin: additive-free almond/coconut milk with no added sugar. (If you eat gluten, you can use unsweetened oat milk instead if you like and if you eat dairy you can use kefir or cow/goat milk)
2. Protein and good-for-you fats: One scoop high quality protein powder – my favourites are Sunwarrior Warrior Blend Vanilla and Solgar Whey to Go vanilla (which contains dairy). You could also use sprouted rice protein, hemp protein or pea protein or a mixture of them to give a more neutral flavour. 1 tbs ground seed blend – pumpkin, flax, sesame and sunflower
Optional: 1/4-½ a ripe avocado
3. Antioxidant-rich fruits: 1 cup fresh or thawed frozen blackberries, blueberries or mixed berries.
4. Optional sweetening if needed:
If you use Sun Warrior protein powders they usually contain stevia so you don’t need extra sweetening.
Stevia drops/powder or, if you don’t have it, Xylitol to taste
To make:
Blitz everything together for a minute or two. If you like a thinner drink, add more liquid. Enjoy…
Why this is great for you Berries are a great source of bioflavonoids, naturally occorring plant substances that help build and maintain collagen in your skin, bones and connective tissue. This means firmer, younger looking skin and stronger bones. Berries also contain salicylates. Salicylates are substances related to aspirin, that also have an anti-inflammatory effect. Making this a thick breakfast that you eat with a spoon means you will eat it more slowly, allowing the food to mix with the digestive enzymes produced in your mouth. This allows you to digest it even better than simply knocking back a thinner drink in 5 seconds.
Avocados are a good source of monounsaturated fats and vitamin E, both of which are good for your heart and skin health. Vitamin E helps dampen down allergies and inflammation (eg hives, eczema). Vitamin E is also important to help vitamin C be used in your body. This again helps build collagen, bones and keep your blood flowing properly to all areas of your body. Vitamin E moisturises your skin from within. If your skin is healthy you will never need to use moisturisers except maybe on your feet, where slight natural hardening of the skin protects your feet. Ground seeds and lecithin produce essential fats for better skin, hair and general health. Non genetically-modified (non GMO) lecithin provides phosphatidyl choline, crucial for cognitive function. Phosphatidyl choline is found in organ meats and organic egg yolks. So if you don’t often eat those foods, lecithin is really important. Good quality protein and good fats are important to eat at breakfast and every meal. Low protein, high grain diets are the main cause of weight gain, diabetes and cognitive/mental health issues as well as digestive issues and skin problems. For more information, read “Grain Brain” by David Perlmutter.


 How do you increase your veggie intake to help your health if you have almost no time in the evenings to prepare a full meal or you have problems chewing? Try these green smoothies. You can even make two servings and store leftovers in an airtight glass jar in the fridge for the next day. Citrus juice and airtight containers help prevent oxidation (nutrient loss and discolouration). If you don’t like your green smoothies cold you can heat these VERY gently in a saucepan until they are lukewarm.