Nov 4, 2025 | Anna's Best Recipes
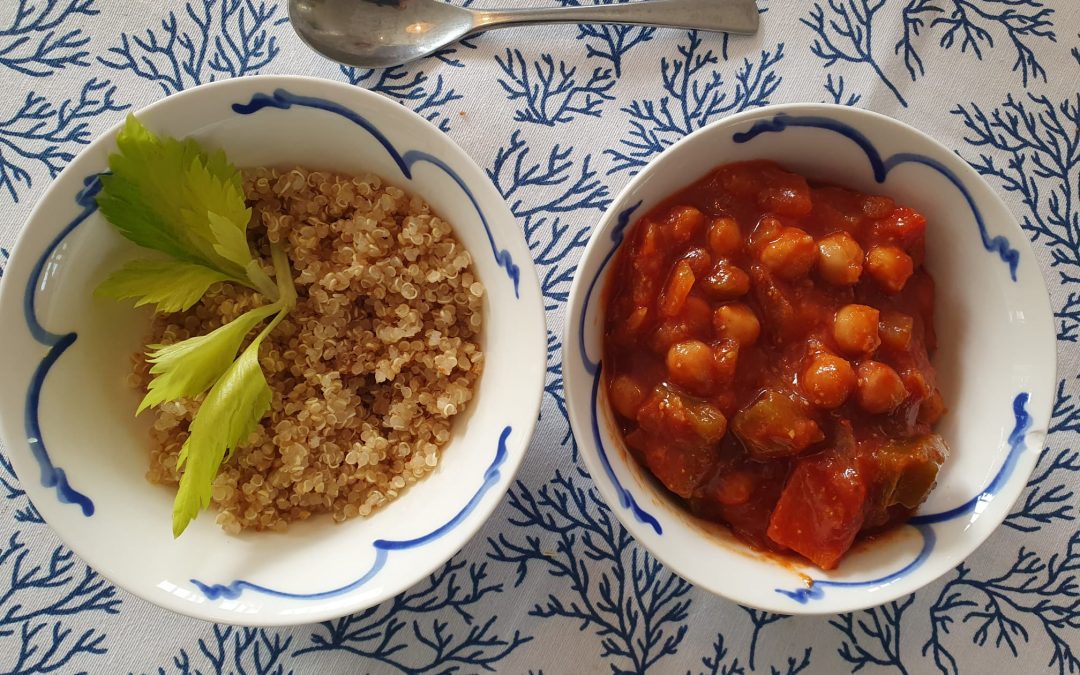
My mother used to cook this in the 1980s, long before vegan was a thing in Ireland. I still love it and it’s so warming on a dark winter’s evening. It also works well with red kidney beans, white haricot beans or butter beans. I like to have this with quinoa for an extra protein kick but brown rice would also be OK.
For 4 (or 2 with freezer leftovers)
2 x 400g cans chickpeas (or 400g dried, soaked overnight then boiled hard till tender, reserving the cooking water)
2 medium onions, peeled and chopped fine
2 large green peppers (or 4 small), de-seeded and chopped (I like around 1cm cubes)
1 tbs extra virgin olive oil
1/2 tsp chili powder (optional)
Heaped teaspoon ground coriander
Heaped teaspoon ground cumin
Heaped teaspoon freshly grated ginger
4 tbs tomato puree
275ml boiling water or leftover veg-steaming water
lemon juice to taste
Sea salt/Himalayan salt and freshly ground black pepper
To serve:
Cooked quinoa (allow 1/4 cup of raw grains per person) or brown rice
Extra virgin olive oil
1. Heat a large heavy bottomed saucepan on a gentle heat, add oil, onions, spices and 1 tbs of water. Cover with a lid and gently “steam-fry” until onions are translucent and softened but not brown. If everything begins to dry out, add another tbs of water.
2. While that’s happening, boil the kettle to cook your quinoa and put this on. If you’re not familiar with cooking quinoa, instructions are at https://annacollins.ie/how-to-cook-quinoa/
3. Dissolve the tomato puree in 275ml of reserved chickpea cooking water or boiling water. Add this, the chickpeas, green peppers and some freshly ground black pepper to the vegetables and mix everything together.
4.Cook 10 minutes, add a little lemon juice, more black pepper and salt to taste.
5. Serve with the quinoa/brown rice and a drizzle of extra virgin olive oil
Why this is good for you:
There are a ton of reasons but I’ll just give you a few of them here.
Green vegetables are rich in magnesium, Nature’s tranquilizer and essential nutrient for detoxification, regular bowel, healthy blood sugar, and beautiful skin.
Chickpeas and onions are rich in prebiotic fibre to feed the healthy bacteria you need for every aspect of health – including healthy immunity, great gut health and a calm mind.
Herbs, spices and extra virgin olive oil are rich in polyphenols – plant antioxidants that are also super-intelligent “antibiotics”. Supporting friendly bacteria and lowering “bad” bugs that cause chronic ill-health.
Tomato puree is a powerful source of lycopene – this polyphenol (natural plant chemical) reduces inflammation, supports skin health, eyesight and keeps you youthful longer. Lycopene is more bio-available (usable by your body) when tomatoes are pureed/processed than when they are raw!
Protein rich – 1 cup cooked chickpeas gives you approximately 14.5-15g protein and 1 cup cooked quinoa 8g. That’s around 23g of protein. Most people, women especially, don’t eat enough protein. And that makes us more susceptable to stress, inflammation, infections and hormone imbalances (e.g. hypothyroid, PMS, problematic menopause…).
Raw extra virgin olive oil is a powerhouse of vitamin E which helps vitamin C to work for your immunity, your energy production and your infection control.
Nov 21, 2024 | Anna's Best Recipes, Main courses
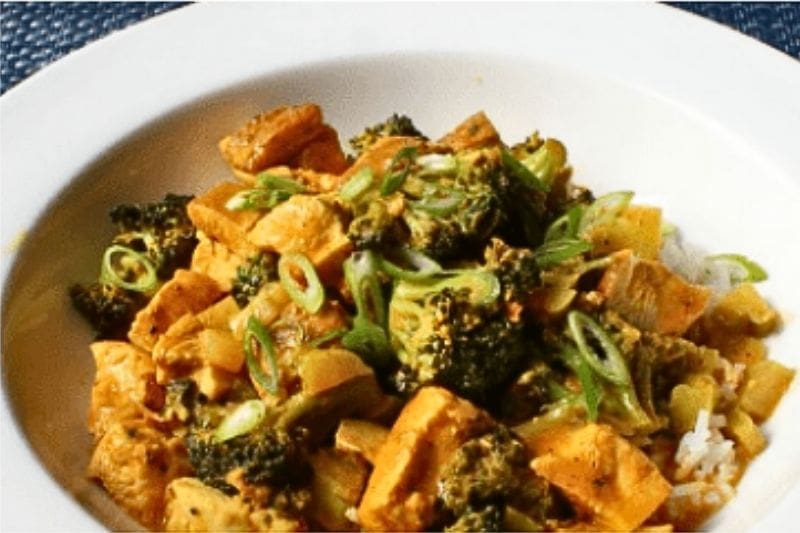
Leftover chicken/turkey and broccoli curry
1 large onion peeled and sliced finely
250 g leftover cooked chicken off the bone, shredded
1 can (400g) chopped tomatoes
2 large cloves garlic, crushed
1 heaped tsp (teaspoon) each of ground coriander + cumin
2 heaped tsp garam masala
Optional chilli powder 1/2 level teaspoon for heat
If you don’t have those spices, 4 tsp gluten-free curry powder will do
1 level dessertspoon virgin coconut oil or ghee
150-200g tenderstem broccoli, cut in 4cm lengths
150g (1 mug to brim) frozen peas
100ml chicken stock or water
100ml (nearly ½ a big can) full fat coconut milk
Salt and Pepper to taste
Optional: fresh coriander leaves to garnish
1. Steam-fry onions: put them with the oil and 1 dsp water into a heavy bottomed saucepan, cover with lid or plate. Cook on medium heat till soft and translucent (around 12 mins). You don’t want them to brown. Browned food is damaging to our health.
2. Add the crushed garlic, spices and stir around for a minute.
3. Add tomatoes, coconut milk and chicken stock/water to the pan and simmer for 10 minutes, stirring regularly till the mixture is a bit thickened. Season to taste.
4. Add chicken, broccoli, put the lid on and cook for a further 5 minutes until the broccoli has changed colour and the chicken is heated through. While you’re waiting for this, pour some hot water over your frozen peas in a strainer to thaw them quickly. Add to the pot a couple of minutes before the end so they’re still an appetizing bright green when you come to eat.
5. Garnish with fresh coriander leaves if you have them.
Serve with:
Low carb (lower carbohydrate = lower sugars): 1 cup cauliflower rice per person
Medium carb (if you do not want to drop weight) brown basmati rice (measure 1/4 mug per person dry weight and cook in twice its volume of boiling water from the kettle).
Variations and swaps:
Instead of the coconut milk use 30g creamed coconut from a block you can buy in Asian shops. Chop it up before adding to the pan with the tomatoes so it doesn’t take ages to melt!. This is very economical cos you just use what you need and keep the rest in the fridge for another time.
Why this is good for you
We’ve all gone a bit fat phobic, culturally. But it is high carbohydrate diets (lots of grains like wheat rice or pasta, potatoes and sugar or fruit juices) that pile on the weight. And cause inflammation in your arteries i.e. heart disease. Refined or heated nut/seed oils are another big driver. So sticking with healthier oils like ghee, coconut milk and olive oil and limiting your carb intake keeps you healthier. Herbs and spices and powerhouses for your health. They are natural anti-inflammatories and alter your gut micro-biome (the micro organisms in our gut we need for health). Alter it in favour of the good guys that regulate weight, blood pressure and every single metric of health, including preventing digestive disorders and diabetes.
Jan 27, 2024 | Anna's Best Recipes, Main courses
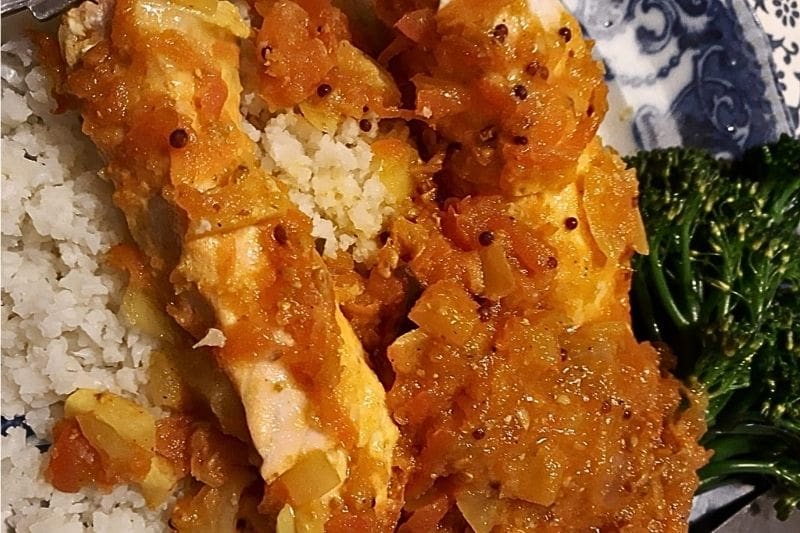
This salmon cooked in sauce is DELICIOUS. If you want make the cook-in sauce in advance to save faff if you’re having people around. The original recipe by Madhur Jaffrey involves marinating the salmon but I skip that and it still turns out fab. I love this served with a generous amount of broccoli/tenderstem. If you dont want to lose weight add some more carbs by measuring ¼ cup brown basmati rice per person and cooking that with a generous pinch of turmeric (added health benefits plus lovely colour!).
Tip: Buy your individual spices in Asian shops. If you have a coffee grinder try grinding some of your own spices – you’ll really notice the flavour explosion. Always keep ground spices airtight in a dark place to preserve aroma.
For 2
300g skinless salmon fillets/2 x 150g skinless darnes
For the sauce:
1 tsp whole mustard seeds
1 level tsp mustard powder
1 dsp ground coriander
½ tsp ground cumin
1/2 tsp ground turmeric
½ tsp tsp curry powder
½ tsp cayenne pepper
150g tomatoes, coarsely grated or chopped small, with their juice
1 tbs extra virgin olive or coconut oil
½ tsp whole fennel seeds
10 fresh curry leaves or 6 bay leaves or fresh coriander
To serve:
2 cups broccoli florets/tenderstem broccoli per person
Low carb: cauliflower rice
Medium carb: brown basmati rice (measure 1/4 cup per person before cooking)
If you’re using brown rice with this, first of all:
Put on the kettle, rinse rice in a sieve under cold running water (to remove toxic arsenic which accumulates on the surface of the grains). Cook rice in twice its volume of boiling water e.g. For 2 people ½ cup rice 1 cup boiling water. Add generous pinch turmeric, cover with a lid, simmer till done.
1. Cut salmon into matchbox-sized pieces or (if you don’t mind waiting longer for it to cook) leave 2 darnes whole.
2. Now make the sauce. Put the ground mustard, ground coriander, cumin, turmeric, curry powder, cayenne, tomatoes, curry leaves or bay leaves, generous pinch salt and 100ml water in a bowl and mix well.
3. Heat oil in a wide, shallow pan (a deep frying pan is ideal) over a medium-high heat.
4. Add mustard seeds. As soon as they begin to pop add fennel seeds.
5. Pour in the spice-tomato mixture and 80-100ml more water, bring to a simmer and cook gently for 10 minutes. At this point sauce can be cooled and refrigerated until you are ready to cook the fish. It will keep a couple of days.
6. To cook the fish, reheat sauce in wide shallow pan and lay the fish in it spooning some of the sauce over the fish to coat it all over.
7. Cover pan with a lid or plate and cook for 5-10 minutes until the salmon is cooked through. Around 5 mins for matchbox sized pieces, around 10 for whole darnes.
Why this is good for you:
Cooking with herbs and spices liberates a powerhouse of antioxidant anti-inflammatory processes in your body. Herbs are antioxidant. They also make your body produce more of its own antioxidants. They also (provided they’re properly kept airtight in a dark place) make your gut a VERY unfriendly place for bad bugs. This allows friendly bacteria more space to grow, promoting more vigorous physical and mental function. Whats not to like. And of course we all know by now that omega 3 fats from oily fish are anti-inflammatory, promote good mental and heart health and even make the cancer cells we all produce more easily destroyed by your immune system.
Jan 11, 2024 | Anna's Best Recipes, Breads, crackers, pancakes & wraps
I’ve never made sourdough bread before. I’ve always thought minding a sourdough “starter” or “mother” seems like a big faff and I’m a more lackadaisical cook. I never found a good recipe – until now. Ever since I had to go gluten-free the one bread I really missed was good brown sourdough (usually rye). Huge gratitude to Sarah Cobacho for posting this online. Thank you SO much, Sarah!
This recipe uses the natural microscopic airborne yeasts and bacteria in the air all around you to start colonising and putting carbon dioxide into the mix. This is what rises the bread. Yes, true sourdough never, ever contains yeast or bread soda. The inside of this bread will not be dried out like normal bread but will retain moisture, just like a regular rye sourdough. Only this is gluten-free!
500 g hulled buckwheat kernels (Please note: It is important to use HULLED and whole BUCKWHEAT. You will not get good results with flour, unhulled (black), or roasted buckwheat.)
200 ml water
¼ tsp Himalayan or Atlantic sea salt
2 tsp poppy or sesame seeds (optional)
2 lb loaf tin and silicon/greaseproof paper to line
A little olive oil to grease the tin (optional)
1.Rinse the 500g of hulled buckwheat kernels under cold water until the water runs clear. This ensures that any dust or impurities are removed.
2.Transfer the rinsed buckwheat to a large bowl. Cover the kernels with cold water, ensuring they are fully submerged. Cover the bowl with a clean cloth and let it sit overnight. This soaking process initiates the fermentation which is key to this gluten-free buckwheat bread.
3.The next day, drain (do not rinse) and transfer to a blender with 200ml water and salt. Blend, starting at low speed and slowly increasing.
4.Pour the blended buckwheat mixture back into the bowl. Cover it again and let it sit at room temperature for 24 hours. This resting period allows the fermentation to continue, developing the unique flavor of the loaf.
5.When you’re ready to bake, preheat your oven to 180C. While the oven is heating, prepare a loaf pan by lining it with baking paper. I like to brush paper and tin with a little olive oil for easier removal but its not essential. Perhaps I am micro-managing the bread!!
6.Pour the fermented buckwheat dough into the prepared loaf pan. If you’d like, sprinkle the top with 2 tsp of poppy and sesame seeds for an added crunch and visual appeal.
7.Bake the bread in the preheated oven for 90 minutes. The bread should be golden brown and firm to the touch.
8.Allow the bread to cool down before slicing. This makes it easier to cut and improves the texture. Now, enjoy your homemade, healthy buckwheat bread! Keeps 4-5 days in in an airtight container or else slice and freeze for up to a month. Prize off a slice or two to pop in the toaster when you feel like it.
Why this is good for you:
Buckwheat is a massive source of a polyphenol called rutin. Rutin turbo-charges the strength of connective tissue, cartilage, bones, blood vessels and skin. I would always include either a rutin supplement or foods rich in rutin in any tissue/bone/skin rebuilding programme. Also helps prevent skin sagging (wrinkles!). Buckwheat also contains potassium, magnesium and calcium for healthy bones.
Sourdough fermentation makes ALL grains hugely more digestible. All grains, even gluten-free ones, contain lectins. Lectins are plant proteins designed to protect the plants babies (seeds) from being digested by predators. So these lectins disable your digestive proteases (enzymes). This causes irritation in the gut. By fermenting the buckwheat you get rid of almost all lectins.
FAQ
Can I use buckwheat flour instead of hulled buckwheat kernels? For this specific recipe, it’s recommended to use hulled buckwheat kernels rather than buckwheat flour. The process of soaking and fermenting the kernels contributes to the unique texture and flavour of the bread. Using buckwheat flour would not yield the same results. Personally I’ve never seen un-hulled buckwheat groats (which are black and inedible) for sale. Hulled are a green/light brown colour and pretty much every health store sells them.
Nov 27, 2023 | Anna's Best Recipes, Cakes, biscuits & bars, Desserts & drinks
Want to have a few Christmas-with-a-twist treats? These have those seasonal flavours. Try them – they’re lovely as well as being super-easy to make. Thankyou to Parry Marsh, whose recipe this is. This makes around 22 pieces.
1 ½ cups (or 190 g) of mixed nuts – chestnuts, pecans & Brazil nuts go well in this
1 tbsp goji berries (*optional)
Grated rind of half a lemon and half an orange, organic if possible
1 scant tsp of mixed spice*
1 tbs runny honey (or if you are not on the special SC Diet, raw agave syrup will also work)
⅔ cup (or 95 g) mixed vine fruit or raisins, organic if possible
4–6 fresh (or Mejool) dates, stones removed
- In a food processor, process the nuts, goji berries, grated rind, and spice, until the nuts are all broken down into small pieces.
- Add honey/syrup, vine fruit/raisins, and process again until the fruit is mostly broken down.
- Then, with the food processor running, drop in the dates one at a time, and let each one get processed into the mix. Keep adding them until the mix starts to stick together.
- Once it’s nice and sticky, remove from the food processor, then break off portions of the dough and roll them in your hands to form balls – they should be about the size of a chocolate truffle or a small walnut shell.
- Eat at once, or chill for a while to firm up. You can even pop them in the freezer and eat them straight from there.
- If you want to make these a little chewier, try forming the balls around a couple of raisins, or even pieces of candied peel or crystallized ginger.
*Goji berries are optional but give it a slightly richer flavor and a few chewy bits since they never blend in totally.
**If you don’t have any mixed spice, you can easily make your own: use equal amounts of ground cinnamon, allspice, clove, nutmeg, and ginger.
Why this is better for you:
These yummy treats are packed with protein and healthy fats which stop the natural sugars in the vine fruits and agave from messing with your metabolism. If you’ve been working with me you know all about balancing your blood sugar and how it turbo-charges immunity, digestive and even mental health and energy production. If you’re curious as to how too balance your blood sugar check out the courses under “work with me tab” on the home page. Or send an enquiry about one-to-one coaching towards a healthier, happier you. Spices are incredibly anti-inflammatory. Dried grapes (sultanas, raisins, currants etc) feed certain species of healthy bacteria in your gut. Enough healthy bacteria are needed for every function in your body, from gut and digestive health to a balanced immune system and stable mood.
Sep 28, 2023 | Anna's Best Recipes, Main courses, Sides, starters, soups & snacks
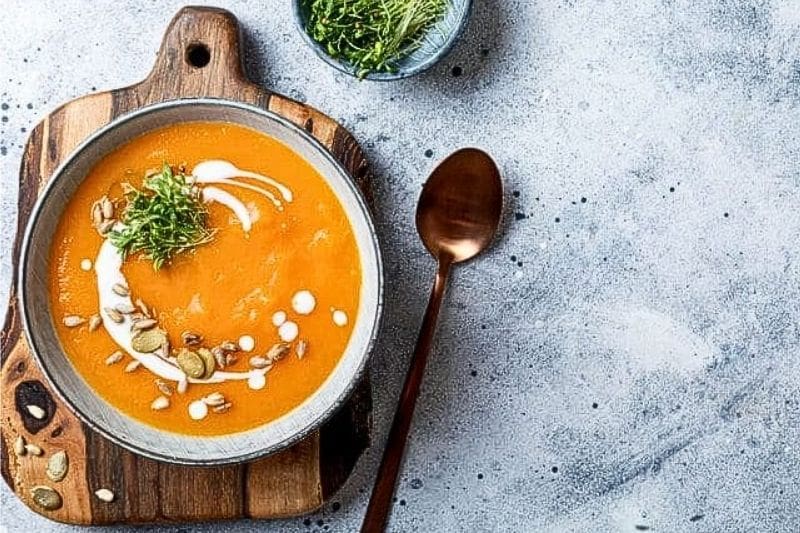
Now Autumn’s here and with it some crazy storms I’ve rediscovered this high protein immune-supporting soup that’s a bowl full of sunshine. To make it into a complete meal add a cupful of cooked greens per person at the end (a bag of baby spinach would do). If you want to gain weight, add some extra carbs such as wholemeal gluten-free bread or leftover cooked rice (reheat well in the soup). If you eat gluten) some 100% rye or wholemeal sourdough. This soup freezes well too.
For 4
Note: You can save yourself effort chop all veg and spices only roughly if you’re going to blend the soup later on.
1 very large onion or 2 medium chopped onions
2 large sticks celery, sliced
2 large carrots (about 300g), sliced
2 heaped tbs (tablespoons) finely grated fresh ginger
1-2 rounded tbs ghee or virgin coconut oil (if you have an inflamed gut, ghee is best).
3 cloves garlic, crushed
Heaped teaspoon turmeric powder
Heaped teaspoon coriander powder
1/2 level tsp ground cardamom powder if you have it
500ml carton of passata (sieved tomatoes) or a 400g can chopped tomatoes
750ml filtered water or leftover vegetable cooking water (e.g. from steaming veg)
250g (mug and a quarter) dried red lentils
1 heaped tsp health store additive-free vegetable stock powder (for the SC Diet use Dr Coys Organic Vegetable Bouillon)
Freshly ground black pepper
1. Heat a large heavy-bottomed saucepan with lid on a medium heat for a minute. Add ghee/oil, onion, celery, carrots, ginger and a small splash of water, cover with a lid and sweat for 10 minutes.
2. Add garlic, turmeric and cardamom if you have it, stir for a minute before adding passata/tinned tomatoes and water.
3.Give everything a stir then add the lentils so they sit on top (otherwise during cooking they stick to the bottom). If the lentils are not entirely submerged in liquid, add a bit more water or stock.
4. Boil for 15-20 mins for 20 mins/until lentils and veg are soft. Only stir the lentils gently at the very top if they are stuck together, otherwise leave them alone.
5. Mix the veg stock powder into a little water and add to the soup AFTER the the lentils are soft (otherwise salt makes the lentils touch).
4. If you want a smooth soup now give it a whizz with a stick blender.
5 reasons this is good for you:
Lentils and onions contain prebiotic fibre. This feeds friendly bacteria you need for healthy digestive system and immunity.
Turmeric, ginger, garlic, coconut oil, cardamom and coriander reduce numbers of disease-causing bacteria/viruses in your gut.
Processed cooked tomatoes are the richest source of antioxidant lycopene to help ALL of you
Ghee contains butyric acid, a metabolite produced by friendly bowel bacteria to keep your gut and immune system tip-top.
Lentils are a rich and easy-to-digest source of protein which is essential for antibody production to protect against infection.
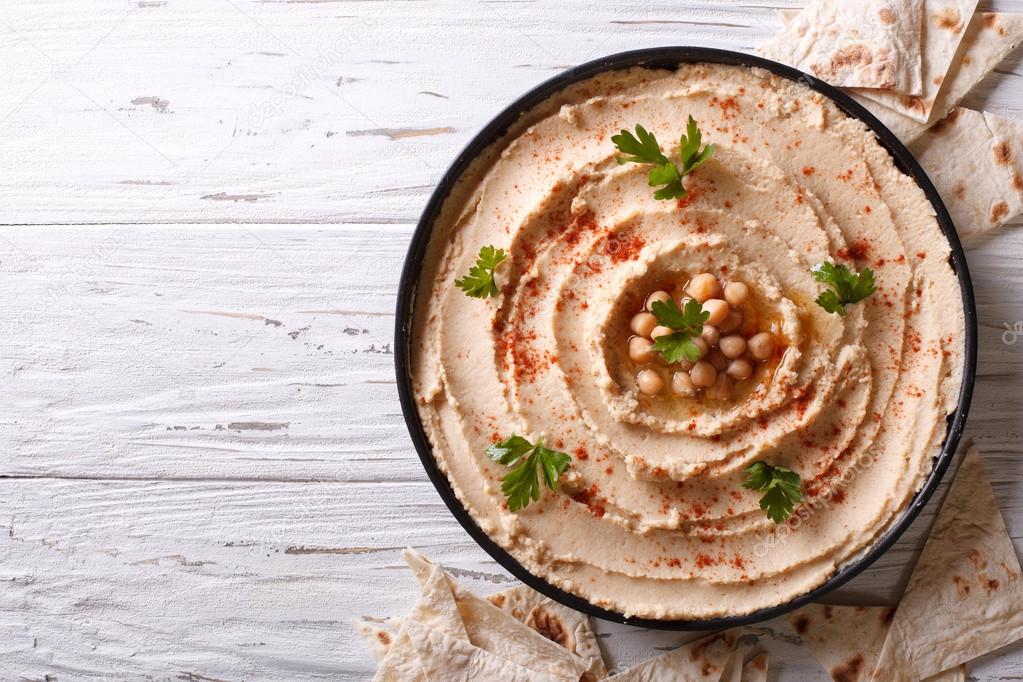
Jul 1, 2022 | Anna's Best Recipes, Dressings, rubs, spreads, sauces & more, Sides, starters, soups & snacks
There’s nothing like home-made hummus for flavour. It’s super-easy to do and if you like it, make a big batch and freeze some for the future.
1 mugful of cooked chickpeas (or haricot, cannellini, butter or broad beans) – keep some of the cooking water if you have cooked your own
OR
400g tin of no added sugar chickpeas, rinsed and drained
1½-3 tbsp olive oil (extra virgin)
2 large cloves garlic, crushed
Juice of ½ – 1 lemon
1 heaped dessertspoonful tahini (health stores/Asian shops. Raw tahini such as Carly’s brand is best)
Plenty of freshly ground black pepper
1 rounded tsp ground coriander
1 rounded tsp ground cumin
Generous pinch or two of Himalayan/Atlantic Sea Salt
Optional extras (see below)
- Blitz everything together in your food processor or mini food processor until mixed. You may need a bit more liquid (lemon juice or olive oil) to get everything mixing well.
- Add extra lemon juice/olive oil to taste. If the mix is too thick add a a bit of chickpea cooking water or plain water and blitz again.
Blitz in one or two of the following if you like:
- 2 tbsp chopped fresh coriander, parsley or chives,
- 3-4 tomatoes you have roasted or cooked under the grill till soft
- A teaspoon of spicy harissa paste (from ethnic shops) or ½ teasp chilli powder
- A teaspoon of sun dried tomato paste from the jar
- A teaspoon of black olive tapenade
- 2-3 roasted red peppers (available in jars from ethnic shops)
Tip:
Grinding your own cumin or coriander with a spice grinder gives a dramatically more flavoursome spice. This is because ground spices, when stored, lose some of their health-giving, aromatic oils. Always store your ground spices in an airtight container in a dark place.
Why this is good for you:
Most shop-bought hummus is made using cheap, refined (toxic) oils instead of the traditional extra virgin olive oil which is a superfood. It stands to reason that making your own is head and shoulders above anything else in quality and freshness.
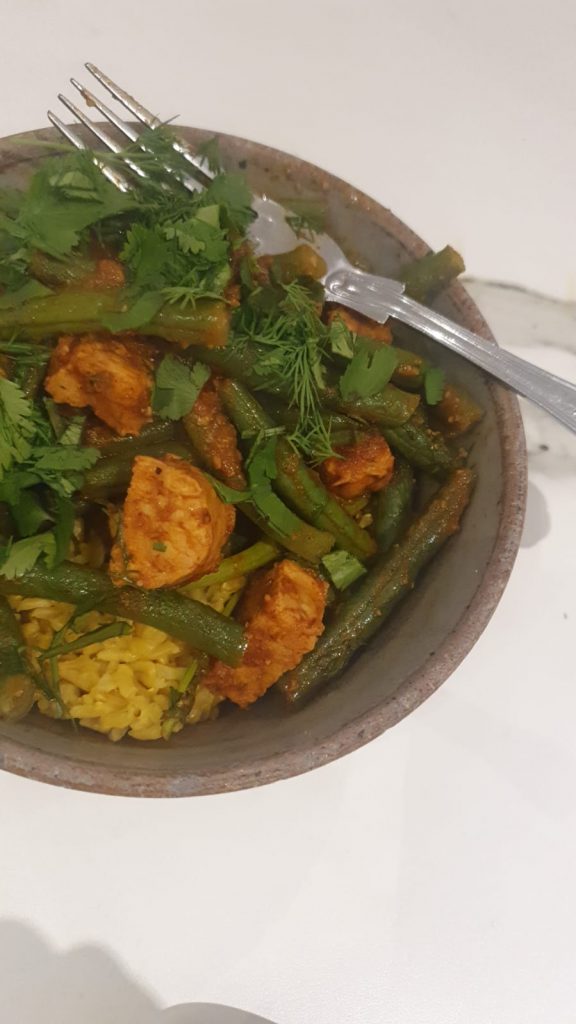
Jan 30, 2022 | Anna's Best Recipes, Main courses
This is my current favourite way to use tofu or tempeh. I adapted it from Ottolenghi’s more complex recipe. My husband is a tofu-hater so when he disappears for a few days I always cook this. Keep in mind that unfermented soya products contain digestion-blocking proteins that damage your gut. So DO make sure to buy the fermented forms for this dish: tempeh or fermented tofu (it will say on the pack).
If you don’t have a small-bowl food processor, chop the chili finely, crush the garlic and use a pestle and mortar to bash the caraway seeds about as much as you can before mixing with the other spices and oil.
For 2
This is gorgeous served with cauliflower/broccoli “rice”, konjac noodles or brown basmati rice.
350g trimmed French (or use runner beans cut in 6cm bits)
Salt and black pepper
200g non-GMO tempeh or fermented tofu, cut into bite size cubes
A few sprigs of dill (small handful), destalked and roughly chopped
Small handful fresh coriander, destalked and roughly chopped
For the sauce:
4 garlic cloves, peeled and crushed
1 green or red chili, deseeded (optional)
2 slightly rounded tsp sweet paprika
1 tbs caraway seeds
1.5 tsp ground cumin
½ level tsp ground Ceylon cinnamon
2 tbs + a little extra avocado oil or extra virgin olive oil
3 tbs tomato puree
250ml water or leftover vegetable-steaming water (full of nutrients!)
Optional: 1 heaped tsp honey or non-toxic sweetener e.g. Dr Coy’s Stevia Erylite or xylitol (from good health stores)
2 limes
Black pepper
Himalayan or sea salt
- For the sauce put the garlic, spices, chili and 2 tbs oil in the small bowl of the food processer and blitz to a thick paste. You might need a touch more oil to bring it together.
- Heat a pan on a medium heat and add a teaspoon more of avocado/olive oil and stir fry the garlic-spice mix for 30 seconds.
- Then add the tomato puree, 250ml water and bring to the boil.
- Stir in the honey or non-toxic sweetener, lime juice, generous pinch (1/4 a level tsp) salt and a few good grinds of black pepper.
- Add the tempeh, turn down the heat, cover and simmer while you prep the green veg.
- Steam the French/runner beans for around 2-3 minutes until the colour changes very slightly and they are softened but still have a bit of crunch.
- Finally, just before serving, stir the herbs into the tofu and sauce, pile on top of your rice and enjoy.
Serve with:
Low carb: Cauliflower or broccoli rice https://www.annacollins.ie/cauliflower-rice/ or konjac noodles from Asian stores.
Medium carb: brown basmati rice cooked with a generous pinch of turmeric
Why this is good for you:
Spices are a powerhouse of antioxidants that help rebalance your gut bacteria in favour of the good guys. The good guys helps digest your food, repair and maintain your gut lining every minute of every day, and reduce inflammation in you. This has massive implications for your immune system, your gut health and even your mood. Yes, anxiety/depression states always involve brain inflammation. Type the name of just one spice into medline (the scientific journal resource) and you’ll find hundreds of peer-reviewed scientific studies.
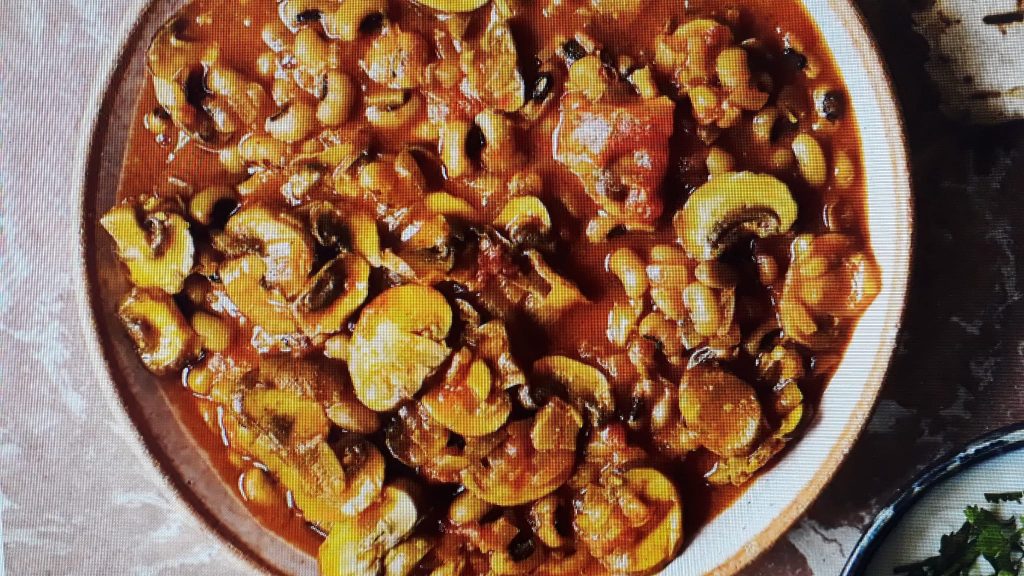
Jan 14, 2022 | Anna's Best Recipes, Main courses
This is DELICIOUS, and simple and fast at 15 mins cook time. Had it for dinner last week and SO enjoyed its warming aromatic spices. I swapped out the refined cooking oil in the original recipe by Chetna Makan for healthier virgin coconut oil which doesn’t mess with your metabolism. If you don’t like coconut oil you could also use avocado oil or at a push light olive oil. The first 2 oils are healthier.
You’ll find tinned no-added-sugar black eyed beans in health stores and Asian shops.
Serves 4 (I like to make this quantity to have some yummy leftovers for the freezer)
2 tbs virgin coconut oil
2 large onions, peeled and finely chopped
2 big garlic cloves, peeled and grated or crushed
2½cm piece fresh root ginger, peeled and grated
400g tin chopped tomatoes
½ level tsp salt
¼-½ level tsp chilli powder or the milder cayenne (if you don’t like heat, leave out)
1 tsp garam masala
1 tsp ground turmeric
300g chestnut mushrooms, thinly sliced (white button mushrooms will do)
400ml tin full -fat coconut milk (organic brands, especially if you have any digestive issues at all)
2 x 400g tins black-eyed beans, drained and rinsed (or make your own – soak overnight 200g black eyed beans and boil hard until tender).
1.Heat the oil in a pan, add the onions, 2 tbs oil and a tablespoon of water. Cover with a plate or lid (or tinfoil) and cook on medium heat until softened, translucent and no longer crunchy.
2.Add the garlic and ginger, cook for a minute, then pour in the tomatoes and cook on a low to medium heat for five minutes.
3.Stir in the salt and ground spices, followed by all the remaining ingredients, stir well and bring to a boil.
4.Cover, then leave to cook on a medium heat for 15 minutes. (If you have more time, cook it over over a lower heat for 30-40 minutes.).
Serve warm with:
SC Diet: squash wedges sprinkled with curry powder and roasted in the oven + 2 cups steamed greens per person – nice ones are broccoli, runner/green beans or cabbage/spring greens.
Medium carb: ½ cup cooked brown basmati rice (avoid for SC diet) + 2 cups steamed greens per person – nice ones are broccoli, runner/green beans or cabbage/spring greens.
Low carb (SC diet-friendly): broccoli rice or cauliflower rice (available frozen in supermarkets). Super simple how to cook instructions at https://www.annacollins.ie/cauliflower-rice/
Why this is good for you:
Beans are a good source of protein while spices are powerful anti-inflammatories. Spices modify your gut bacteria in favour of the good, useful ones that control every (and I mean every) aspect of your health. Spices are more antioxidant gram for gram than any fruit or vegetable. Small quantities pack a powerful punch. Did you know that 1g turmeric twice a day is shown to reduce acid reflux (heartburn). Herbs and spices now have thousands (or maybe tens of thousands) of scientific studies confirming their actions on the human body. Whats not to like? A more interesting range of flavours in your meals AND massive benefits to your present and future health – digestive, mental, immune and so much more…
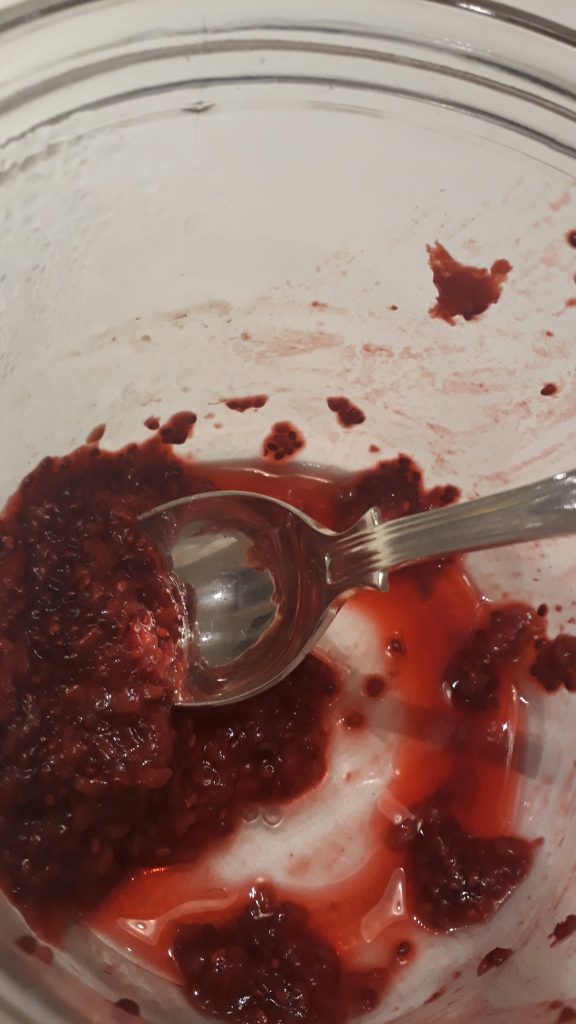
Dec 21, 2021 | Anna's Best Recipes, Dressings, rubs, spreads, sauces & more
I made this last weekend for a new gluten-free stollen recipe I was working on and wow its delicious. So was the Stollen just posted on blog now. The jam recipe comes from www.gimmesomeoven.com and it’s a good one. I swapped out the syrup for lower sugar sweetening options.
2 cups fresh or frozen fruit (see suggestions below)
2 tablespoons chia seeds
1 tablespoon freshly-squeezed lemon juice
Extra sweetness (only if needed): a few drops of pure stevia glycosides or some monk fruit extract, honey or erythritol (from www.pureandnatural.ie or www.iherb.com).
- Heat fruit in a small saucepan over medium-high heat, stirring occasionally, until the fruit is heated through and begins to break down and bubble. Use a spoon or potato masher to mash the fruit to your desired consistency.
- Stir in the chia seeds and lemon juice until combined. Then taste, and stir in some of your chosen sweetener if needed.
- Remove from heat and let cool for 5 minutes. (The jam will thicken considerably as it cools.)
- Give the jam one final good stir. Then serve immediately, or transfer to a sealed container and refrigerate for up to 1 week, or freeze for up to 3 months.
Fruits that work well in chia jam:
Berries (strawberries, blackberries, blueberries, raspberries), cherries, peaches, apricots, plums, pineapple, kiwi…basically any “juicy” fruits. But bear in mind that very sweet fruits like pineapple and kiwi contain a lot of sugars so eating large amounts isn’t so great.
Optional add-ins:
1/2 teaspoon vanilla extract
lemon zest (to make your jam a little more tangy)
a pinch of spices (such as cinnamon, ginger, or nutmeg, etc.)
Why this is better for you:
I’m almost embarassed to say this because it’s so obvious but most jams are loaded with sugar. Sugar as an ingredient added to food lowers your immune system, raises inflammation and can massively contribute to obesity. Standard jams are at least 45% added sugar while the “no added sugar” ones are sweetened with fruit juice concentrate. Although less refined, these jams are still a massive sugar dump into your system, which raises inflammation, slows detoxification and has other unwanted effects. Raw fruits (rich in vitamin C) are more nutritious than cooked but sometimes it’s just nice to have jam. When wet chia seeds swell and emit a gel which is rocket fuel for friendly gut bacteria. Friendly bugs are important for ALL areas of your health – mood, immunity, even blood pressure and mental clarity. Enjoy…