May 27, 2020 | Anna's Best Recipes, Main courses
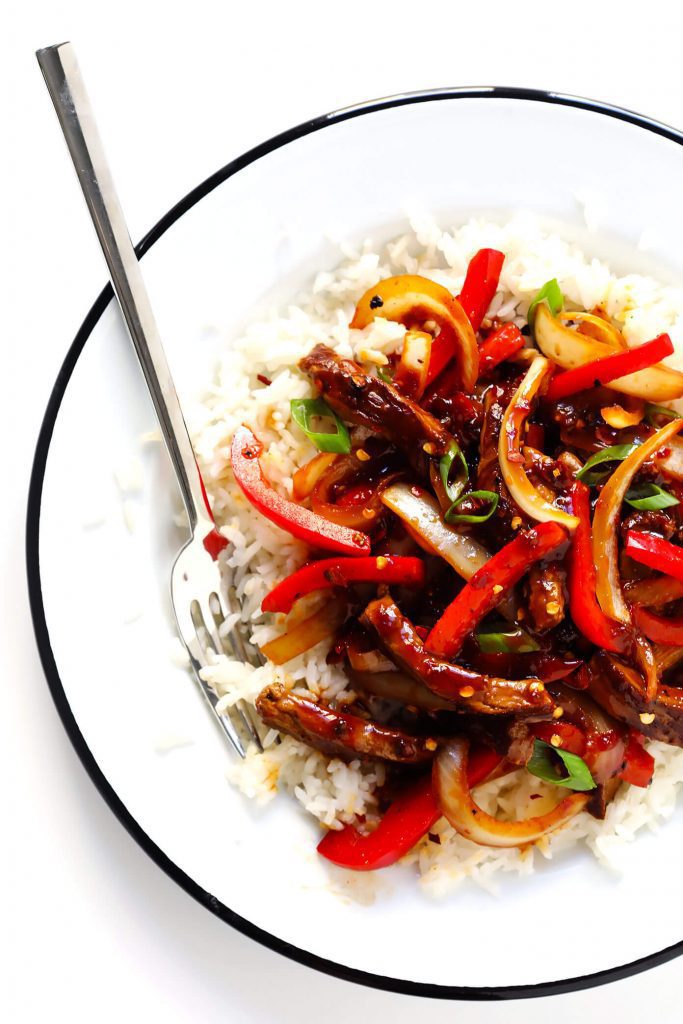
I love stir fries especially when I want to use up what’s lurking in the bottom of the fridge. I think there are 6 elements in a good stir fry:
1. Aromatics: ginger, tamari sauce plus Chinese 5 spice powder or Szechuan pepper
2. Onions or spring onions
3. Vegetables: greens plus something else brightly coloured
4. Extra virgin coconut oil and/or chicken stock for the actual stir frying and cooking
5. Protein: e.g. chicken fillets, beef sirloin, tempeh, fermented tofu, prawns
6. Extra liquid: I like a glug of white wine/dry sherry and/or a chicken/veg stock/water
One of the keys is to have all ingredients totally prepped before you start to stir fry, that way the actual cooking can take as little as 10 minutes. Get your accompaniment (rice/cauliflower rice/noodles) ready and waiting in a warm place before you start stir frying.
Once you are used to making stir fries you’ll start adding your own twists, using additional veggies and making this your own.
For 2
1 heaped teaspoon extra virgin coconut oil
1 large onion (about 200g is nice)
2 large red peppers/2 medium carrots (or 1 pepper 1 carrot)
1 thumb of ginger (enough to make a heaped dsp or a bit more)
2 large cloves of garlic, finely chopped
1 heaped tsp Chinese 5 spice powder – if you make your own it’s amazing https://www.annacollins.ie/chinese-five-spice-powder/
2 large handfuls greens: e.g. green cabbage/kale, pak choi, or 2 cups small broccoli florets
Tamari sauce – about 2 tbs
Optional – about 2 tbs white wine or dry sherry
50-100ml vegetable or chicken stock or boiling water (Kallo stock cubes or Vecon vegetable bouillon powder are good)
Protein: 250g chicken fillet/beef sirloin or 300g tempeh or fermented tofu
Optional: 1 slightly rounded tsp arrowroot powder/cornflour to thicken the sauce
To serve:
2-3 cups cauliflower rice https://www.annacollins.ie/cauliflower-rice OR 100g basmati rice (dry weight)
1.Peel and cut onion in half lengthways then cut into wedges (like segments of an orange)
2.Slice red peppers 1cm thick/peel carrots and cut into thin matchsticks or slices.
3. Peel and chop the ginger finely. Set aside the onion, carrot/peppers and ginger – they will be added to the pan together.
4.Measure out 5 spice powder and set aside.
5.Shred greens/slice pak choi into 3cm lengths/break broccoli into small florets, chop garlic finely and set aside.
6. Prep your protein: trim chicken/beef of skin/fat, slice thinly across the grain (less than 1cm thick). If you are using tempeh/fermented tofu cut it in small bite sized cubes.
7. Measure out the tamari sauce with the sherry/wine if using and set aside.
8. Boil the kettle. If you have chicken stock/veg stock cube make up about 50-100ml, otherwise plain hot water will do.
9.Heat your frying pan or wok on a medium heat, add the coconut oil and when it’s melted add the onion, red peppers/carrots and ginger and the 5-spice powder. Stir fry till the onions are starting to get translucent and the carrots/peppers have softened a little. If it starts to “catch” add a splash of stock or water to the pan and stir will it’s all unstuck.
10.Add the garlic, shredded/sliced greens/broccoli florets, meat or tempeh the tamari sauce, sherry/wine, give it a stir to coat and cover the pan with a large place or a lid. You want everything to steam until the greens are softened enough to eat but not so cooked that they lose their fresh colour.
11.After a few minutes, stir and check that the meat is getting in contact with the heat and cooking through.
12. When the meat/tofu/tempeh is cooked through check the liquid levels.
13. If you like your sauce thickened, combine 1 tsp cornflour/arrowroot with a few tablespoons of cooled stock or water, mix to amalgamate. Pour on to the pan, stirring well until it’s all cooked (a couple of minutes), adding a splash or water of stock if you think its too thick. Once its thickened and no longer has a chalky taste, its cooked.
Serve with:
Cauliflower rice or rice
Why this is good for you:
Having a big diversity of vegetables, herbs and spices in your weekly eating fosters diversity of friendly bugs in your large intestine. This is important for ALL aspects of your health. Good bugs are critical for mood, getting autoimmune conditions into remission, regulating your weight your blood pressure and even blood sugar. Yes, even diabetes responds to a change in gut bacteria. In short, if want to get well, or continue to enjoy fantastic health, you need plenty of types of good bugs living happily in you.
Garlic and spices selectively reduce numbers of “bad” gut micro organisms and encourage growth of helpful ones. Avoiding polyunsaturated vegetables oils and switching to extra virgin coconut oil (or extra virgin olive oil) for cooking means reducing the toxic trans fats that sabotage the function of every cell in your body.
Quality protein needs to make up 1/4 of your every meal. You need enough protein to be resilient to stress, to power detoxification of normal (and environmental) toxins, and to support your immune system. GMO-free Tempeh or fermented tofu are the highest protein vegan food sources. By soya milk, soya “cheese”, and unfermented tofu are high in substances called lectins, which can cause damage and inflammation in our gut. Damage in your gut fuels ALL chronic health issues from acne and anxiey.
Green veg are a rich source of magnesium, Nature’s Tranquiliser – important for over 400 metabolic processes in YOU. Happy eating!
May 14, 2020 | Anna's Best Recipes, Main courses
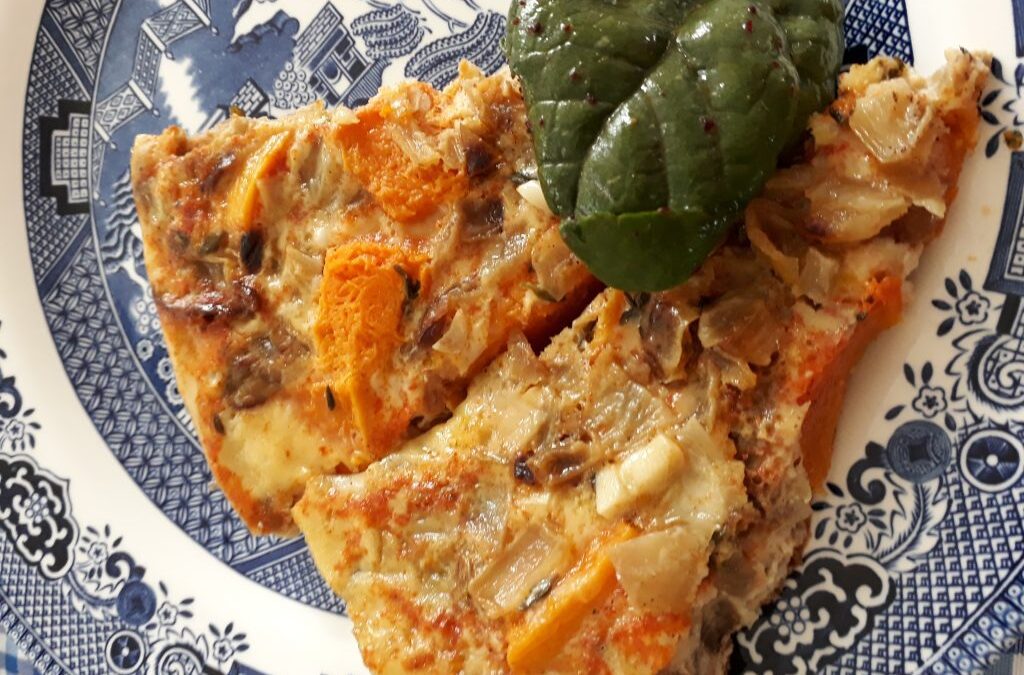
Today I wanted to make a version of a frittata with lots of thyme. It’s a superfood and amazing for your lungs – helping protect them from damage and alfor breakfast or brunch over a few days. This recipe is one you can adjust as you like. If you don’t have squash, cooked broccoli florets would also work well. If you are NOT on the SC diet, sweet potatoes are another option.
The essentials of a frittata are onions, garlic, eggs and extra virgin olive oil and some sort of additional vegetable.
For 4
8 large eggs, ideally organic
1 large onion (200-250g)
2 cloves garlic, crushed.
Half a large butternut squash, peeled (you want around 450g flesh for the recipe)
Half level tsp Himalayan salt or sea salt
Generous handful of fresh thyme, rinsed and dried
3-4 tbs extra virgin olive oil
Optional extras: 1 dsp finely chopped sage leaves and/or 1 level tsp paprika
Heavy-bottomed frying pan that can be put under your grill
- Preheat oven to 200C(or 180C for a fan oven).
- Scatter thyme, stalks and all, into a roasting tin, add the squash, 1 tbs olive oil, sprinkle on the salt, some freshly ground black pepper and toss well.
- Roast for 45-60 minutes (giving it a toss half way through) until the flesh is soft when pierced.
- Meanwhile peel and chop your onions (about 1cm squares is nice). Add to a heavy bottomed frying pan along with 2 tbs olive oil 1 tbs of water and steam fry on a medium heat till translucent and soft. Steam frying is using a mix of oil and water and covering with a lid/plate and gently cooking till soft. This technique avoids the browning that damages food (and causes us inflammation).
- When squash is done (softish), remove from oven, let it cool a bit, then poke through, gathering up the thyme sprigs.
Pull the leaves off with your fingers (yes, you will get messy!) and add back into the squash. Throw away the bare twiggy bits. - Beat 8 eggs with a generous pinch of black pepper, a pinch of salt and (if using) some paprika/finely chopped sage or both.
- Add the cooked squash and thyme, 2 cloves of crushed garlic to your cooked onions, give a stir and flatten down.
- Pour on the eggs and cook on a low heat for at least 25 minutes until the egg is set. I cover with a plate/lid during cooking to speed it up but you don’t have to.
- If you feel like it, flash the whole thing (but not any plastic handle!) under a hot grill for a few minutes to brown the top.
Serve hot or at room temperature with:
A big crunchy salad of green leaves dressed with my Mediteranean salad dressing (also on blog).
Why this is good for you:
Using extra virgin olive oil instead of low grade cooking oils helps make this healthier. All polyunsaturated nut/seed oils are toxic when heated or refined. Extra virgin olive oil, and virgin coconut oil are not polyunsaturated and so are much more stable when heated. This means they don’t do you harm.
Thyme helps your lungs function better, resist infection more, and helps prevent/treat coughs. There is a tide of high quality peer-reviewed research on medline about the bronchial benefits of thyme. Orange veggies are a rich source of beta carotene which in your diet also protects your lungs.
Onions are rich in inulin, a type of “prebiotic” fibre. Prebiotic fibres feed good gut bacteria which are so critical for your immunity. Over 70% of your immune cells live in your gut. Your immune cells are controlled in large part by the bacteria, fungi and viruses (yes viruses can be useful) that live in you. So eating a big variety of veg, herbs and spices gives a friendly environment for “good” critters to grow and help you. In fact there are more cells belonging to critters in and on you than make up you. Its just that the cells of micro organisms are a lot smaller than human cells!
May 8, 2020 | Anna's Best Recipes, Desserts & drinks, Dressings, rubs, spreads, sauces & more
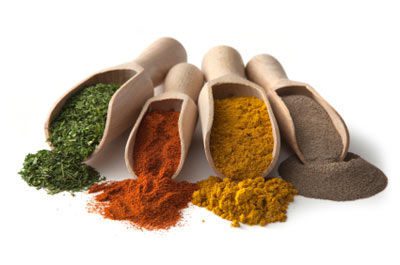
When I was in Marrakech last year I had a lovely concoction called cafe aux epices – literally coffee with spices. I like to make my coffee as normal, add the spices and then the milk or plant milk. Do remember to buy spices as fresh as possible and store airtight in a dark and ideally cool place. This prevents them losing their potency and flavour. There is a world of difference between stale and fresh spices.
I would suggest the only spice that’s really essential is the Ceylon cinnamon, everything else is mix and match according to your preference.
6 teaspoons ground Ceylon cinnamon
1 teaspoon ground cardamom
1/2 teaspoon of one or more of the following:
Ground cloves
Ground aniseed/fennel
Ground black pepper
Ground ginger
Why this is good for you:
Did you know that you have a very individual metabolic response to caffeine? If you (like me) have the genetic variant of the CYP1A2 gene then having more than 1 cup a day increases risk of high blood pressure and heart disease. This is why studies in the past have produced conflicting results on how coffee affects heart health. BUT just a cup a day can be beneficial for most of us. However some people with digestive issues may need to skip coffee and substitute dandelion coffee (try www.intelligenttea.ie mail order ground dandelion coffee – its delicious). Lighter roast coffee contains more beneficial polyphenols than dark. Polyphenols modify your good bacteria in favour of the good guys that help immunity and reduce inflammation.
Spices have an antioxidant effect. They stimulate your body to make more antioxidants. This is a great idea if you prefer not to struggle with inflammation. All common chronic health conditions of are driven by inflammation e.g. heart disease, asthma, eczema, depression, autoimmune conditions (e.g. hypothyroidism, Crohn’s) and cancer. Tens of thousands of high quality research papers published in peer reviewed scientific journals confirm the various health benefits of spices. By the way, Ceylon cinnamon helps you regulate blood sugar levels. So if you have insulin-resistence (pre-diabetets) or type II diabetes a teaspoon of Ceylon cinnamon a day is a fantastic thing to add in – whether in coffee/coffee substitutes, mixed in porridge/granola or in curries.
Apr 29, 2020 | Anna's Best Recipes, Main courses, Sides, starters, soups & snacks
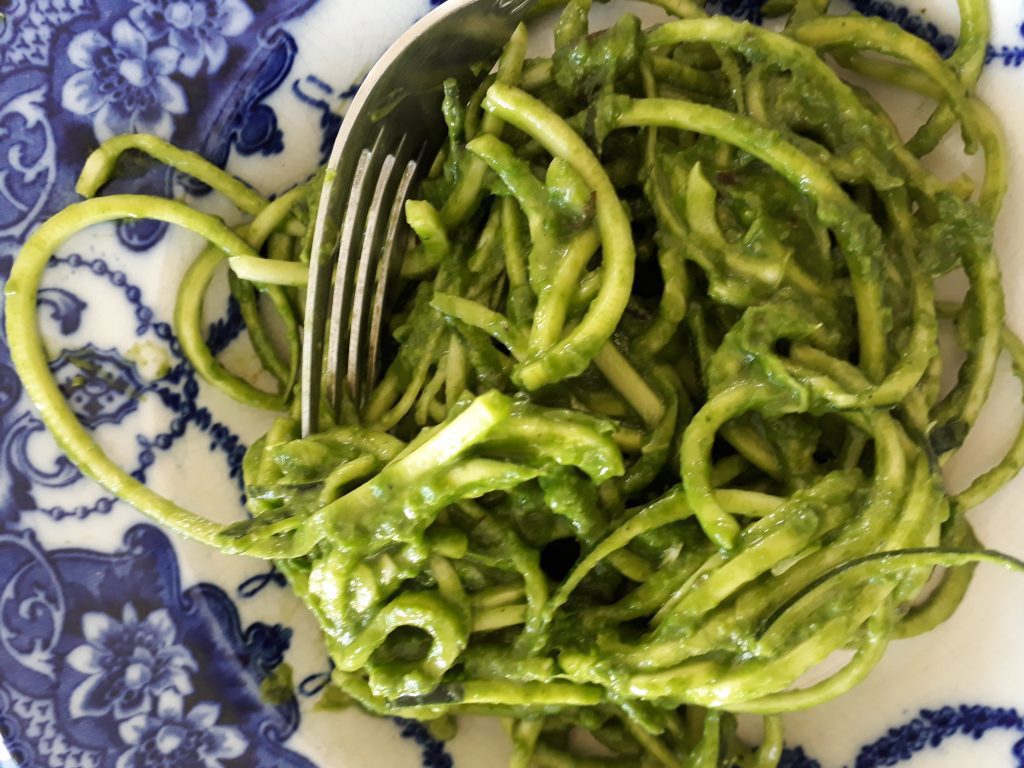
I wish I could claim this idea as my own but every supermarket now sells spiralized courgettes for you to use instead of pasta. The oil and salt lift courgetti from being worthy to being delicious. I used to make a lot of wholemeal pasta dinners until I studied nutrition. Then I realised the large proportion of starchy foods in meals was contributing to my fatigue, frequent infections and poor stress tolerance. Rebalancing my plate helped me enormously within days.
For 2 people
2 medium courgettes
2 dsp extra virgin olive oil (more if you want!)
Pinch of Himalayan salt or sea salt
1. Make long strands of courgette: Either grate them lengthways (skin and all) on the big side of your grater or use a spiralizer.
2. Heat a frying pan on a medium heat. Add the olive oil, the courgetti and scatter over a generous pinch of salt.
3. Now heat, stirring every so often, for around 5 minutes. You want them heated, VERY slightly softened, but not so soft they release water and go into a bit of a mush. It took me a few tries to get this right!
4. Serve immediately with your pasta sauce. Enjoy!
 Why this is good for you:
When we eat more than 1/4 of our lunch and dinner as high carb foods (e.g. pasta, potatoes, bread) it makes us more likely to struggle with poor detoxification (acne, PMS, headaches or fatigue anyone?). Your body stores excessive sugars as fat and this is why reducing carbohydrates to modest levels helps so quickly in getting you to your ideal weight. Farmers know that one of the fastest ways of fattening their livestock for market is to switch from grass-feeding to grain-feeding. Excessive sugars come not only from “healthy” grains, potatoes and fruit juice but also (even more) from added sugar foods like biscuits, cakes and “fruit juice drinks”.
About wheat pasta: Did you know that gluten breeches the lining of your small intestine within minutes of reaching it? This allows gut bacteria, waste and undigested food to flood into your bloodstream. It’s called increased intestinal permeability and lasts for a minimum of 3 hours. This has been proven by ground-breaking research using capsule video cameras swallowed by HEALTHY STUDY VOLUNTEERS. This is not related to gluten sensitivity or coeliac disease. It happens to everyone though its effects are more serious in those groups. So finding ways to lower gluten in our daily eating is a great way of moving towards better health. Looking after your gut lining makes you less likely to suffer sepsis should you become very ill with an infection. Low gluten grain choices include sourdough bread and oats. If you have an autoimmune condition like hypothyroidism (90% is autoimmune) you will need to switch to naturally (not highly processed!) gluten-free options.
Apr 18, 2020 | Anna's Best Recipes, Desserts & drinks
This is easy to make and a fantastic support for your immune system. I have many packets of kefir grains packaged up in my freezer in 2019 ready to post to you (in Ireland) or to be picked up (by prior arrangement, with social distancing) if you live locally. These will get you started.
I call kefir the king of fermented foods. It’s very like natural yoghurt but more tangy because it is fully fermented so contains no milk sugar (lactose). It also thinner. Sometimes I strain my kefir through muslin to get a texture like greek yoghurt but mostly I use it as a drink, in smoothies or blended with a banana. Milk kefir contains over 30 different types of probiotics (beneficial yeasts and bacteria) compared to one or two species in yoghurt. Kefir includes lactobacillus plantarum and rhamnosus which studies have shown can help alleviate inflammatory bowel conditions. It also contains saccharomyces boulardii which successfully raises secretory IgA (an antibody) in your airways and gut. sIgA defends you against throat, lung and gut infections. Commercial kefir products are of variable quality and often are not fully fermented. This means they taste sweeter but have not broken down the hard-to-digest milk protein (casein) nor the lactose (milk sugar). They do not always contain live bacteria either. Making your own is the way to go and its really simple.
Friendly gut bacteria perform 80% (!) of your detoxification. They are important for energy, good skin, allergy control, preventing obesity and diabetes and healing your digestive system. They reduce the tendency to auto-immune conditions by promoting “immune “tolerance” or balance. Every type of good bacteria has its own special functions so the more you can get into your diet the better. Our grandparents ate a lot of fermented foods before the days of fridges but now our diet is sterile. Because kefir is easy to make and use it’s one of my favourite fermented foods to share with people. Use it any way you like, so long as you don’t expose it to heat. Eating it fresh ensures more beneficial bacteria. Add it to smoothies, knock half a glass back after a meal once or twice a day, or even use it to soak oat or buckwheat based muesli overnight to make super-digestible Birchner muesli (recipe on this blog).
Making kefir
There are two ways to make kefir. You can use live kefir grains that reproduce and will last a lifetime if you treat them right or you can purchase kefir freeze-dried culture packets (single use). In the recipe for Basic Kefir, I teach you how to make kefir using live grains. Kefir “grains” are in fact a cluster of microorganisms (bacteria and beneficial yeasts) held together by a polysaccharide matrix named kefiran.
Where to buy live kefir grains
In Ireland try the Sharing Starter Cultures Ireland FB group. This is a group of people who swap and donate surplus cultures – just put up a post to see who near you has grains to spare and collect for free. You can also email me to see if I have grains to spare that you could collect. Good grains will be creamy-white and look like springy cauliflower florets. Treat them right and they will live indefinitely, and grow. From anywhere in Ireland you can also buy grains online at www.adverts.ie. Or buy the kefir culture packets I mentioned before, but these only make a certain amount of kefir –you have to keep buying them.
Quantities
If you are only making kefir for one person, use1 tbs of grains for a cup (230ml) of milk. In a warm kitchen this will usually be fermented within 24 hours. If you are using from frozen it can take longer for the grains to revive.
How to Make Dairy Kefir
For top-quality kefir, try to buy organic milk. Goat’s milk is great but cow’s milk is fine too.
People who are dairy sensitive CAN usually tolerate well-fermented (i.e. not shop bought) kefir. This is because, when the kefir organisms ferment the milk, the lactose (milk sugar) is broken down and so is the casein (the main milk protein). Lactose intolerance is due to not producing lactase, an enzyme that digests lactose. Dairy sensitivity/allergy is due to difficulties breaking down casein. Casein is the protein that causes a problem for people with dairy allergy or sensitivity. The kefir micro organisms hydrolyse (break down) the casein, in effect pre-digesting it. This means there is no intact casein left in the kefir. Lactose is digested by kefir bacteria to produce beneficial lactic acid.
You can use the method below to make any amount of kefir you like. Just keep in mind that a good rule of thumb is to use 1 tablespoon of kefir grains per 1 cup of milk. So, if you want to make 1 cup of kefir, use 1 tablespoon of kefir grains and 1 cup of milk. For 2 cups of kefir use 2 tbs of grains and 2 cups of milk. Never heat kefir as this kills the good bacteria.
For 2 servings:
2 tbs live kefir Grains*
450ml/2 cups whole milk preferably organic. I use raw organic milk (available from organic markets such as The Green Door www.thegreendoor.ie in Dublin 12).
Plastic strainer
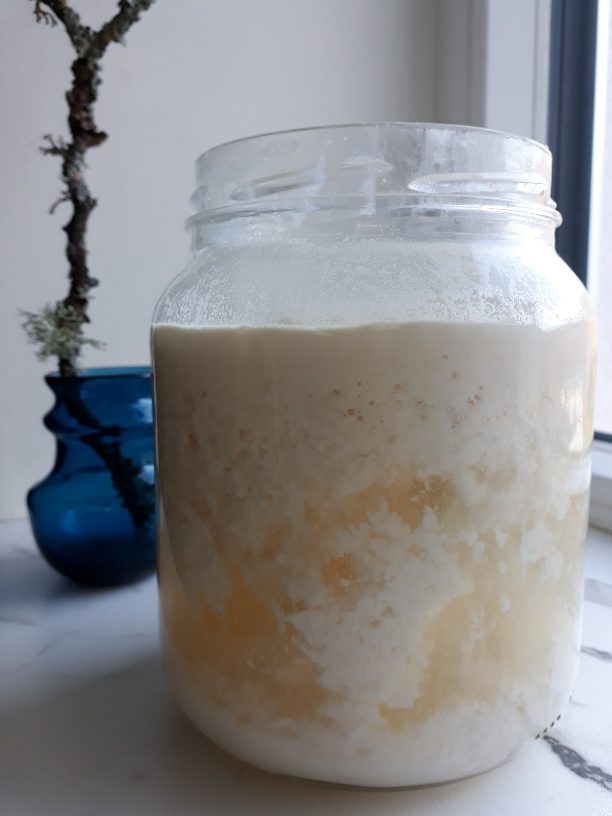
- Place fresh kefir grains in a glass jar and add the milk (It’s best not to fill jar more than ⅔ – ¾ full)
- Place a lid or plastic wrap loosely over the jar (those good bacteria need oxygen to fermwent) and let sit at room temperature for approx. 18 to 24 hours, or until the milk has thickened. (You might want to designate a spot for kefir fermentation in a cupboard or away from direct sunlight).
- It is important to swirl the kefir gently in the jar a few times during fermentation to mix the grains with the milk. This means all the milk is fully fermented, allowing less possibility for food sensitivity reactions (to lactose or milk proteins). If you are not sensitive to dairy products you don’t need to be so careful.
- Pour the contents into a strainer to separate your grains from the liquid kefir.
- Wash the jar, then place the kefir grains from the strainer back into the washed jar. (Do not add kefir grains to a jar that is still hot from washing! The heat can kill your grains) Then add fresh milk.
- The whole process is repeated again. The ready-to-use kefir can now be stored in the fridge until you are ready to use it – it will last for weeks, probably becoming more tangy as it goes as the last of the sugars are consumed by the grains.
If you are going away, remember to put your kefir grains in enough milk to keep it alive and fermenting for the number of days you are away. If you are away for 5 days, you will need 5 cups of milk per tablespoon of kefir, and it will still be alive when you get back. Or strain the grains and store in the freezer. They usually come back to life no problem.
How to Make Almond (or Coconut) Milk Kefir
This is an alternative to dairy kefir if you are vegan or highly sensitive to dairy. Don’t worry that the almond milk is sweetened. The kefir grains eat the sugars from the honey or agave syrup, using them up to support itself, leaving the finished product as low sugar (low glycaemic index) drink that won’t mess with your digestive system. Or buy unsweetened almond milk and add a teaspoon of natural agave syrup or honey to each 230ml of milk. Never heat kefir as this kills the good bacteria. I buy my almond milk for this from Dublin Food Co Op in Newmarket, near St. Patrick’s Cathedral Dublin 8. http://www.dublinfood.coop/ Most decent health stores sell almond milk. Ecomil original is a good brand (free from harmful additives like polysorbate 80 and sodium carboxymethylcellulose).
For 2 servings
2 tbs live kefir Grains*
450ml/2 cups agave-sweetened or honey-sweetened almond milk
500ml (or larger) glass jar with lid (or use a saucer/muslin and elastic band)
Plastic (not metal) strainer
- Place fresh kefir grains in a glass jar and add the almond milk (It’s best not to fill jar more than ⅔ – ¾ full)
- Place a lid or plastic wrap on the jar and let sit at room temperature for approx. 18 to 24 hours, or until the milk has thickened or has become sour to your liking. (You might want to designate a spot for kefir fermentation in a cupboard or away from direct sunlight)
- Pour the contents into a strainer to separate your grains from the liquid kefir.
- Wash the jar, then place the kefir grains from the strainer back into the washed jar. (Do not add kefir grains to a jar that is still hot from washing! The heat can kill your grains) Then add fresh milk.
- The whole process is repeated again. The ready-to-use kefir can now be stored in the fridge until you are ready to use it.
- If you are going away either:
a.strain off, rinse (in filtered or boiled cooled water) and freeze your grains until you want to use them again
b.put your kefir grains in enough milk to keep it alive and fermenting for the number of days you are away. If you are away for 5 days, you will need 5 cups of milk per tablespoon of kefir, and it will still be alive when you get back (especially if you put it in a coolish place).
c. some people bring the grains with them on holidays so they don’t miss out!
*There are special considerations that you have to take when making almond, coconut or other non-dairy kefir.
Kefir grains do not survive in almond or coconut milk long-term. They grow and thrive by eating the lactose from dairy milk, and since there is no lactose in almond or coconut milk, the grains will need to be refreshed in dairy milk (sheep, goat or cow) once a week or more. Beneficial cultures in dairy-free kefir will be less diverse and possibly lower in number.
Allow 1 cup or 230ml milk for each tablespoon of kefir grains, and make kefir in the usual way by fermenting the kefir with the milk (24 hours per cup of milk works well). The lactose in the milk feeds and grows the kefir. Then you can reuse the grains to make almond or coconut kefir again. You can also rinse them in coconut or almond milk to remove the dairy if you are allergic. The more often you do this, the more your grains will grow and multiply. It’s the lactose that keeps the bacteria alive and thriving.
Did you know?
In hot weather your kefir will be ready sooner. Warm temperatures speed up the process. Cooler temperatures delay it.
Books on fermenting, with lots of recipes:
Schwenk, Donna Cultured Food for Life
Pike, Charlotte Fermented